eGFI - Dream Up the Future Sign-up for The Newsletter  For Teachers Online Store Contact us Search
Read the Magazine
What's New?
Explore eGFI
Engineer your Path About eGFI
Autodesk - Change Your World
Overview E-tube Trailblazers Student Blog
  • Tag Cloud

  • What’s New?

  • Pages

  • RSS RSS

  • RSS Comments

  • Archives

  • Meta

A Shot Under Pressure
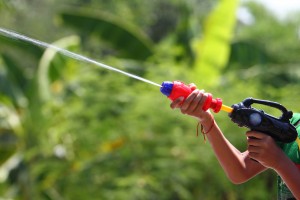
super soaker water gun

Activity courtesy of TeachEngineering.org, a teacher-tested, searchable online library of standards-based lessons and activities developed by the Integrated Teaching and Learning Program at the University of Colorado’s College of Engineering. See companion activity on Bernoulli’s Principle.

Note: Teachers should err on the side of caution and make sure administrators know about and approve of letting students bring their water guns to school.

Summary

Working in groups of three, high school students use their understanding of projectile physics and fluid dynamics to calculate the water pressure in squirt guns by measuring the range of the water jets. They create graphs to analyze how the predicted pressure relates to the number of times they pump the water gun before shooting.

Grade level: 9-12

Time: 120 minutes

Cost: $2 per group

Learning Objectives

After this activity, students should be able to:
  • Use projectile motion physics to determine the initial velocity of a projectile launched horizontally.
  • Use Bernoulli’s equation to find the pressure of a fluid.
  • Collect, record, and analyze data to determine relationships among variables.

Learning Standards

Common Core State Math Standards

  • Create equations that describe numbers or relationships. Rearrange formulas to highlight a quantity of interest, using the same reasoning as in solving equations. For example, rearrange Ohm’s law V = IR to highlight resistance R.
  • Solve linear equations and inequalities in one variable, including equations with coefficients represented by letters.
  • Represent and solve equations and inequalities graphically. Understand that the graph of an equation in two variables is the set of all its solutions plotted in the coordinate plane, often forming a curve (which could be a line).
  • Solve equations and inequalities in one variable.

Next Generation Science Standards

Create a computational model to calculate the change in the energy of one component in a system when the change in energy of the other component(s) and energy flows in and out of the system are known. [9 – 12]

International Technology and Engineering Educators Association

Energy cannot be created nor destroyed; however, it can be converted from one form to another. [9-12]

Engineering Connection
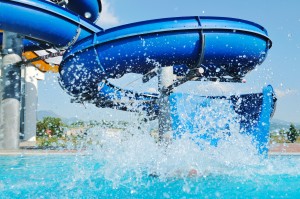
water slide

When engineers design water amusement park rides, water fountains, or anything that involves shooting water, they use a similar modeling process to determine where water jets will land. This ensures the safety and best experience for its users. More generally, Bernoulli’s equation is used by any engineer working with fluids. For example, biomedical engineers use this principle to model the flow and pressure of bodily fluids, and civil engineers use it to determine the size of pipes needed to get water to people’s homes and workplaces, or to run industrial processes.

Materials List

For each group:
  • Water gun with a pumping mechanism (for example, Super Soaker Water Blasters; available at stores such as Target, Kmart, WalMart or online; ~$10 each); ask students to bring in their own, if possible
  • Moveable desk or table, on which to mount the water gun
  • Duct tape
  • Access to a tape measure long enough to measure 35+ feet (11+ meters), the shot distances
  • (optional) Chalk or tape, to mark off every 10 meters of the shooting range
  • Pen or pencil
  • Take Your Best Shot Worksheet, one per person
  • Evaluation & Enhancement Worksheet, one per person
  • (optional) Computers and Excel spreadsheet software for data manipulation and graphing

Introduction/Motivation

Nothing is better on a hot summer day than the thrill of a fast, steep ride at a water park. To make that ride both fun and safe, engineers must predict how fast people will move, what the forces on their bodies will be, and where they will land. Fortunately for you, projectile motion physics and fluid mechanics provide the equations they need to determine these variables. Today we’ll see how.

Procedure

Bernoulli Equation: The Bernoulli equation is an important expression that relates pressure, height and velocity of a fluid at one point along its flow. According to the Venturi Effect, a fluid’s pressure decreases as its velocity increases. The Bernoulli equation puts this relationship into mathematical terms and includes a term for fluid height. Think of water moving down a water slide. At the top (where you load), the water is slow moving, pushed only by the water behind it. When the slide drops, the water rushes down quickly, increasing speed as it falls. Thus, the velocity is also affected by gravity through height. When all these terms are related and scaled for density and gravity, we have the Bernoulli equation,

Equation: ½ pv2 + pgz + P = constant
Equation 1
where v is fluid velocity, ρ is fluid density, z is relative height, and P is pressure. Notice the constant has units of pressure as well.
Derived from energy conservation, the Bernoulli equation tells us that the sum of the kinetic and potential energy at any point along a streamline must remain constant. Technically, the equation only applies to the case of flow that is steady (not changing), has constant density, and is inviscid. Many fluids (such as the water in a squirt gun) approximate these conditions, making Bernoulli’s equation a useful model.
Finding the Pressure in a Water Gun: Students are asked to use the equations of projectile motion, combined with Bernoulli’s equation to find the water pressure. This section explains how to arrive at the solution, if you’d like to give students more guidance. Bernoulli’s equation can determine the pressure inside the water gun, but first you have to know how fast the water coming out of it is moving. Kinematics physics equations can help us find the velocity of the water.
As the water leaves the water gun, it is travelling entirely in the horizontal direction, so its total velocity vector can be reduced to horizontal velocity, or Vx . A simple relationship relates the horizontal velocity (V x) to the distance (x) it travels in a certain amount of time (t),
Equation: x = vx * t
Equation 2

The distance can be measured, but unfortunately, we do not know time. However, we can determine the time using another kinematic equation that relates time to the initial and final vertical positions of the water (y0 and yf ), the initial vertical velocity (vy0), and the vertical acceleration, ay ,
Equation: yf = yo + vyot + ½ ayt2

This equation simplifies greatly under the initial conditions set by this problem. The initial vertical position of the water (y0 ) is the table, and the final position (yf ) is the floor, so yf– y0 is simply the height of the table, or h. As we already said, the initial velocity of the water is directed horizontally, making the initial vertical velocity, vy0 , equal to zero as well. Finally, the vertical acceleration is g, or -9.8 m/s2, the constant acceleration due to gravity. The equation simplifies to
Equation: h = -1/2 gt2
Equation 4

Using algebra, we can solve for time, and then plug the result into Equation 2 to solve for velocity.
Once velocity is found, we can solve for pressure using Bernoulli’s equation. Because the Bernoulli equation equals the same constant at all points along a streamline, we can set the Bernoulli equation at two points equal to each other and use information on the system at one point to solve for information at another, as shown in the equation below:
Equation: 1/2pv12 + pgh1 + P1 = ½ pv22 + pgh2 + P2
Equation 5

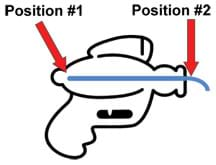
Side-view sketch of a water gun, showing a horizontal blue line through the middle, representing the water flow line. Arrows point at the beginning and at the end of the blue line, at which point it leaves the nozzle before dropping down.
To solve for the pressure, two useful points to choose are the inside of the water gun (position #1) and the outside of the gun at the nozzle (position #2) because we know some of the quantities at these locations.

Copyright © 2009 ITL Program, College of Engineering, University of Colorado at Boulder.
For this particular problem, two useful points to choose are the inside of the gun (position #1) and the outside of the gun at the nozzle (position #2). These points are chosen because we know some of the quantities at these locations. We know that the velocity of the water inside the gun (v1 ) is initially zero, and that the pressure outside the gun (P2 ) is the atmospheric pressure. The density (ρ) is the density of water, and the relative heights (h1 and h2 ) are equal because we are keeping the gun level. After some algebraic manipulation, the pressure inside the water gun is easily solvable.

Before the Activity

  • Gather materials. If possible, ask students to bring their own super soaker water guns from home.
  • Make copies of the Take Your Best Shot Worksheet and the Evaluation & Enhancement Worksheet.
  • Find an appropriate location to shoot the squirt guns. It is best to secure a relatively open space with access to water and a dry concrete surface (to better see where water lands).
  • Set up a table or desk so it is level, and mark off with chalk or tape the distance from the table every meter for ~10 meters.
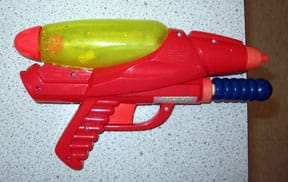
Photo shows a red gun-shaped toy laying flat on a table with its nozzle pointed off the table edge.
Copyright © 2009 James Prager, ITL Program, College of Engineering, University of Colorado at Boulder.
Place the water gun on the table, securing it with duct tape if unstable, making sure the nozzle is horizontal and level.

With the Students

  1. Conduct a pre-activity assessment discussion with the students, as described in the Assessment section.
  2. Have students read the background and procedural instructions on the Take Your Best Shot Worksheet, and set up their experiments.
  3. When ready, run the experiments as described in the worksheet.
  4. Have the students perform the calculations and graphing on the Take Your Best Shot Worksheet. (Optional: Have them use a digital spreadsheet such as Microsoft Excel for data manipulation and graphing.)
  5. Have students complete the Evaluation & Enhancement Worksheet.

Safety Issues

  • Do not aim squirt guns at eyes.

Troubleshooting Tips

  • Depending on your exact water gun design, it is probably best to place the water gun sideways on a flat table to ensure a horizontal shot and easy trigger access.
  • One or two pumps might not yield any results depending on the type of water gun used. If this is the case, have students start their data collection at the first number of pumps that yield results and perform trials at up to ten pumps beyond that.
  • It is important to leave some air in the water tank to make sure the water gun works properly.
  • If holding the trigger until the water stops shooting does not work, the depressurization of the chamber between trials can be achieved by opening the water tank, thereby depressurizing the system.

Assessment

Pre-Activity Assessment

Discussion: Solicit, integrate and summarize student responses.
  • Most popular water guns today use a hand pump to build up air pressure and shoot water out of a tube, often in order to soak your friends and family while looking totally awesome. How much pressure do you think it takes to have this fun? How would one even go about calculating that? The following activity answers those questions, but first, what do you think?

Activity Embedded Assessment

Activity Worksheet: Have students individually complete the Take Your Best Shot Worksheet. Review their answers to gauge their mastery of the subject.

Post-Activity Assessment

Evaluation & Enhancement Worksheet: Have students individually complete the Evaluation & Enhancement Worksheet in which they reflect upon potential sources for error in the experiment, their impact on the results, their graph shapes, and how the data could help them in real-world problem solving. Review their answers to gauge their mastery of the subject.

Activity Scaling

  • For lower grades, have students calculate and graph the pressure generated by five pumps instead of 10. Also, depending on students’ math ability, provide them with more help in doing the calculations. For instance, provide the equations in order of use and rearrange each one so that the unknowns are on the left sides, requiring minimal algebraic manipulation.
  • For higher grades, have students work out the problem solution more independently and require more analysis of the results.

Additional resources

  • African-American Inventors. Several eGFI teachers features, including Garrett Morgan, inventor of the traffic signal,
  • Bernoulli’s Principle. NASA lessons, hands-on activities, and history of 18th-century scientist Daniel Bernoulli for student in grades 5 to 8. [PDF]
  • Bernoulli’s Principle Companion TeachEngineering. org activity for high school students.
  • History of the Super Soaker. Brief history and timeline of the popular water gun’s development and its inventor, mechanical engineer Lonnie Johnson, Jr.
  • Who Made That Super Soaker? The 2013 New York Times Magazine feature includes a q & a with a University of Texas fluid dynamics Ph.D. student who designs high-power squirt guns.
  • Super Soaker Project-Based Math Activity This standards-based high-school lesson from Worcester Polytechnic Institute’s Center for Industrial Mathematics and Statistics lets students apply algebra, gather data, develop and interpret graphs, plot linear equations, and calculate percents. Click HERE for other math projects.
References

Bernoulli’s principle. Wikipedia, The Free Encyclopedia. Accessed February 21, 2016.

Knight, Randall. Physics for Scientists and Engineers: A Strategic Approach. Second edition. San Francisco, CA: Pearson Addison-Wesley, 2008.

Munson, B. R., Young, D.F., Okiishi, T.H., Fundamentals of Fluid Mechanics. Fifth edition. New York, NY: John Wiley & Sons, Inc., 2006.

Contributed by by James Prager, Karen King, Denise W. Carlson © 2009 by Regents of the University of Colorado.

Supporting Program: Integrated Teaching and Learning Program, College of Engineering, University of Colorado Boulder

Super Small Science: Nano Videos

Super Small Science logo

Nanotechnology – an emerging field that measures materials in billionths of a meter – is showing up in products from cosmetics and sunblock to pharmaceuticals and water-repellent coatings.

In the past 15 years, the federal National Nanotechnology Initiative (NNI) has invested more than $22 billion in research to understand matter at the nanoscale level and develop applications that benefit society. As these applications proliferate, some scientists and educators have pushed to introduce nanoscience and engineering  at the K-12 level as a way of sparking excitement about studying STEM.

To assist this effort, NBC Learn and the National Science Foundation have teamed up to produce Nanotechnology: Super Small Science. The five-minute videos are available for free on the NBC Learn and NSF websites. One features researchers discussing nanoscale coatings that can protect steel bridges from corrosion. Another explores the nanotechnology in smartphones.

The video series is just one example how the National Nanotechnology Coordination Office (NNCO) is promoting nanoscale science and engineering education across the country. Other activities include working with nanoHUB to develop a searchable database for nanoeducation; collaborating with a local school district to develop educational videos that were distributed nationwide (Innovation Workshop: Nanotechnology); providing guidance to students making animations about nanotechnology featured on Science Matters, Community Idea Stations; coordinating a growing, national Nano & Emerging Technologies Student Network; and providing outreach via presentations, workshops, participation in trade shows, and the administration of contests, including the “Generation Nano: Small Science, Superheroes” contest (deadline Feb. 2, 2016), EnvisioNano, and Tiny Science. Big Impacts. Cool Videos.

Three semi-finalists in the Superheroes competition will win a trip to the 2016 USA Science & Engineering Festival on April 16-17, 2016, in Washington, D.C., where they will present their entries and compete for cash prizes.

For more information about any of these activities or to share opportunities to advance nanoeducation, contact nanoed@nnco.nano.gov.

ASEE K-12 Engineering Workshop 2016

K12 workshop 2015 circuits

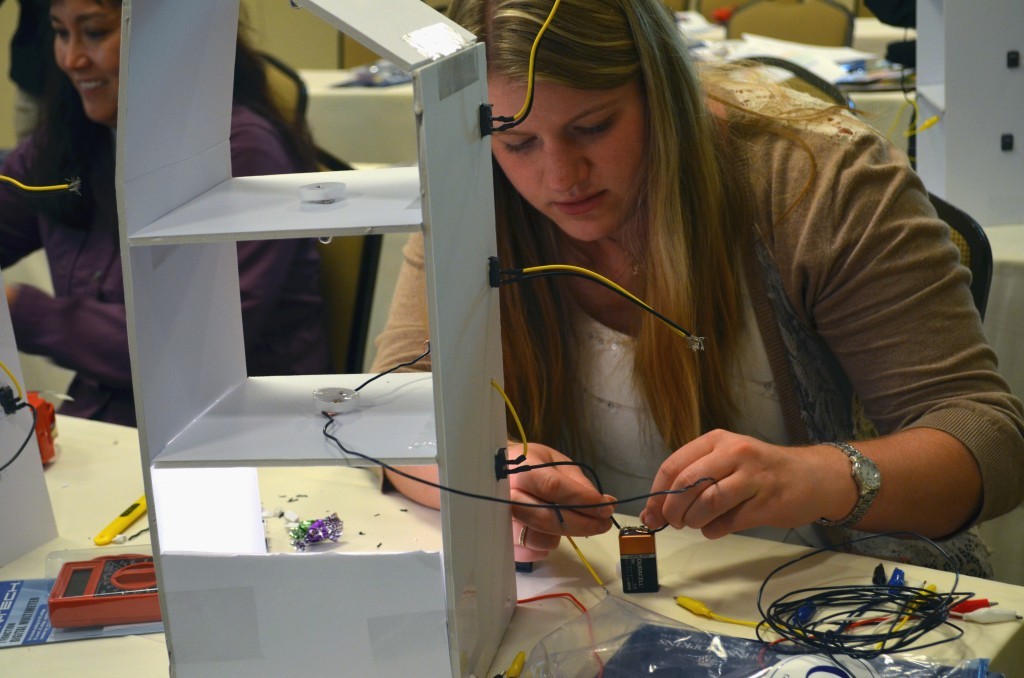
Participants design and test circuits at the 2015 ASEE K-12 Workshop in Seattle. Photo by Michelle Bersabal Copyright © 2016 American Society for Engineering Education.

Want to get students from preschool to high school excited about learning? Integrate authentic, hands-on engineering activities and projects into your curriculum!

Whether you’re seeking fun, immediately useful ways to enrich your STEM, literacy, or art classes or an opportunity to network and learn alongside STEM teachers and engineering faculty from across the country, the American Society for Engineering Education’s annual K-12 Workshop is the place to be.

WHERE: New Orleans Convention Center, New Orleans Louisiana 2016-k12-banner
WHEN: June 25, 2015
8:00 am – 5:00 pm 

All attending K-12 Teachers will receive a complimentary Sunday pass to ASEE’s Annual Conference & Exposition on Sunday, June 26th.

New this year! Join us for a 2nd day of Teaching Engineering through Making! This will include in depth workshops on how to incorporate STEM disciplines in the curriculum through the Maker movement.

June 26, 2016
9:00 am – 1:00 pm

The K-12 Curriculum Exchange – All educators are invited to display their original ideas and innovative models that show how they integrate engineering and STEM. These best practices and experiences will be shared with attendees during a special workshop session and as the culminating event of the day.

Non-Member registrations include a full year of ASEE Membership and automatic membership in the K-12 Division! Register HERE.

Watch ASEE TV’s highlights of the 2013 K-12 workshop

Naked Egg Drop

Naked Egg Drop activity contributed by the University of California, Davis’ s College of Engineering. It is one of the activities on TeachEngineering.org, a searchable online library of teacher-tested lessons compiled by the Integrated Teaching and Learning Program, College of Engineering, University of Colorado, Boulder. 

Summary

Paris of students in grades 3 to 6 experience the engineering design process by building and modifying devices to catch and protect a “naked” egg as it is dropped from increasing heights. The activity scales up to district or regional egg drop competitions.

Grade level: 3-6

Time: 120 minutes

Learning Objectives

After this activity, students should be able to:
  • Explain the transfer of potential to kinetic energy of a dropped egg and explain where the energy goes after it hits the egg catcher.
  • Explain why some materials are better than others for absorbing the kinetic energy of a falling egg.
  • Describe the relationship between height and the kinetic energy of a dropped egg.
  • Explain design modifications made during the design process, weighing factors such as height and materials.

Learning Standards

Next Generation Science Standards

  • Define a simple design problem reflecting a need or a want that includes specified criteria for success and constraints on materials, time, or cost. [Grades 3 – 5]
  • Generate and compare multiple possible solutions to a problem based on how well each is likely to meet the criteria and constraints of the problem. [Grades 3 – 5]
  • Plan and carry out fair tests in which variables are controlled and failure points are considered to identify aspects of a model or prototype that can be improved. [Grades 3 – 5]
  • Make observations to provide evidence that energy can be transferred from place to place by sound, light, heat, and electric currents. [Grade 4]
  • Apply scientific ideas to design, test, and refine a device that converts energy from one form to another. [Grade 4]
  • Define the criteria and constraints of a design problem with sufficient precision to ensure a successful solution, taking into account relevant scientific principles and potential impacts on people and the natural environment that may limit possible solutions. [Grades 6 – 8]
  • Evaluate competing design solutions using a systematic process to determine how well they meet the criteria and constraints of the problem. [Grades [6 – 8]

International Technology and Engineering Educators Association

  • The engineering design process involves defining a problem, generating ideas, selecting a solution, testing the solution(s), making the item, evaluating it, and presenting the results. [Grades 3 – 5]
  • E. Models are used to communicate and test design ideas and processes. [Grades 3 – 5]
  • F. Design involves a set of steps, which can be performed in different sequences and repeated as needed. [Grades 6 – 8]

Engineering Connection

Engineers must understand the concepts of energy transfer, conservation of energy, and energy dissipation in order to design real-world projects. They also must understand the properties of materials to design complex systems. Materials can dissipate energy through various means, such as heat, light and vibration. For example, engineers design skyscraper foundations using concrete and steel that can withstand the huge force of the building it supports during earthquakes. Engineers who design computer keyboards want to select a material that can be repeatedly tapped,  feels good under finger tips, is inexpensive and environmentally benign, and is cleanable. Identifying the materials that help to meet project constraints is an important aspect of the design process.

Materials List

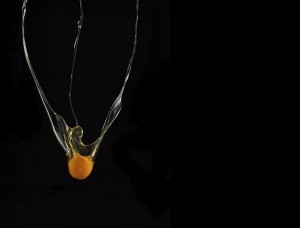
egg drop yolk expanded

Each group needs:
  • 1 or more sheet(s) of paper, to sketch and plan egg catcher designs
  • pencils
  • scissors
  • tape and/or glue; white glue for younger students; hot glue for adult helpers and older students
  • at least 1 raw egg (depending on the number of testing trials planned per group)
  • computer with Internet access, for the research phase of the engineering design process
  • Novice Engineer Pre-Assessment, one per student
  • Naked Egg Drop Rules and Score Sheet, one per group
  • Expert Engineer Post-Assessment, one per student
To share with the entire class: materials for building egg catchers:
  • Provide materials such as cardboard or paperboard, clean food containers, foam, tissue paper, fabric, rubber bands, packing peanuts, fiberfill, bubble wrap, cotton balls, grass and other soft and cushiony materials. Reduce the cost by salvaging these materials as much as possible and/or asking students to salvage and bring items from home.
  • Do not provide the following materials because they are such excellent shock absorbers (it is nearly impossible to break the egg from amazing heights): food and food ingredients, powders (sand, flour, baby powder), and pastes and gels that stay wet.

Competition supplies to share with the entire class:

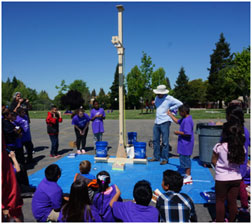
Photo: Students keep their eyes on the egg during the naked egg drop competition. Copyright © 2015 Denise Jabusch. Used with permission.
  • 6 foot (or taller) laddernaked_eggdrop_activity1_figure2web
  • tape measure
  • tarp, newspaper or butcher paper, to simplify clean up
  • concrete or asphalt slab on which to hold the egg drop competition since grass absorbs a significant amount of shock
  • (optional alternative to the ladder) To improve student safety and increase the wow factor, build an egg dropper rig using the materials list and building instructions provided in the Egg Dropper Construction and Use (see photo). Building the device is especially recommended if a district or regional competition is planned as part of the Elementary School Engineering Design Field Day unit, since its labor and material costs can be shared among many instructors/classrooms/schools. Estimated materials cost for the rig is ~$300.
  • (optional) Especially helpful for large competition events, make a tool to enable quick measurements of egg catcher diameters and heights before the egg drop, as a way to easily enforce the design constraints. The homemade device in Figure 6 consists of a 25-cm diameter circle cut out of wood and an arm with a sliding ruler for measuring device height.
  • (optional) For the testing/competition, it may be helpful to have a few other adults or older students on hand to serve as judges and helpers to perform material and dimension checks.

Introduction/Motivation

Imagine that you are at the Olympics competing in the 10 meter (~30 feet) platform diving event. You’ve practiced your flawless dive countless hours and you are ready to win a gold medal. You bend your knees, your toes push against the rough surface of the platform, you take a deep breath, and you jump. You whiz through the air, moving faster and faster for what feels like forever. You twist and turn, doing flips as you watch the faces of your supporters. Suddenly, your fingers dip into the water with your arms, shoulders, torso falling from the sky into the depths of the pool. You make the smallest of splashes. Your powerful legs kick and you surface to see all 10.0s from the judges.
Think about what type of energy you had before your jump, during your jump, and right before you hit the water. What allowed you to jump from a great height safely and confidently? What type of energy did you have at the beginning of the jump? (Answer: Gravitational potential energy.) What type of energy did you gain during the jump? (Answer: Kinetic energy.) How could you tell?

Procedureegg carton purple

Before the Activity

  • Decide whether to provide students with an assortment of building materials from which to use, or break the first hour into two parts, with time in between for the teacher and/or students to acquire building materials as specified from group designs. Then, for the building component of the activity, assemble scavenged or purchased materials and/or request that students bring scavenged or purchased materials from home. Take note of the banned list of materials—items that are too effective at being shock absorbers!
  • Gather and assemble materials for students to plan and build egg catchers.
  • Gather and assemble competition supplies and equipment. Arrange for extra helpers and judges if necessary.
  • Make copies of the Novice Engineer Pre-Assessment, Naked Egg Drop Rules and Score Sheet and Expert Engineer Post-Assessment.

With the Students

  1. Administer the pre-assessment, as described in the Assessment section.
  2. Present the Introduction/Motivation content to the class.
  3. Divide the class into groups of two students each. Hand out the supplies, including the rules and score sheet.
  4. Introduce the design challenge: To create a device to catch an egg dropped from a height without the egg breaking.
  5. Review the steps of the cyclical and iterative engineering design process. Tell students that as student engineers, they might begin by asking questions to understand the problem, including its criteria and constraints, then researching to learn more, then imagining ideas before making plans for how to create the best solution they can think of. Next, teams each create a prototype, test it, and change and improve the design from what they learn through testing.
  6. Ask: Identify the need and constraints. Have students read the first page of the competition rules and score sheet. As mentioned earlier, the engineering “need” is to design a device to catch an egg dropped from a height without the egg breaking. Make sure teams are aware of the constraints (requirements and limitations). Remind students that the egg catchers must be made of approved materials (no gels, food, powders), have all materials secured, and be less than 25 cm in any direction.
  7. Research the Problem. Have student teams independently investigate materials science and energy of motion topics. Show the class the Squash Ball Bounce video and discuss the elasticity measuring device. Additional research might focus on inventions such as trampolines, catchers’ mitts and rock climbing pads to learn about their design approaches and materials.
  8. Imagine: Develop possible solutions. Direct student teams to brainstorm together and then design and sketch on paper their ideas for egg catcher designs. Remind students to include dimensions and materials lists. Remind them to calculate the surface area available to catch the egg of their planned devices. Encourage students to salvage materials or use materials some people consider waste (what’s in the recycling bin?). Engineers often try to incorporate underutilized materials like “waste” to decrease the cost and the environmental impact of their designs. Examples include saved and dried paper towels used as cushioning in the egg catcher or an empty cereal box to make the egg catcher exterior structure.
  9. Plan: Select a promising solution. After teams have developed a few design ideas, have them decide on a final design. Remind them to review the rules and scoring sheet to make sure the design addresses and considers all the constraints.
  10. Require the final plan to include a drawing of what the catcher will look like including labels that describe special features, and a list of materials and amounts, especially if the teacher is providing the materials.
  11. Create: Build a prototype. Next, student engineering teams each build an initial prototype. Figures 1 and 5 show examples of completed student-designed and -built egg catchers.eggdrop_activity1_figure6web
  12. Test and evaluate prototype. A) Use the score sheet to record pre-competition material and dimension checks to verify that team prototypes meet all the constraints, balancing the conflicting factors of their devices. This includes a check for permitted vs. banned materials and a shake test, plus measurement of the catcher height and footprint area (all dimensions must be < 25 cm). B.) Then test the catchers by dropping eggs either by hand from a ladder or by using an egg dropper device (like the one shown above). The minimum drop height is 100 cm and the maximum height for the egg-dropping device is 365 cm. The maximum height using a ladder depends on ladder height and student safety limitations. C.) During competition, give each group three drops; let them pick how much to increase the height between each successful drop. D.) After the test, students calculate their drop height-to-catcher height ratios, which are indicators of effective design and used to determine the competition winner. The shorter the egg catcher and the taller the drop ratio indicates a team that has selected materials and amounts that can successfully dissipate much kinetic energy.
  13. Improve: Redesign as needed. Expect students to learn a lot from their egg catcher tests and from observing other teams’ tests, resulting in many ideas for design improvement and refinement.
  14. Regroup the teams or class to discuss what parts of their designs worked well and what needs to be changed during the re-design process. If an egg breaks due to bouncing, a revised design might raise the catcher walls. If an egg breaks due to inadequate cushioning, a team might change the material amount or type. Other issues might be the result of student error, such as poor aiming of the dropped egg or sloppy placement of the catcher on the ground below the egg.
  15. Then direct teams to restart the design process with their design changes in mind. Test again, as time and materials permit, declaring a winner at competition end.
  16. Administer the post-assessment, as described in the Assessment section.

Safety Issues

If using a ladder to drop the eggs, do not permit any rough-housing around the ladder. Have one person dedicated to holding the ladder when a student is climbing it.

Assessment

Pre-Assessment: Before starting the activity, administer the three-question Novice Engineer Pre-Assessment to gauge students’ base level of understanding about the egg drop challenge and the types of energy involved. Answering the questions also helps students begin to formulate solutions.

Activity Embedded Assessment:  Rules and Score Sheet: Have students use the Naked Egg Drop Rules and Score Sheet to prepare for the competition. Throughout the design process, observe and evaluate students’ catchers to help them think through the constraints of the challenge.

Discussion Questions: Ask students questions to determine their depth of understanding, such as:
  • What are ways you can get disqualified from the competition? (Answer: Using prohibited materials, building an egg catcher with any dimension greater than 25 cm, not securing materials to the structure of the egg catcher.)
  • What egg catcher shape maximizes surface area under our constraints? (Answer: A circle.)
  • What materials dissipated the kinetic energy from the falling egg? (Answer: Elastic materials.)
  • Why might you need walls on the sides of an egg catcher? (Answer: To prevent the egg from bouncing out and breaking on the ground.)
  • What are safety concerns with this activity? (Answer: Falling off the ladder.)
Post-Assessment: After the activity, administer the six-question Expert Engineer Post-Assessment to gauge student comprehension. This short-answer test gives students an opportunity to write about their successes and failures through experiencing the design process.
Discussion Questions: As a class, ask the following questions to reveal students’ depth of comprehension:
  • How did your design change from your initial sketch to your first-built catcher prototype to your last catcher? (Have each team share its story.)
  • Why was it important to test your catcher before competition?
  • What did you learn by doing a test? (Listen to examples from many teams.)
  • Why do professional engineers build prototypes and models and test them?
  • Why is it important to understand the properties of materials for your designs?
  • What types of energy or energy transfer are present in the fall of the egg? (Answer: Prior to the drop, an elevated egg has a large amount of gravitational potential energy due to its height above the ground. When it is dropped, that the energy is transferred from potential to kinetic. Right before the egg hits the egg catcher, (nearly) all the potential energy has been converted to kinetic energy.)
Presentations: As an alternative post-activity assessment, require student groups to make brief summary class presentations of their egg catchers to the rest of the class, pointing out their features, lessons learned, improvements and final results.

Activity Scaling

  • For lower grades, relax the construction requirements to permit larger devices or more materials.
  • For higher grades, increase the construction requirements to smaller egg catchers or increase the initial drop height.
  • Have more advanced students do some area calculations to determine the shape that provides the biggest egg catcher design surface area within the 25 cm constraint. (A circle footprint.)

Additional Resources

  • Destiny Woodbury, a 5th grade science teacher at KIPP Liberation College Prep in Houston, Texas, created a unit on “egg engineering” in partnership with Boeing engineers. Activities include having students create models and blueprints for an egg-drop challenge. Watch the Teaching Channel video on Education Week’s Inspired Instruction blog.
  • Show students an example of how energy can dissipate by watching what happens to a rubber ball as it hits a wall in the four-second Squash Ball Bounce video at https://www.youtube.com/watch?v=5IOvqCHTS7o.
  • NASA Mars Egg Drop activity for grades 7-9 and Egg Drop Lander, in which students design and test parachutes to safely land an egg.
  • Former NASA scientist Mark Rober shows how to ace an egg-drop contest. [YouTube video 9:49]

Contributed by Lauren Jabusch © 2015 by Regents of the University of Colorado; original © 2015 University of California, Davis. Supporting Program RESOURCE GK-12 Program, College of Engineering, University of California Davis

The contents of this digital library curriculum were developed by the Renewable Energy Systems Opportunity for Unified Research Collaboration and Education (RESOURCE) project in the College of Engineering under National Science Foundation GK-12 grant no. DGE 0948021. However, these contents do not necessarily represent the policies of the National Science Foundation, and you should not assume endorsement by the federal government.
Destiny Woodbury, a 5th grade science teacher at KIPP Liberation College Prep in Houston, Texas, created a unit on “egg engineering” in partnership with Boeing engineers. Activities include having students create models and blueprints for an egg-drop challenge. Watch the Teaching Channel video on Education Week’s Inspired Instruction blog.

Integrated STEM Curricula

kids drawing chalk gears on sidewalk

Mission to Mars, CubeSats, and Polymers for the Planet are among the hands-on engineering units developed by 4th to 8th grade science teachers in a unique partnership between the Boeing Company and the Teaching Channel.

The recently released curricula are part of a collection of K-12 education resources under development to celebrate Boeing’s 100th anniversary,

Each two-week unit integrates design thinking and problem-based learning into the science curriculum and align with the Next Generation Science Standards now adapted in roughly a third of states.

Teachers and engineers in the project received training from learning scientists at the University of Washington’s Institute for Science and Math Education, led by researcher Philip Bell. His team also created a template to support the development of curricula aligned to academic standards and research on science learning and teaching.

The 10 Puget Sound and Houston teachers who authored the units also taught them. This year, a panel of science educators will review the content to suggest improvements, particularly in relation to the NGSS EQuIP’s Rubric for Science.

Companion videos produced by Teaching Channel showcase one lesson from each of six units, such as using models and blue prints to engineer an egg-drop challenge written by a Houston 5th grade science teacher. The videos are meant to demonstrate how educators shifted their practice to integrate engineering practice and habits of mind in their classrooms.

Video Snippets Show Elementary Engineering in Action

EIE video snippet

What does it mean for fourth graders to plan and carry out investigations? How can you help students develop such engineering habits of mind as optimism?

Engineering is Elementary just added a new series to its collection of videos for K – 12 engineering educators that shows what engineering practices and design looks like in real classrooms. Use “EiE Video Snippets” to see:

Elizabeth Parry, coordinator of K-16 STEM Partnership Development at North Carolina State University’s College of Engineering, calls the video snippets “perfect” for pre-service teacher education. She also imagines them being used for professional development and as examples for parents and administrators for schools thinking about integrating engineering into the curriculum. “Pretty potent punch for such brief snippets!”

Read more on the EiE Blog.

Engineering Football Safety

Football UAB graphic

In the movie Concussion, Will Smith plays a Pittsburgh pathologist who uncovered a link between repeated concussions and brain damage in professional football players, then fought a lonely battle against the NFL’s efforts to suppress his work. See official trailer.

Research on chronic traumatic encephalopathy (CTE) since that 2002 diagnosis has produced a body of evidence about the dangers of repeated blows to the head. Investigators at the Veterans Affairs Administration and Boston University examining the brains of deceased pro football players recently announced that 87 of the 91 brains tested positive for the Alzheimer’s-like degenerative disease. In the past five years, there have been 39 changes to NFL rules to promote player health and safety, reducing concussions by 35 percent since 2012. Schools and pro leagues alike have instituted concussion protocols and sideline spotters, and the NFL has invested millions of dollars in research and technology. The federal Centers for Disease Control and Prevention even launched a Heads Up to Brain Injury campaign to keep parents, coaches, and student athletes informed.

Still, safety can be a tough sell in a bruising sport like football. Earlier this season, Rams quarterback Case Keenum was allowed to stay in the game despite showing signs of being dazed after his head smashed the turf in a tackle, touching off an outcry. The league responded with plans to discipline teams that failed to follow medical protocol.

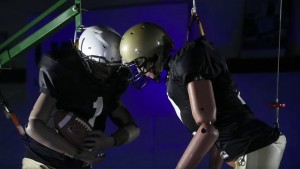
Engineers can’t change behavior. But they can make sports safer to playfootball crash dummies UAB

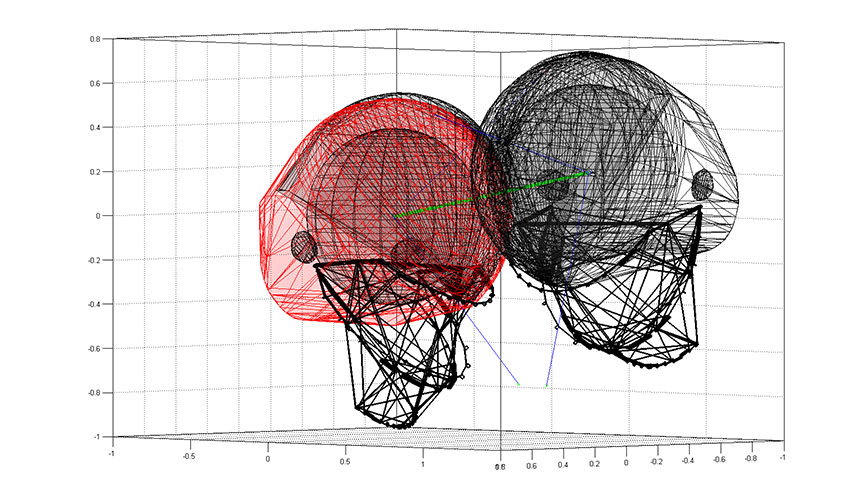
Engineering researchers are working to improve helmets. Dean Sicking, a professor of engineering at the University of Alabama, Birmingham, who revolutionized safety in auto racing, is tackling football helmets in an effort to reduce brain injuries at every level of the sport. His goal: reduce concussions by 75 percent not only by using new materials but also by changing the way football helmets are tested. Instead of linear models of force and motion, Sicking’s lab studies the impact on players’ heads using crash-test dummies that mimic the way human bodies collide on the gridiron.

Watch a video of Sicking’s crash-dummy helmet tests.

At the University of Michigan, mechanical engineering professors Ellen Arruda and Michael Touless have developed a shock-absorbing material called Mitigatium that dissipates energy from repeated hits to a prototype helmet,  including side blows, which current models cannot do.

Helmets aren’t the only gear getting an engineering makeover. Engineers at Carnegie Mellon University are working on sensor-studded footballs and other equipment to learn about forces on players.

University of Virginia biomechanical engineers Jeff Crandall and Richard Kent discovered that the majority of elite football players were wearing cleats that didn’t fit properly. It turns out that the inside dimensions of football shoes don’t necessarily comply with stated shoe size, and can vary greatly depending on the model and manufacturer. Their solution: a new shoe-sizing device that helps equipment managers and players identify shoes that precisely match the dimensions of a player’s feet. By wearing properly sized shoes, players can enhance performance and perhaps help reduce foot and lower-leg injuries.

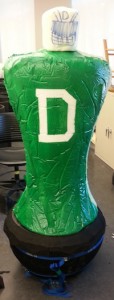
At Dartmouth College in Hanover, N.H., head football coach Eugene Teevens teamed updartmouth football dummy with students in the Engineering Design Methodology course to develop an automated tackling dummy to reduce injuries. The Mobile Tackling Target, which received a provisional patent, is a padded foam form perched on a ball-like, omni-wheeled base that simulates the size, weight, and agility of a real football player. “We created it to eliminate player-on-player contact during tackling drills, while maintaining the level of challenge associated with a real live person,” explained master’s student Elliot Kastner.
Then there are the engineers in the end zone: engineering students who also play football. Carnegie Mellon University’s 2013 starting punter Thomas Healy, a mechanical engineering graduate student, was inspired by the game to research helmet safety. Louisiana State University mechanical engineering senior Tommy LeBeau managed to balance his studies with gridiron drills during the 2015 season, as did Georgia Tech left guard Trey Braun, a mechanical engineering student with a 4.0 GPA. And in addition to its top-tier engineering program, MIT also has a strong football team. Its name? The Engineers!

National Youth Science Camp 2016

NYSC Brochure 2016

Level: Graduating High School Seniors
Deadline: February 17, 2016NYSC science project
Where: Camp Pocahontas, near Bartow, W.V.
Dates: June 15 – July 10, 2016
Cost: Free, including travel to and from the camp and visit to Washington, D.C.

The National Youth Science Camp (NYSC), one of the country’s premier science education programs, offers graduating high school seniors from around the country and world a month of outdoor adventure and hands-on projects in the beautiful woods near Bartow, W.V., all travel costs and camp fees paid.

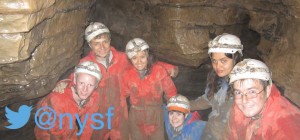
A typical day might include a morning lecture from a guest scientist, small-group, hands-on science seminars, and lots of hiking, caving, art projects, and fun discussions on topics from why engineered systems fail to origami. There also are trips to the National Radio Astronomy Observatory and to Washington, D.C., just five hours by car, where recent keynote speakers have included astrophysicist Neil deGrasse Tyson and National Institute of Health director Francis Collins. See highlights and photos from the 2015 camp.

Each state and country conducts its own competition to select two delegates to represent them at the camp. NYSC alumni include astronauts, members of Congress, Nobel Prize winners, and business leaders.

Applications must be completed online and are due  February 17, 2016. Click HERE to apply (students will need to set up an account) and for answers to frequently asked questions.

nysc cavingApplicants must:

  • Graduate from high school between July 1, 2015, and June 30, 2016;
  • Demonstrate superior academic proficiency, including recognition in mathematics and/or the sciences;
  • Demonstrate an application of leadership abilities and social maturity through involvement in both school and community activities;
  • Demonstrate skills and achievements outside the realm of science and outside the realm of academic pursuits; and
  • Demonstrate a curiosity and an eagerness to explore many and varied topics.
  • Commit to attending all four weeks of the camp.

The camp is made possible through planning and fundraising from the National Youth Science Foundation, a nonprofit organization with a mission to honor, sustain, and encourage youth interest and excellence in science by conducting comprehensive informal science education programs. These programs are designed to provide opportunity for students to have constructive interaction with others and emphasize the social value of scientific careers.

Greeting Card Assembly Line

Little girl making Christmas cards

Lesson created by Heather Krey of Kutztown University. It won the 2013  American Association of University Women’s “Engineer a Lesson” contest. Click HERE for PDF

Summary

In this collaborative math and art lesson, students in grades 4 through high school explore central ideas in industrial engineering – including productivity, efficiency, and quality – by designing their own assembly line and working together to mass produce greeting cards.

Note: This is meant to be team taught with an art and math teacher, but if just one teacher is available, a parent volunteer could help out.  

Grade level: 4th and 5th but can be adapted for high school students.

Time: 1.5 – 2 hours

Learning Objectives

After doing this lesson, students will be able to:

  • Use art materials to create a greeting card based on a predetermined design
  • Work together to design an assembly line
  • Evaluate and improve the assembly line
  • Understand the definitions in the vocabulary list
  • Develop an appreciation for the profession of industrial engineering

Essential Question: How can we produce greeting cards as efficiently as possible without sacrificing quality?

Standards

Common Core State Mathematics Standards

Standards for Mathematical Practice: 1. Make sense of problems and persevere in solving them Standard for Mathematical Practice: 4. Model with mathematics Standard for Mathematical Practice: 5. Use appropriate tools strategically.

Grade 5 Standards: Number and Operations in Base Ten Cluster:

  • Perform operations with multi-digit whole numbers and with decimals to hundredths.
  • Standard: 6. Find whole-number quotients of whole numbers.
  • Domain: Measurement and Data 4 Cluster: Represent and interpret data.
  • 2. Make a line plot to display a data set of measurements in fractions of a unit (1/2, 1/4, 1/8). Use operations on fractions for this grade to solve problems involving information presented in line plots.

Materials

  • Whiteboard & markers
  • Stopwatches
  • Sample greeting card
  • 7 Posters
  • 12 Small signs with Velcro (or large Post-It notes) that can be affixed to poster
  • 2 bins or boxes labeled “pass” and “fail”
  • Card making materials (card stock, scissors, glue, etc.) for each student to make about ten cards

Pre-Class Preparation

Seven large signs should be created that read Warehouse, Quality Control, Workstation 1, Workstation 2, Workstation 3, Workstation 4, and Repair Shop.

The art teacher should design a greeting card that takes several steps to create, as it will need to be produced in an assembly line. This could be a thank you, happy birthday, or any other type of greeting card. The design should incorporate the school’s name and be appropriate for the season.

The teachers should break down the card making process into about 12 steps and prepare small signs for each individual step. These signs should either have Velcro on the back or simply be written on postit notes so that they can be affixed to the workstation signs by the students.

The room should be set up so that each student will have individual work space, but flexibly enough that the students can work in groups later in the lesson. There should also be areas designated as the warehouse (where the materials will be located) and quality control (where the pass and fail bins will be located).

Instructional Procedure  2010 card making with kids and Michelle Obama at White House

Introduction (5 minutes) Both teachers welcome the students to class and tells them they are going to be industrial engineers today. The math teacher explains that there are many kinds of engineers. For instance, civil engineers design roads and bridges, mechanical engineers design things with moving parts like machines, and computer engineers design computers. Industrial engineers, on the other hand, do not design products but figure out how to build them correctly and efficiently. In other words, a mechanical engineer might come up with the design for a new car, and then an industrial engineer will figure out how to produce 10,000 of those cars in a factory.

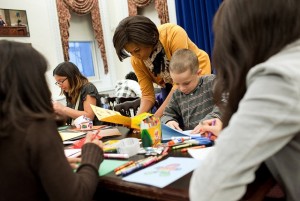
Photo: First Lady Michelle Obama looks at holiday cards being made for active duty service members at a Nov. 29, 2010 mentoring event.

Demonstration (5 minutes) The art teacher explains that the product we will be building today is a greeting card. She shows the students a card she has already designed and then “builds” a new card, describing each step as she goes. As the art teacher is demonstrating the steps, the math teacher should bring the pre-prepared sign for each step into view.

Trial One (10 minutes) The students are then instructed that they will have 10 minutes to make as many cards as possible, each working individually. The math teacher, taking on the role of supervisor, sets a timer for 10 minutes and tells the students to START. At that point, each student may gather materials from the warehouse and begin constructing cards. Each time a card is completed, the student must hand it to the art teacher, who takes the role of quality control and sorts the cards into the pass and fail bins. After 10 minutes, the math teacher calls “STOP” and all production must cease.

Discussion One (5 minutes) The art teacher counts how many cards are in each bin and writes the results on the whiteboard. The math teacher leads a discussion in which the concepts of productivity, efficiency, and quality are introduced. She draws the three charts on the whiteboard (see figure), entering the data from Trial One. The productivity is the total number of cards is the pass bin. The efficiency is the productivity divided by 10 (since it was a 10 minute trial). The quality is the total number of cards passed divided by the total number of cards made, expressed as a percent.

Line Balancing (10-25 minutes) Students are then asked if they have any ideas as to how they could work more efficiently. If the students do not come up with the idea themselves, the teacher should suggest that they work as an assembly line. She will direct their attention to the small signs with each task and provide them with the large signs for the workstations. If time permits, students should work together using stopwatches to determine how much time it takes to complete each individual task.

Using this data (or their best guess, if the timing step was skipped) the students should decide which tasks should 0 5 10 15 20 25 Trial 1 Trial 2 Trial 3 Trial 4 Productivity (Cards Made) 0.0 0.5 1.0 1.5 2.0 2.5 3.0 Trial 1 Trial 2 Trial 3 Trial 4 Efficiency (Cards Per Min) 50 55 60 65 70 75 80 85 90 95 100 Trial 1 Trial 2 Trial 3 Trial 4 Quality (Percent Passed) 7 be done at which stations, and affix the correct steps to each workstation sign. The teacher will tell the students that distributing the tasks so that the total time for each workstation is approximately equal is called line balancing. They should also organize themselves as the workers at the various stations and move the materials from the central warehouse to the point where they will be needed in the assembly line. They may also place their partially completed cards in the correct workstations to be finished by the assembly line.

Trial Two (10 Minutes) When the students are ready, the math teacher says “START” and gives the students 10 minutes to produce as many cards as possible working as an assembly line. Each card should be inspected by quality control and placed into either the pass or fail bin. Discussion Two (15 Minutes) At the end of Trial Two, the art teacher counts the cards in the pass and fail bins, and the three charts are updated accordingly. The math teacher leads a discussion where the students brainstorm ways in which their efficiency could be improved even more. The teacher should use this discussion to introduce the term bottleneck as the workstation that takes the longest time. The students should identify which workstation is the bottleneck, and decide if one of its tasks should be moved to a different workstation or if more workers should be assigned to the bottleneck workstation. They should also identify the workstation with the most idle time, and make appropriate changes. Finally, students should be invited to create a new workstation, the repair shop, which fixes cards in the fail bin and resubmits them to quality control.

Trial Three (10 minutes) When the students have completed their improvements to the assembly line, the math teacher says “START” and gives the students 10 minutes to once again produce as many cards as possible. At the end of the 10 minutes, the cards in the pass bin are counted and the productivity, efficiency, and quality charts are updated. If time permits, the students may be given the opportunity to make more improvements and complete a Trial Four.

Closing (15 minutes) Students should already be organized into their groups according to their workstation. One of the teachers leads a short discussion where the students are given a chance to discuss what they learned in this activity. The teacher also asks them to think of examples of products that are probably produced on an assembly line. Finally, student groups work together to complete the matching exercise.

Follow Up At a later time, the students may vote on what to do with all the cards they have produced. For instance, they may each take some home for personal use, they may give the cards to school staff on Teacher Appreciation Day, or they can sell the cards as a fundraiser.

Assessment

See quiz on page 12-14 of PDF.

Adaptations for older students

This lesson is designed for the fifth grade, but it could certainly appeal to older students as well. Older students can produce more complex cards and will need less guidance from the teacher to complete the activities. For instance, instead of breaking the process down into several smaller tasks, the teacher should allow the students to do that on their own. Furthermore, the quality control standards can be higher for older students. High school students may benefit from watching the video on Line Balancing before designing their assembly line.

Additional resources

Line Balancing video

Card Making Assembly Line video

Assembly Line Card-making ClubScrap.com how-to lesson for turning 6 A2-sized pieces of paper into nine cards. [YouTube 4:51]

Build a Pop-Up Card PBS Kids’ Design Squad Nation activity