Beat the Motion Sensor
TeachEngineering.org activity was contributed by the Integrated Teaching and Learning Program, College of Engineering, University of Colorado, Boulder.
Note: This activity, featured in the February 2014 eGFI Teachers’ newsletter marking Black History Month, was inspired by Clarence L. Elder, inventor of the Occustat – the energy-conservation system now ubiquitous in office buildings and schools that adjusts lights and cooling according to a room’s occupancy.
Grade level: 7-9
Time: 120 minutes
Summary
In this activity, students in grades 7 to 9 explore material properties as they relate to motion detection, and use that knowledge to make design decisions about what types of motion detectors to use in specific applications, such as conserving energy in commercial buildings.
Engineering Connection
Architectural engineers are often involved in designing the systems that control building lighting, heating, and cooling systems. They also determine what types of sensors are most appropriate for each space type and the amount of use it receives. Through this activity, students experience how different types of common building and furniture materials interact with motion-detection technology and extend that knowledge into the field of architectural engineering by making decisions like those engineers make in designing commercial buildings.
Engineering history connection. Inventor Clarence L. Elder, an African American, received a patent in 1976 for the energy-conservation system based on motion sensors now found in most schools and commercial buildings. The Occustat uses a light beam to monitor traffic in and out of rooms, adjusting heating and cooling levels accordingly and cutting total energy consumption by as much as 30 percent.
Learning Objectives
- Describe how the two main types of motion sensors (passive infrared, or PIR, and ultrasonic) detect motion using heat and sound waves.
- Describe how different materials interact with heat and sound waves.
- Explain why a motion sensor did, or did not, “see” a moving object because of the way in which materials interacted with it.
- Understand how architectural engineers use motion sensors to conserve energy in buildings.
- C. The design process is a purposeful method of planning practical solutions to problems [Grades 3-5]
- F. New products and systems acan be developed to solve problems or to help do things that could not be done without the help of technology [Grades 6-8]
- G. Humans can devise technologies to conserve water, soil, and energy through such techniques as reusing, reducing, and recycling. [Grades 9-12]
- Forces and Motion
- Abilities of Technological Design
- Science and Technology in Society
Students who demonstrate understanding can:
- MS-PS4-1 Use mathematical represenations to describe a simple model for waves that include how the amplitude of a wave is related to the energy in a wave.
- MS-PS4-2 Develop and use a model to describe that waves are reflected, absorbed, or transmitted through various materials.
- MS-ETS1-1 Define the criteria and constraints of a design problem with sufficient precision to ensure a successful solution, taking into account relevant scientific principles and potential impacts on people and the natural environment that may limit possible solutions.
- a. Develop a uniform probability model by assigning equal probability to all outcomes, and use the model to determine probabilities of events. For example, if a student is selected at random from a class, find the probability that Jane will be selected and the probability that a girl will be selected. [Grade 7]
- 7. Use the definition of congruence in terms of rigid motions to show that two triangles are congruent if and only if corresponding pairs of sides and corresponding pairs of angles are congruent. [Grades 9 – 12]
- 1 toy LEGO® racer car (or other pre-made toy car that rolls smoothly across a table and is less than 6 inches long)
- 1 disposable hand warmer (typically found at outdoor stores, pharmacies or online from large retailers)
- 6 inch x 6 inch pieces of the following materials (purchased at hobby and/or hardware stores): 1/16-inch thick aluminum, ceramic tile, 1/8-inch acrylic/Plexiglas, 1/8-inch wood veneer
- 7 inch x 7 inch piece of fabric
- 6-inch embroidery hoop (for fabric frame)
- several lengths of masking tape
- 8-10 wooden craft (Popsicle) sticks or plastic straws
- Can You Trip It? Worksheet, one per person (pdf)
- 2 inch x 2 inch plywood square – one per testing station (use 1/2-inch plywood so it is sturdy)
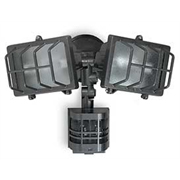
- Passive infrared sensor with a light bulb, preferably red (a PIR sensor is a motion sensor-controlled socket, available in the lighting sections of home improvement stores)
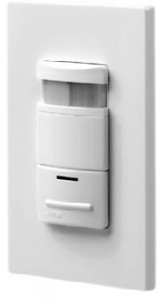
- (optional) Ultrasonic motion sensor (ultrasonic sensors like the one shown below are typically used in commercial buildings; available online for $50-100; if possible, purchase a sensor that is designed to mount to a wall, not a ceiling)
- light socket with attached wiring and light bulb, preferably red (for use with the ultrasonic sensor)

Controls can dim the lights or turn them off completely when sunlight is bright enough. If enough “free” light from the sun can light our rooms, then why waste energy to produce electric light? Lighting controls can also turn the lights off when no one is in the room. If a room is empty, why is artificial light needed?
However, no one is perfect at lighting control. Therefore, architectural engineers design and install automatic controls in buildings to make sure that artificial lighting is off when rooms are empty. This is usually done by using motion sensors, which can be mounted to walls and ceilings, or in place of light switches. Motion sensors can automatically turn on the lighting when someone comes into a room, and automatically turn it off when the room is empty.
Activity
Before the Activity
- Gather materials in appropriate dimensions.
- Make copies of the Can You Trip It? Worksheet.
- Cut 7 inch x 7 inch fabric squares, and attach the fabric to embroidery hoops, one per group.
- Divide the class into teams of three students each.
- Prepare at least one testing station. Position the testing station(s) on a table next to a wall, so that the movement of students does not accidently activate the sensor. Put two tables side by side to provide plenty of room for the cars to roll.
- First testing station: Passive infrared (PIR) motion sensor. Mount the PIR sensor to a vertical piece of plywood that positions the center of the sensor ~16 inches above the table surface. Install a light bulb, preferably red.
- (optional) Second testing station: Ultrasonic motion sensor. A light socket and power wiring are also required since typically these sensors do not come with a built-in socket. Connect the sensor to the socket following the manufacturer’s instructions. Mount the sensor and socket to a vertical piece of plywood that positions the center of the sensor ~24 inches above the table surface. Install a lamp (light bulb), red, if available.
With the Students: Pre-Activity Brainstorming
- Show students the PIR testing station. Use a hand warmer to demonstrate how the light comes on when the sensor is triggered.
- Show students the materials they have to work with, including:
- aluminum
- ceramic tile
- acrylic/Plexiglas
- fabric-covered embroidery hoop
- wood veneer
- Ask student teams to spend a few minutes brainstorming what outcomes they expect from using the different materials to trigger the sensor.
- Instruct students to complete Table 1: Before-Testing Analysis on the worksheet.
With the Students: Activity Instructions
- Hand out the cars and materials (except the hand warmers) to student teams. (Note: Wait to pass out the hand warmers until testing, to avoid any “early” activation.)
- Instruct teams to come up with a way to hold the hand warmer to their cars using tape and craft sticks.
- Have teams construct their first “shields” to go on one side of their cars to “hide” the motion using one or more of the pieces of material.
- Once all teams are finished building, have students gather around the testing station.
- Have one student from each team place its project behind the plywood “wall” of the PIR testing sensor until ready to test.
- Have all students seated and turn off as many lights as possible. Leave on only one or two dim lights so students can see when the sensor is triggered. The outside light from windows may be enough.
- One by one, after the sensor light has reset itself to “OFF” from the last testing team, have a new team carefully, and slowly, roll its project in front of the sensor across the table, noting whether or not the light is triggered. Alert students to be careful not to place their arms in front of the sensor when rolling the cars.
- Have students record the outcomes of their first design test. For each design, document a list of the materials used, a small drawing of the design, and a summary of whether or not the lights were triggered “ON” or not.
- Give students a chance to redesign and retest using all materials. Record results.
- After all testing is completed, have students complete Table 2: After-Testing Outcomes on the workshee
Attachments
- Beating the Motion Sensor Presentation (pptx)
- Beating the Motion Sensor Presentation (pdf)
- Can You Trip It? Worksheet (doc)
- Can You Trip It? Worksheet (pdf)
Safety
Alert students to use caution handling the acrylic/Plexiglas sheets, as they have rough, sharp edges that can cut skin.
Troubleshooting Tips
The sensors typically have switches that determine how long the lights stay on once triggered. Set that value to the lowest setting possible, so that testing can be done as quickly as possible, one after the other.
Assessments
Activity Embedded Assessment
- (before testing) Describe what you did and why you did it.
- (after testing) Describe successes and failures during testing.
- Did the cart move too quickly across the table? If so, why?
- Was the entire heat source covered, or could the sensor see some around the material?
Post-Activity Assessment
- Office: Both. PIR is shadowed by the metal. Ultrasonic is dampened by the fabric and metal.
- Warehouse: Ultrasonic, which can likely “see through” the crates, depending on the contents. PIR is also suitable because the motions are typically large.
- Bathroom: Ultrasonic, since ceramic and metal reflect the sound well.
- Airport security: PIR, since it can “see” through the glass.
- Assign students to conduct Internet research to discover the many ways motion sensors are used in public spaces. Tip: Websites that describe buildings and spaces considered “green,” “smart” or “LEED-certified” are more likely to provide explanations of their advanced lighting and controls engineering.
- Have students research the Doppler effect and investigate how engineers use it for many applications. Ask them to report back to their classmates as to how the Doppler effect is used within other engineering disciplines.
Activity Scaling
- For lower grades, either fill out the worksheet for students, or do it together as a class.
- For upper grades, give students additional materials to test. Be sure to give them non-dangerous materials (for example, students could cut themselves on glass or mirror edges).
Resources
- Clarence Elder, inventor of the Occustat Brief bio from the MIT-Lemelson Center’s Inventor of the Week series of the man who created the energy-saving motion detectors for buildings.
- MythBusters: Thermal Detector. YouTube clip [10:05] of MythBuster team trying to defeat a thermal motion sensor.
- MythBusters: Motion Detector. YouTube clip [3:18] demonstrating ways to foil a motion-detector alarm system.
- MythBusters: Infrared Laser System. YouTube clip [2:40] showing it’s possible to foil an infrared alarm system.
- PIR Infrared Detector. YouTube clip [4:12] shows the inside of a PIR detector and how effectively it detects motion from across the room.
- Motion-Tracking Technology used in Virtual Reality. Article on NASA’s development of virtual reality technology based on motion-tracking sensors.
© 2011 by Regents of the University of Colorado
Filed under: Class Activities, Grades 6-8, Grades 9-12
Tags: absorption, architectural engineering, building, Clarence L. Elder, Design, Doppler effect, Electrical Engineering, Energy, Energy and Environmental Technology, energy conservation, lighting, material properties, materials, motion, motion detectors, reflection, sensor, sound wave, visible light


