What Are Gears?
 Lesson from Teachengineering.org contributed by the GK-12 Program, Computational Neurobiology Center, College of Engineering, University of Missouri. Note: This is one in a series of activities
Grade level: Grades 4-8
Time: 50 minutes
Summary
Students in grades 4 to 8 use LEGO spur gears to learn about different types of gears and how they are used in many engineering devices, including bicycles, to change the speed, torque, and direction of a power source.
Engineering Connection
Gears represent an important component of many mechanical devices and are usually identified with mechanical engineers (who are sometimes called “gear heads”). Although it may not be obvious to students before this lesson, gears are pervasive in our world. They are found in the mechanisms of cars, trucks, bikes, pumps, analog watches, wind turbines, bulldozers, and most engineering machines.
Learning Outcomes
- Explain the role of gears in mechanical devices
Standards
Common Core State Mathematics Standards
1. Understand the concept of a ratio and use ratio language to describe a ratio relationship between two quantities. For example, “The ratio of wings to beaks in the bird house at the zoo was 2:1, because for every 2 wings there was 1 beak.”
2. Understand the concept of a unit rate a/b associated with a ratio a:b and use rate language in the context of a ratio relationship. For example, “This recipe has a ratio of 3 cups of flour to 4 cups of sugar, so there is 3/4 cup of flour for each cup of sugar.”
International Technology and Engineering Educators Association Standards
Students will develop and understanding of:
- Standard 8. The attributes of design.
- Standard 1. The characteristics and scope of technology.
- Standard 3. The relationships among technologies and the connections between technology and other fields of study.
Next Generation Science Standards
- Define a simple design problem reflecting a need or a want that includes specified criteria for success and constraints on materials, time, or cost. (Grades 3 – 5)
- Define the criteria and constraints of a design problem with sufficient precision to ensure a successful solution, taking into account relevant scientific principles and potential impacts on people and the natural environment that may limit possible solutions. (Grades 6 – 8)
Introduction/Motivation
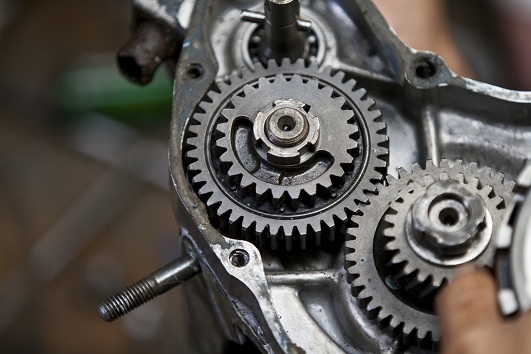
 Image copyright © 2009 Keithonearth, Wikimedia Commons URL
- one 1/16 beam
- two #6 axles with a bushing on the back side
- 8-tooth gear
- 40-tooth gear
- one additional gear of any size
Note: These parts are included in the LEGO MINDSTORMS Education NXT Base Set and Software Pack, part #5003404, for $376, which is the same set that is used throughout this 2-lesson, 5-activity robotic design unit. One base set can serve four groups since it includes at least four of the large gears.
Have ready a computer/projector with Internet access to also show two online videos and an animation at a website.
- Administer the pre-quiz by handing out paper copies; the quiz is also on slide 2. The answers are provided for the teacher on slide 3 for discussion after students have completed the quiz.
- (slide 4) Introduce the lesson objective: What are gears and what do they do? Motivate students to pay attention by pointing out that the concepts in today’s presentation are important to learn and understand in order do well in the design challenges that they will participate in during the next class.
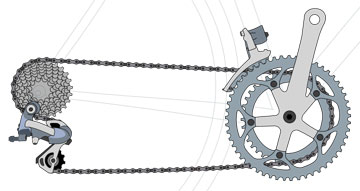
- Describe what a gear is using slide 5 and an excellent 11-minute “Gear Basics” video (link on slide 6 and in the Additional Multimedia Support section). Gears come in various sizes and types; they are used to change the speed, torque and direction of a power source. Topics covered in the video: gear types, gear rotation, gear ratio, rates of rotation, mechanical advantage and examples of use (river locks and bicycles).
- (slide 7) Provide an overview of the various types of gears, including spur gears, worm gears, bevel gears and pulleys, as shown in the pictures.
- Either individually or in small groups (depending on the number of supplies available), have students participate in the following simple hands-on exercise to reinforce the concept of gears. Give each group a 1/16 beam, two #6 axles with a bushing on the back side, one 8-tooth gear, one 40-tooth gear and one additional gear of any size (such as a 24-tooth gear).
- Direct students to assemble two gears of different sizes using a simple beam, as shown on slide 8, and then explain gear ratios. A gear ratio tells us how many turns of one gear cause how many turns of the other gear. So with the given gears, the gear ratio is 8:40 or 1:5, meaning that 5 turns of the small gear cause 1 turn of the large gear.
- Then make a minor modification, as shown on slide 9, to introduce the concept of idler gears. To do this, students add between the first two gears a third gear of any number of teeth (a 24-tooth gear is shown on slide 9).
- After this exercise, hand out the worksheets and ask students to write answers to its two questions (also on slide 10). Review their answers to check their understanding of gear ratios. As a class, volunteers share their responses and then discuss the answers (provided on slide 11).
- Once students understand the concept of gear ratios, introduce the concept of torque (slide 12). The key point is that at a particular power setting on the LEGO (or any machine), power = torque x speed. If power is constant, explain that torque and speed are inversely related. This means that increasing torque decreases speed, and vice versa.
- Complete the discussion on gear types with the concept of worm gears (slide 13) and belts/pulleys (slide 14). This includes showing students an online worm gear description, animation and 1:43-minute video (links on slide 14 and in the Additional Multimedia Support section).
- Administer the post-quiz by handing out paper copies; the quiz is also on slide 15. The answers are provided on slide 16.Vocabulary terms and definitions are provided on slide 17. Next, conduct the associated activities.
Related Activities
- Hare and Snail Challenges – Student groups design, construct and test gear ratios and LEGO robot weights in order to make the taskbots go either faster or slower. After the challenges, they explain how different gear ratios affected the robots’ speed and torque.
- Sumobot Challenge – Students apply their knowledge of constructing and programming LEGO robots to create sumobots—strong robots capable of pushing other robots out of a ring. While following the steps of the engineering design process, groups consider robot structure, weight and gear ratios in their designs, with the winner decided in a class competition.
- Line-Follower Challenge – Student groups are challenged to program LEGO robots with light sensors to follow a black line. The light sensor acts as the robot “eye” and informs the NXT computer when the sensor is on the tape and when it’s not. The brick is programmed such that it can “decide” how to move the motors so that the light sensor detects the tape, thus ensuring that the robot follows the line. Teams test their ideas for approaches to solve the problem and ultimately learn a (provided) working programming solution.
- Robot Soccer Challenge – In the concluding activity of the unit, students learn how two LEGO NXT bricks can be programmed to send and receive messages from each other and respond accordingly. Using the (provided) programs, they see how the controller (an NXT brick acting as the remote control device) sends different Bluetooth messages when its buttons are pressed and how the receiver (a LEGO brick/taskbot) moves when it receives Bluetooth messages. Students examine how the programs work in tandem as they play “robot soccer.”
Attachments
- What Are Gears? What Do They Do? Presentation (pptx)
- What Are Gears? What Do They Do? Presentation (pdf)
- Gears Pre-Quiz (docx)
- Gears Pre-Quiz (pdf)
- Gears Pre-Quiz Answer Key (docx)
- Gears Pre-Quiz Answer Key (pdf)
- Get in Gear Worksheet (docx)
- Get in Gear Worksheet (pdf)
- Get in Gear Worksheet Answer Key (docx)
- Get in Gear Worksheet Answer Key (pdf)
- Gears Post Quiz (docx)
- Gears Post-Quiz (pdf)
- Gears Post-Quiz Answer Key (docx)
- Gears Post-Quiz Answer Key (pdf)
Assessment
Post-Introduction Assessment
Additional Resources/Multimedia Support
Contributors
Sachin Nair, Pranit Samarth, Satish S. Nair
Copyright © 2014 by Regents of the University of Colorado; original © 2013 Curators of the University of Missouri.
This curriculum was developed under National Science Foundation GK-12 grant no. DGE 0440524. The contents do not necessarily represent the policies of the National Science Foundation, nor should you assume endorsement by the federal government.
Filed under: Class Activities, Grades 6-8, Grades K-5, Lesson Plans
Tags: bicycle, Class Activities, gears, Grades 6-8, Grades K-5, LEGOS, Mathematics, Mechanical engineering, Physics, simple machines, speed, torque


