Watercraft

Lesson adapted from PBS’s Design Squad Nation, ©2012 WGBH Education Foundation. Click for the PDF version in English (508K) or Spanish (736K).
Grade Level: Grades 5 – 8
Time: 30 to 45 minutes
Summary
In this activity, students learn about the engineering design process and the physical principles of buoyancy and displacement by working together to build a boat out of straws and plastic wrap that can hold 25 pennies for at least 10 seconds before sinking.
Related Engineering Disciplines Include:
Ocean, Naval Architecture, all disciplines (design process, particularly planning; collaboration).
Engineering Habits of Mind Connection
Systems thinking, creativity, collaboration, optimism, communication.
Learning objectives
After doing this activity, students should be able to:
- Identify the tradeoffs between stability and buoyancy
- Understand the physical forces that cause objects to float or sink
- Understand the engineering design process and how to work in teams
Standards
National Science Education Standards
- Technology in Society
- Science & Technology
- Technological Design
- Motions & Forces
International Technology and Engineering Educators Association
- Characteristics and scope of technology
- Attributes of design
- Role of troubleshooting, research, innovation, and experimentation in design
Common Core State Mathematics Standards
- Recognize volume as an attribute of solid figures and understand concepts of volume measurement. (Grade 5)
- Solve real-world and mathematical problems involving area, volume, and surface area of 2- and 3-dimensional objects. (Grade 7)
Next Generation Science Standards
Engineering design: Analyze data from tests to determine similarities and differences among several design solutions to identify the best characteristics of each that can be combined into a new solution to better meet the criteria for success. [Grades 6-8]
Materials
Per 2- person team:
- container filled with water (e.g., bucket, sink, plastic tub)
- 36 inches (1 yard) of transparent tape
- paper cups (8-ounce or larger)
- 10-to 12-inch strip of plastic wrap (measurement doesn’t have to be exact)
- 10 straws (preferably non-bendable, but any kind will work)
- paper or notebook and pencil or pen, to sketch designs
- 25 pennies (or about 15 metal washers)
For group use:
- towels (paper or cloth) for mopping up spills
- yardstick or three 1-foot rulers taped together (to measure materials)
- Optional : Disposable plastic or vinyl tablecloth or old newspaper to place underneath water container.
Procedure
Preparation:
Set up the testing station(s).
- If desired, cover the surface on which the water-filled container will rest with plastic or vinyl tablecloth or several layers of recycled newspaper.
- For best results, place testing stations on the floor or stable table (a desk may not work well with students moving to and from the station). Fill plastic tote or bucket with several inches of water (no more than halfway). Several totes or buckets could be used with larger groups if supervision is available.
- Put pennies or washers in a cup near each testing station. There is no need for these to be out with the students in their groups.
Set up materials table (preferably away from the testing stations to manage traffic.)
- Tape down yardstick or rulers (end to end) to use as general measuring guide for plastic wrap and tape dispensing.
- The plastic wrap is best dispensed upon request, as it sticks together easily. Tear off approximately a 10-12 inch long strip, but the length is not critical so there is no need to measure exactly during distribution
- The tape is also best dispensed upon request. Again, the measurement does not need to be exact; the idea is to limit the amount vs. allowing unlimited use.
Activity
- Introduce the challenge: Working with a partner, design and build a boat out of simple materials such as straws, tape, plastic wrap, and cups that will hold 25 pennies without sinking for at least 10 seconds. Students will use the Engineering Design Process to solve this problem and must do with limited materials in a fixed amount of time.
- To help students understand the objective of the challenge, give them some information about why things float. Suppose you had one large and one small empty soda bottle, each with its cap on. If you pushed them underwater, which would be harder to keep down? (The big one)

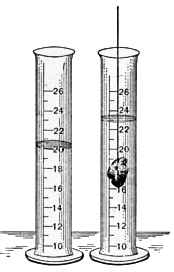
- Why is this? Well, both of the bottles will push water out of the way as you push them down. This is called “displacement.” The water that was displaced pushes back on the bottles. The more water that gets displaced, the bigger the upward push of the water on the bottle. Since the bigger bottle displaces more water than the smaller one does, there is more force pushing it up. Therefore, it floats better. “Buoyancy” is the word that describes this force pushing back up on the bottle. The more buoyancy something has, the higher it floats on water.
- The first step of the process is to ASK: How can we design a boat (using the materials given) that will displace a lot of water, or be “buoyant”?
- The next step is to BRAINSTORM or IMAGINE possible ideas. How will you make a boat that floats well enough to support a heavy load without sinking? Should the boat be a platform (e.g., a raft or barge) or an open boat (e.g., a rowboat or canoe)? How big do you need to make your boat to hold 25 pennies?
- Then students plan which one to BUILD or CREATE. For this step, have them divide one piece of paper into fourths by folding it first in half lengthwise and then again in half width-wise. When they unfold the paper, the creases from the folds will have created four rectangles. Tell the students to draw one idea in each rectangle, and then choose the best one to create.
- Using their plan, students will obtain materials from the materials table and return to their workspace to create their design.
- Students will then TEST their designs by first placing them in the water, and then adding one penny at a time, up to 25 pennies.
Watch drafting & design “mythbusters” at Indian Valley Vocational Center in Sandwich, Ill., tackle this challenge:
[youtube]http://www.youtube.com/watch?v=XwQM0V5c4JU[/youtube]
Tips and troubleshooting
It’s best to let students discover their own possible solutions to problems making their watercraft float or hold the pennies. Some background information for the facilitator can help guide them:
If the watercraft:
- Sinks easily. Students must increase its ability to float. Tell the students to put their watercraft back in the water and observe how the water is acting on it. Explain that the water they are moving, or displacing, is pushing back on the watercraft’s bottom and sides. Encourage them to experiment with the watercraft’s width and height of sides to see how its buoyancy changes.
- Leaks a lot. Ask student if they can see where the water is coming in. Are the straws filling with water or is the plastic wrap separating?
- Tips easily. Suggest students examine how the weights are placed on it. Are they too close to each other or not spread out on the surface? To demonstrate, ask one student to put out his/her hand with the palm open and facing up. First stack pennies on top of each other in one column. Next, place the pennies near each other but on one end of the hand (near the finger tips). Finally, spread them out all over the palm. Encourage them to discuss the differences and make changes to their weight distribution based on these.
Extensions
- Take your design to the next level and see if you can construct a watercraft that holds 50 pennies for at least 10 seconds.
- Build a boat using half the materials that can hold 25 pennies for at least 10 seconds.
- Add a design feature, such as a paper cup, to hold the pennies
Real-World Connection
French windsurfer, explorer, and aquaculture vet Raphaela le Gouvello has crossed the Atlantic, Pacific, and Indian oceans on a specially designed sailboard that allowed her to sleep, eat, and send email. An airbag system provided by the European Space Agency helped guard the craft from capsizing, satellite navigation helped her head in the right direction across isolated stretches of water, and solar cells generated electricity.
Watch Le Gouvello’s voyage across the Indian Ocean.
[youtube]http://www.youtube.com/watch?v=YeATktlAEk0[/youtube]
Resources

The Bridge, the Virginia Institute of Marine Science’s free, teacher-approved marine education resources, includes classroom activities on buoyancy and other standards-based lessons. Don’t even sink it!
Floaters and Sinkers, an activity to teach students about buoyancy developed by Duke University’s Center for Inquiry-Based Learning, expands on the concepts of volume, mass, and displacement found in this lesson. For an extended explanation of displacement and hull design, see CIBL’s What Floats Your Boat lesson on teachengineering.org.
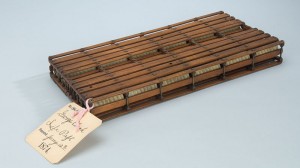
The Smithsonian Institution’s On the Water maritime history exhibit includes devices invented to save lives during shipwrecks, including the life raft (photo, right) and lifeboat.
The Cub Scouts have a tradition of holding Raingutter Regattas, in which kids design, build, and race boats along gutters filled with water. Your class could host one, too!
See the engineering that went into the 2013 America’s Cup racers in this New York Times video-graphic.
Acknowledgements: Lesson adapted from Design Squad Nation, ©2012 WGBH Education Foundation
Filed under: Class Activities, Grades 6-8, Grades 6-8, Grades K-5, Grades K-5, Lesson Plans
Tags: boats, buoyancy, flotation, forces, Marine engineering, ocean engineering, sailboat


