


Sandcastle Investigations
This Next Generation Science Standards-aligned investigation for 2nd grade was adapted by Rogers (Arkansas) Public Schools teachers from the lesson Making Claims From Evidence from the Teaching Channel, a lesson from Springdale Public Schools (Arkansasa), and investigations used in UASEP Fall 2016 grant workshop. Click HERE for PDF.
Note: It is recommended that you watch the video link above for teacher background prior to activity. The Teaching Channel allows nonsubscribers to watch the first video free.
Summary
Elementary students draw on their knowledge of Earth science and follow the engineering design process to investigate solutions for protecting structures – in this case, sandcastles – from wind and water damage. They make hypotheses, measure changes, and support their results using evidence.
Grade Level: 2 (Grades 1-3)
Time: Ideally, each investigation gets 90 minutes (one 45-minute class for each)
Learning Standards
Next Generation Science Standards
Performance Expectations: 2-ESS1-1
- Use information from several sources to provide evidence that Earth events can occur quickly or slowly. [Clarification Statement: Examples of events and timescales could include volcanic explosions and earthquakes, which happen quickly and erosion of rocks, which occurs slowly.]
- 2-ESS2-1 Compare multiple solutions designed to slow or prevent wind or water from changing the shape of the land.* [Clarification Statement: Examples of solutions could include different designs of dikes and windbreaks to hold back wind and water, and different designs for using shrubs, grass, and trees to hold back the land.
Science and Engineering Practices:
- Planning and Carrying Out an Investigation
- Analyzing and Interpreting Data
- Developing and Using Models
- Constructing Explanations and Designing Solutions
- Engaging in Argument from Evidence
- Using Mathematics and Computational Thinking
- Obtaining, Evaluating, and Communicating Information
Crosscutting Concepts:
- Cause and Effect
- Stability and Change
Phenomenon to Investigate 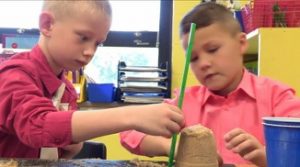
Which causes more change: wind or water?
Students should have some knowledge of changes that affect the Earth quickly (landslide, volcanoes, earthquakes, humans) and changes that affect the Earth slowly (erosion, weathering, water, wind, ice, vegetation, and people).
Purpose: These investigations will allow students to understand how water and wind can change the surface of the Earth and draw conclusions about which may cause more change based their investigations. Through these hands-on investigations, students should gain better understanding of changes by wind and water and ways they could protect the land from these changes.
INVESTIGATION #1
Students will explore how both wind and water can change the surface of a “sandcastle.” Students will use spray bottles of water to replicate the effects of water (rain) and will blow through a straw to replicate the effects of wind. (If spray bottles are not available, an alternative solution is attached at the end of the lesson.)
Materials
- Small Plastic Cups (2 per group)
- Sand
- Water
- Spray bottles (for water)
- Straws
- Rulers
- Newspaper/butcher paper/craft paper
Preparation/Setup:
Cover tables with newspaper/butcher paper/craft paper. If possible, setup work stations outside for less mess in classroom.
Each group will need two cups of packed sand (to create sand castles), a spray bottle of water, a straw, and a ruler – along with the investigation recording sheet or science notebook
Troubleshooting Tip: If you do this in small groups, you may find it effective to assign group roles: recorder, measurer, wind maker, rain maker. Roles can be switched during Investigation 2 so that students have opportunity to be one of the “change makers.” Which causes more change: wind or water? Have groups discuss their thoughts about this question and predict which they think will cause more change.
Process
- Students build their two sand castles using the plastic cups. They will pack each cup full of sand and flip it over onto the flat testing surface/table top. Remove the cup and they have their sand castle.
- Measure the height of each sand castle prior to the wind and water tests. Record measurements on investigation recording sheet or in notebooks. Students should also draw a picture of the sand castles prior to the tests.
- Another form of evidence could be pictures that students take of their sand castles before and after the tests.
- Once measurements have been taken, begin the tests: Wind: Wind maker – using the straw, blow 10 times on the sand castle.
- Record observations about what happened after the wind.
- Measure height of sand castle after the wind and record.
- Draw picture of what the sand castle looks like after the wind.
- Rain: Rain maker – using the spray bottle, spray the sand castle 10 times with water.
- Record observations about what happened after the water.
- Measure height of sand castle after the water and record.
- Draw picture of what the sand castle looks like after the water.
- After the investigation, students will begin to craft explanations using claims and evidence statements.
- Students make a claim (answer the question): “Which caused more change: wind or water?” on their investigation sheet or in their notebooks.
- After their claim (answer to the question), they will write why they think this is true using evidence from their investigations.
Class discussion/debrief
Lead the class through a discussion about their investigations. Example discussion prompts:
- Were the results the same for each group? Why? Why not?
Discuss the evidence they have to support their claims and why their evidence may look different from other groups. If pictures were taken, share pictures and discuss their observations.
What could we do to ensure we get similar results? This leads into ideas about consistency in testing procedures/fair tests, like:
- How far away was the straw from the sand castle?
- How far away did you hold the spray bottle from the sand castle?
- What setting was the spray bottle on? Why would that make a difference?
- What direction did you blow/spray on your sand castle? (from top, side) Did that make a difference?
Discussions about the consistency or fair tests may encourage your students to plan another investigation with consistent measures. Explore these ideas and further investigate with your students before moving onto the next investigation – this will provide a basis for procedures in the next investigation.
Investigation #2 – Planning and Designing a Solution
Students will use the engineering design loop process to design a solution to protect or prevent change to their sand castles. They will use the same procedures found in investigation 1 to simulate the changes.
Materials
For Design Solutions:
Bags of a variety of materials…some options:
Popsicle sticks
Toothpicks
Coffee filters, mesh, fabric, etc.
Construction paper
Plastic wrap/wax paper/aluminum foil
Pipe cleaners
Tape
Preparation/Setup
For Investigation Procedures: Small Plastic Cups (2 per group)
Sand
Water
Spray bottles (for water) – or make a sprinkler from a plastic cup filled with water and covered with plastic wrap or foil that has holes poked in it and is secured with a rubber band.
Straws
Rulers
Newspaper/butcher paper/craft paper
Cover tables with newspaper/butcher paper/craft paper. If possible, set up work stations outside for less mess in classroom
Each group will need: bag of materials for design solutions, two cups of packed sand (to create sand castles), a spray bottle of water, a straw, and a ruler – along with the investigation recording sheet or science notebook.
If you do this in small groups, you may find it effective to assign group roles: recorder, measurer, wind maker, rain maker. Roles can be switched from Investigation 1 so that students have opportunity to be one of the “change makers.”
Engineering Design Challenge: Can we reduce the amount of change to our sand castle?
Students will be working as engineers to solve the problem of reducing the amount of change to their sand castle by creating a design to protect their sand castle from changes due to wind or water (rain). The same investigation procedures from investigation 1 will be used to simulate the wind and rain. Students will compare the solutions of other groups and will explore how multiple solutions can be created to solve the problem.
Before beginning, groups need to decide if they want to design a solution to prevent change from wind or change from water.
Engineering Design Loop Process: 1. Students will work together to understand the problem there are to solve and ask any questions they may have about the problem or process. 2. Students will brainstorm ideas for protecting their sand castle. It may be helpful to provide independent brainstorming time, and then give the groups time to share these ideas and brainstorm together. 3. Groups will select one of the solutions they discussed and design a plan. Allow them time to sketch their design and craft a brief explanation of how it should work. 4. Using the materials given, students will build their design. 5. Allow students to test their design – recording their observations. **Use the investigation procedures from Investigation 1 to test for the wind or water change. Groups may want to revise their designs and retest. Allow this process as time permits. 6. After design testing, allow groups to observe the other solutions and share their thoughts about why their solution worked or didn’t work.
Class discussion/debrief
Lead the class through a discussion about the challenge.
Example discussion prompts: Were you able to design a solution that prevented change/protected your sand castle How was your design similar/different from other groups? What changes would you make if you did this again?
After the discussion, students will craft explanation about how their solutions reduced the amount of change to their sand castles using claims and evidence statements.
Students make a claim (answer the question): “Can we reduce the amount of change to our sand castle?” on their investigation sheet or in their notebooks. After their claim (answer to the question), they will write why they think this is true using evidence from their investigations.
Troubleshooting Tips
If doing this indoors, you may want to have a basin or container that students use to collect the water during the test.
Sample worksheets and prompts
Investigation #1 Which
Sand Castle #1 – Water Sand Castle #2 – Wind
Height before water : Height before wind:
Picture: Picture:
Height after water : Height after wind:
Picture: Picture:
What causes more change: wind or water?
My claim:
My evidence:
Investigation #2 Engineering a Solution: Protecting Your Sandcastle
We want to protect our sandcastle from the effects of ______________. (wind or water)
My ideas:
Materials we will use:
Diagram of our design:
Why will this work? We think this will work because…
Height before water :
Picture:
Height before wind:
Picture:
Height after water :
Picture:
Height after wind:
Picture:
Did your design work? Were you able to protect your sand castle?
My claim:
My evidence:
Filed under: Class Activities, Grades K-5, Grades K-5, Lesson Plans
Tags: construction, data, Earth Science, Engineering Design, erosion, materials, measurement, NGSS, sandcastle construction, sandcastle engineering, structural and civil engineering