Squishy Circuits
Activity courtesy of AnnMarie Thomas, associate professor of engineering at St. Thomas University, and the Playful Learning Lab. Visit the Squishy Circuits home page for a how-to guide, videos, and sample activities.
Summary
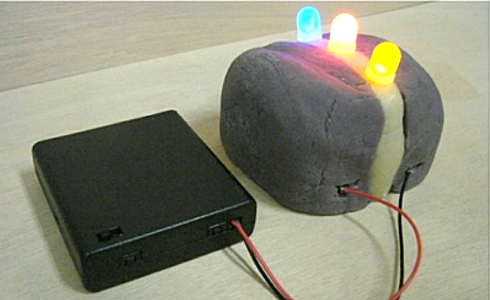
Students of all ages learn basic principles of electricity by fashioning circuits from play dough, batteries, wires, and LEDs. No soldering necessary!
Grade level: Preschool to high school
Time: 25 to 60 minutes.
After doing this activity, students should be able to:
- Define, recognize, and build a closed circuit.
- Define, recognize, and assemble series circuits
- Explain why a closed circuit is required for any electrical device to operate.
- Describe the transformations of energy that occur in the circuit.
- Distinguish the difference between a parallel circuit and a series circuit.
See Squishy Circuits in action at the Exploratorium in San Francisco:
[vimeo]http://vimeo.com/26600828[/vimeo]
Standards
International Technology and Engineering Educators Association
- G. When parts of a system are missing, it may not work as planned.
- C. Troubleshooting is a way of finding out why something does not work so that it can be fixed.
- E. The process of experimentation, which is common in science, can also be used to solve technological problems.
- D. Follow step-by-step directions to assemble a product.
Next Generation Science Standards
- Define a simple design problem reflecting a need or a want that includes specified criteria for success and constraints on materials, time, or cost. (Grades 3 – 5)
- Apply scientific ideas to design, test, and refine a device that converts energy from one form to another. (Grade 4)
Watch AnnMarie Thomas, an associate professor of engineering at St. Thomas University, discuss Squishy Circuits in this short TED talk:
Engineering Connection/Motivation
Many everyday devices, including cellphones, TV remote controls, and flashlights, need a voltage source such as a battery to close the circuit in order to operate. In this hands-on activity, students use batteries, wires, tiny light bulbs, and play dough to learn the difference between an open and closed circuit, and that electric current only occurs in a closed circuit. They also can experiment with serial and parallel circuits.
Materials
For the conductive dough:
- 1 cup water
- 1.5 cups flour (Replace with gluten-free flour if desired)
- 1/4 cup salt
- 3 bsp. Cream of Tartar* (or 9 Tbsp. of lemon juice may be substituted)
- 1 Tbsp. Vegetable Oil
- Food Coloring (optional)
For the insulating dough:
- 1/2 cup flour
- 1/2 cup sugar
- 3 Tbsp. vegetable oil
- 1/2 cup deionized (or distilled) water (Regular tap water can be used, but the resistance of the dough will be lower.)
- Battery packs with 4 AA batteries and added terminals
- 10 mm diffused lens light-emitting diodes (LED lights)
- Motors with added terminals (optional)
- Buzzers with added terminals (optional)
Click here for information about purchasing Squishy Circuits kits
LEDs” by Afrank99 – Own work. Licensed under CC BY-SA 2.0 via Wikimedia Commons
Procedure
The Squishy Circuits classroom guide includes step-by-step directions with photos for making both types of dough and conducting various fun activities.
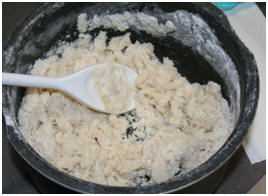
- Mix the solid ingredients in a pan, setting aside half a cup of flour for later use.
- Add a small amount (1 tbsp.) of deionized water.
- Repeat this step until the majority of the water is absorbed
- Knead the mixture into one “lump”
- Knead more water into the dough until it has a sticky texture
- Knead in flour until desired consistency is achieved
Make the conductive dough:
- Mix water, 1 cup flour, cream of tartar, vegetable oil, and food coloring in a medium-size pot

- Cook over medium heat, stirring continuously
- The mixture will begin to boil and get chunky – keep stirring until it forms a ball in the center of the pot
- Place the ball on a lightly floured surface. (Caution: it’s hot!)
- After the ball cools, slowly knead in the remaining flour until it reaches the desired texture
Store in an airtight container; done properly, the dough can last several weeks. Condensation is normal; just knead any excess moisture into the dough and it should be ready for use.
Review the circuit basics with your students and have them build a closed circuit. 
Have students build series and parallel circuits.
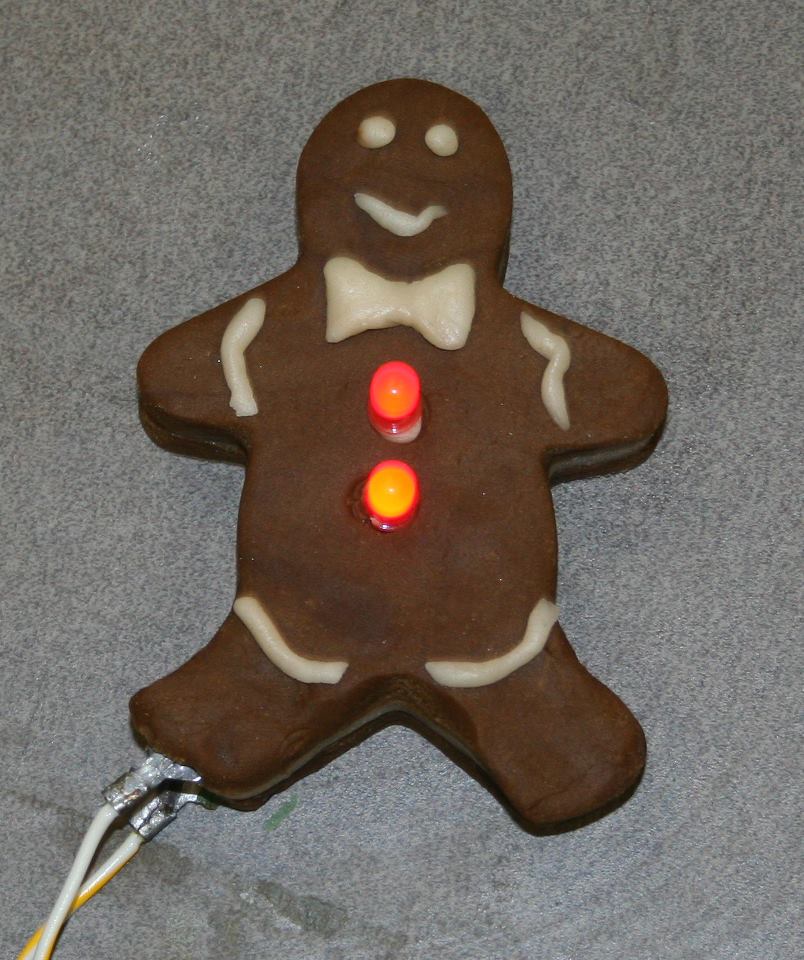
Add a battery-powered motor to animate the circuits, or build a squishy critter with light-up eyes!
Need inspiration? Check out Dough Creatures, a two-hour squishy circuits activity from PBS SciGirls, or the Squishy Circuits lesson plan and activity guide from UCLA.
is a two-hour activity using Squishy Circuits.
Safety issues
- Never connect LEDs directly to the battery pack; too much current can damage the components or cause them to overheat and pop.
- Safety glasses are recommended, particularly when doing this with young children
- The conductive dough will be very hot at first. Roll it out and let it cool for a few minutes before use.
Troubleshooting tips
- The salt in the conductive dough rusts components over time. Wipe the components after use with a damp towel may promote their longevity.
Activity Extensions
For older students, uses squishy circuits in conjunction with a physics or math unit covering Ohm’s law, electricity and magnetism, or energy.
Additional Resources
TeachEngineering. Standards-based, teacher-tested, hands-on activities involving circuits and electricity. They include Put a Spark In It (curricular unit on electricity for grades 3 -5); Bulbs & Batteries (Ohm’s law and series circuit activity for grades 3-5) Salt-Water Circuits (1 hour activity for grades 7-8); and Introduction to Circuits and Ohm’s Law (curricular unit, grades 9-12). Lights On! uses Christmas lights to demonstrate circuits with elementary students.
Squishy Circuits Facebook page. Includes photos of students’ projects.
Squishy Circuits. St. Thomas University article by AnnMarie Thomas on how she created the project, with recipe for making the two doughs and a simple circuits project. See the academic paper she co-authored on using squishy circuits in electronics education.
Squishy Circuits in action. The Exploratorium’s Tinkering Studio shows what squishy circuits looks like in the classroom.
Squishy Circuits Lesson Plan and Power to the People game. This monopoly game and associated teaching material for Squishy Circuits from the people at Colorado’s Learn 2 Teach, Teach 2 Learn Program is designed to help teenagers first learn basic technology concepts and then turn around and teach the same concepts to their younger peers.
Rethinking Squishy Circuits. Stanford’s Fab Lab team documents the process of developing RGB LED and other activities based on play-dough circuits.
Squishy Circuits Explained. NPR’s Science Fridays blog post gives the squishy circuits basics.
Circuits. PBS Learning unit for students in grades 3 to 8 includes short videos and several fun activities, including acting out electrons in a circuit.
Electricity resources for teachers from Silicon Valley’s Tech Museum include classroom activities and a capstone design project.
Circuits and Electricity. Britain’s Teaching Ideas houses a wealth of worksheets, activities, and other aids for teaching circuits and electricity.
Design and Build a Glow Stick. Discovery Education activity on serial and parallel circuits for students in grades 7-9.
Code for the Holidays. Google’s Made With Code site includes a holiday-light programming activity.
Filed under: Class Activities, Grades 6-8, Grades 6-8, Grades 9-12, Grades K-5, Grades K-5, Lesson Plans, Web Resources
Tags: afterschool activities, circuits, Class Activities, Electrical Engineering, electricity, Energy, Grades 6-8, Grades 9-12, Grades K-5, LEDs, lights, Squishy Circuits, St. Thomas University, STEM education


