eGFI - Dream Up the Future Sign-up for The Newsletter  For Teachers Online Store Contact us Search
Read the Magazine
What's New?
Explore eGFI
Engineer your Path About eGFI
Autodesk - Change Your World
Overview E-tube Trailblazers Student Blog
  • Tag Cloud

  • What’s New?

  • Pages

  • RSS RSS

  • RSS Comments

  • Archives

  • Meta

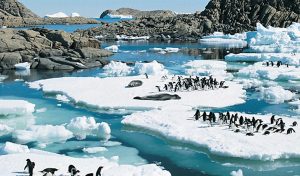
Save the Penguins


Unit developed by Auburn University science educator Christine Schnittka with the help of University of Virginia engineering professor Larry Richards and his students. Click HERE for PDF or HERE for the website. Schnittka’s other engaging “save the animal” STEM lessons and iBook versions can be accessed HERE.

Grade level: 6 – 8

Time: Five 70- to 80-minute units

Summary

Middle school students build up a background knowledge of thermal energy transfer by investigating heat flows and insulating properties of various materials. They then follow the engineering design process to create, test, and redesign a structure (igloo) to keep an ice cube (penguin) from melting.

NOTE: This unit is designed to identify and correct misconceptions about fundamental heat-transfer concepts, so it is important to teach all five hands-on lessons in sequence.

Learning objectives

LESSON 1 – Introduction and Insulation

  • Heat transfers from areas of high temperatures to areas of lower temperature.
  • Insulators slow down the rate of heat transfer.
  • Engineers must identify the problem in order to solve it.

LESSON 2 – Conduction, Radiation, and Convection

  • Heat transfers in three different ways.
  • Engineers must research and understand the problem in order to solve it.

LESSON 3 – Review of Heat Transfer and Introduction to Experimental Design

  • Materials affect the rate of heat transfer.
  • Different materials vary in their ability to reduce heat transfer.
  • Engineers must use their knowledge of science to brainstorm possible solutions to the problem.

LESSON 4 – Design and Construct Penguin Dwellings

  • Materials can be used in conjunction with one another to affect the rate of heat transfer.
  • Different materials prevent different types of heat transfer.
  • Engineers work within constraints (time, materials, space, money) and use scientific knowledge and creativity to design solutions to problems.

LESSON 5 – Test Penguin Dwellings, Re-design and Final Testing

  • Scientific knowledge can be used in the design, construction, and evaluation of a device.
  • Engineering is an iterative process of designing, testing, re-designing, and retesting.
  • Engineers must document their process of design and present their solution to the problem.

Learning Standards

Next Generation Science Standards

Grades 3 -5

  • ESS3-1. Make a claim about the merit of a design solution that reduces the impacts of a weather-related hazard.
  • ETS1-1. Define a simple design problem reflecting a need or a want that includes specified criteria for success and constraints on materials, time, or cost.
  • ETS1-2. Generate and compare multiple possible solutions to a problem based on how well each is likely to meet the criteria and constraints of the problem.
  • ETS1-3. Plan and carry out fair tests in which variables are controlled and failure points are considered to identify aspects of a model or prototype that can be improved.
  • 4-PS3-2. Make observations to provide evidence that energy can be transferred from place to place by sound, light, heat, and electric currents.

Grades 6-8

  • MS-PS4-2. Develop and use a model to describe that waves are reflected, absorbed, or transmitted through various materials.
  • MS-PS3-3. Apply scientific principles to design, construct, and test a device that either minimizes or maximizes thermal energy transfer.
  • MS-PS3-4. Plan an investigation to determine the relationships among the energy transferred, the type of matter, the mass, and the change in the average kinetic energy of the particles as measured by the temperature of the sample.
  • MS-ETS1-1. Define the criteria and constraints of a design problem with sufficient precision to ensure a successful solution, taking into account relevant scientific principles and potential impacts on people and the natural environment that may limit possible solutions.
  • MS-ETS1-2. Evaluate competing design solutions using a systematic process to determine how well they meet the criteria and constraints of the problem.
  • MS-ETS1-3. Analyze data from tests to determine similarities and differences among several design solutions to identify the best characteristics of each that can be combined into a new solution to better meet the criteria for success.
  • MS-ETS1-4. Develop a model to generate data for iterative testing and modification of a proposed object, tool, or process such that an optimal design can be achieved.

National Science Education Standards

Physical Science Content Standard B [Grades 5-8]

  • Heat moves in predictable ways, flowing from warmer objects to cooler ones, until both reach the same temperature.
  • Light interacts with matter by absorption or reflection.

Introduction and Background

Students’ conceptions of heat and temperature begin at a young age and persist through school. Because of how youngsters experience warmth, cold, and touching hot or cold things, naïve concepts of temperature and heat transfer are often resistant to change. Even young children intuitively develop a “framework theory of physics” to describe and explain the world they experience. The once-popular caloric theory that heat is a substance made of particles that flow still dominates children’s thinking, and they rely on their senses to measure temperature, not understanding the kinetic theory and its implications in heat transfer.

The belief that cold is a substance that moves is prevalent with middle and high school students. They also think that metal objects are naturally colder than plastic ones because metal attracts the cold. The directional nature of heat transfer is not understood because heat is not seen to be a form of energy.

This unit is designed to help middle-grades students with science concepts related to heat and energy as well as teach them the basics of engineering design. The broad context is global climate change. Students learn that the energy we use to heat and cool our houses comes from power plants, most of which use fossil fuels to convert chemical energy to electrical energy. The burning of fossil fuels has been linked to increased levels of carbon dioxide in the atmosphere, which in turn has been linked to increases in global temperature. This change in temperature has widespread effects upon life on Earth.

Penguins live in the southern hemisphere, primarily on the icy continent of Antarctica. As the Earth warms and ice melts, penguins lose habitat. Therefore, students see that better-designed houses that use less energy for heating and cooling can have an effect on penguins. Energy efficient houses that minimize unnecessary heat transfer will draw less electricity from the fossil fuel burning power plants and not contribute as much to global climate change.

Engineering Connection/Motivation [contributed by eGFI]

Engineers and scientists work together to tackle the world’s greatest challenges, from developing personalized medicine to protecting communities and the environment from the ravages of climate change.

The polar regions, which affect weather patterns, sea levels, and shipping routes, have drawn increasing attention in recent years. Researchers at NASA and the National Oceans and Atmospheric Administration, for example, have studied ice-shelf fracturing and analyzed the chemical and biological contents of Greenland melt water.

Engineering faculty and students also are involved in cold-zone research. At Dartmouth’s Thayer School of Engineering, professors and graduate students are designing robots for extremely cold environments and interpreting Greenland ice core samples. Other engineering researchers are devising more energy-efficient homes to reduce fossil-fuel emissions that contribute to climate change. They also are building sturdier ice breakers and ships to navigate northern sea channels as well as instruments and other technologies to study fragile polar ecosystems.

Teacher’s Guidance
While you may be tempted to jump into the design activity and skip over the demonstrations, please do not. The demonstrations provide the cognitive scaffolding necessary for students to link the design challenge with the complex science of heat transfer. They present students with cognitive dissonance through discrepant events; the opportunity to face and refine their misconceptions of heat is imperative for the success of this lesson. Without the demonstrations and discussions that surround them, students will take away a fun activity that may or may not help them understand the science or what engineers do. With the demonstrations, students will gain increased conceptual understanding about thermal energy, heat transfer, and temperature.

Materials

Technology

  • For PowerPoint presentations: A computer with speakers, an LCD projector, and screen.
  • If laptops or tablets are available, encourage the use of the social networking educational space, Edmodo. You’ll need to set up an account for yourself and a “space” for your students to dialogue with each other, share ideas, photos, videos, websites, etc. It’s also a good way for you to post questions and encourage students to respond.

For each student:

For each team to do all five activities, assuming one teacher with four classes of about 112 students in total. See individual lessons for when each material is needed.

  • 1 bag 100% cotton balls, 100 count
  • 1 pack craft sticks, 150 count
  • 1 pack Black construction paper
  • 1 pack Green construction paper
  • 1 pack Pink construction paper
  • 1 pack White construction paper
  • 12 each color Foam sheets in white, black, pink and green
  • 12 pieces White felt fabric, polyester, 9” x 12”
  • 12 pieces Pink felt fabric, polyester, 9” x 12”
  • 12 pieces Black felt fabric, polyester, 9” x 12”
  • 12 pieces Green felt fabric, polyester, 9” x 12”
  • 1 Duck bubble wrap, 12″ x 10 feet
  • 1 Heavy duty aluminum foil, 75 sq. feet
  • 3 sheets Mylar 18” x 30” Sheets
  • 1 Hefty One Zip gallon storage bags, 12 count
  • 7 Scotch tape Office
  • 7 Aileen’s Original Tacky Glue, 4 fl. Oz
  • 28 Plastic shoebox, 6 qt. size
  • 1 Black tote bin, 108 quart capacity
  • 7 Dixie cups, white plastic
  • 1 Play money
  • 2 Silicone penguin ice cube trays
  • 14 Digital thermometers
  • 7 Desk lamps or Shop lamps
  • 7 Light bulbs, 100W
  • 1 6 pack of soda
  • 1 Wool sock
  • 1 Cotton sock (charcoal/black)
  • 1 Plastic tray
  • 1 Metal tray (silver or silver plate is best)
  • 2 Top Fin flexible aquarium thermometers
  • 14 Poster boards
  • 7 Metal spoons (silver or silver plate is best)
  • 7 Plastic spoons
  • 1 Homemade cardboard house with black painted roof

Optional: Award certificates (PPT template) for winning designs.

Procedure [See PDF for full procedure, teacher’s notes, video links, and materials needed]
Lesson 1 – Introduction & Insulation –  in a nutshell [pages 10 – 17 of the PDF]
1. Heat Transfer Evaluation pre-assessment (10 minutes)
2. Save the Penguins Introduction PowerPoint (30 minutes)
3. Introduction to Storyboard poster (15 minutes)
4. Demonstration 1 – Soda Can Demo (20 minutes)

Teacher Note: Now is a good time to address the “Keeping the Cold In” misconception by reminding students that only heat (not cold) transfers. If only heat can transfer, what is their method really doing? Keeping heat out, NOT keeping the cold air in.

Extensions

Math Connection: The data acquired from Lesson 1 provides the opportunity to discuss Fahrenheit to Celsius conversions. Have students develop graphs to determine:

  • Box and whisker plots for each can over time
  • The relationship between time and temperature

Lesson 2 – Conduction, Radiation, and Convection – in a nutshell  [Pages 18 to 27 of the PDF]

  1. Review insulation demonstration from day before (10 minutes)
  2. Demonstration 2 – Trays demo (10 minutes)
  3. Demonstration 3 – Spoons demo (15 minutes)
  4. Demonstration 4 – Black-roofed house demo (20 minutes)
  5. Demonstration 5 – Space blanket demo (5 minutes)
  6. Documenting learning on storyboard (10 minutes) Teacher Note: Below are two critical misconceptions among students with

Teacher’s note: Address two critical misconceptions now. First, the “Heat Rises Misconception.” Students will often state that heat rises. Remind the student that heat is not a substance and while hot air can rise, heat is the transfer of thermal energy and that can occur in any direction. Hot air does not rise unless it is pushed up (displaced) by sinking cooler air.

Second is the “Cold Transfers Misconception” – Students may think that because cold air sinks, that “coldness” transfers. Remind them that cold substances can move, but cold itself does not transfer. Energy transfers. Thermal energy transfers.

Lesson 3 – Introduction to Experimental Design – in a nutshell [pages 28 to 32 of the PDF]

  1. Review exit card on methods of heat transfer (15 minutes)
  2. Introduce students to kit of materials (5 minutes)
  3. Model how to conduct experiments at experimentation stations (15 minutes)
  4. Students test materials and keep records of their work on storyboard (30 minutes)
  5. Teacher and students discuss all the experiments done in class this day (10 minutes)

Lesson 4 – Penguin Dwellings, Design & Construction – in a nutshell [pages 33 to 37 of the PDF]  
  1. Students discuss engineering and what engineers do. (15 minutes)
  2. Students conduct additional experiments as needed and share results (10 minutes)
  3. Students design initial dwelling (15 minutes)
  4. Students purchase additional materials necessary from Igloo Depot (10 minutes)
  5. Students construct dwelling (40 minutes)

Includes What is Engineering PowerPoint presentation and engineering design process handout.  See also this eGFI Teachers’ blog post on the engineering design process and a lesson and diagram from The Works.

Lesson 5 – Penguin Dwellings, Design Testing & Retesting – in a nutshell [pages 38 to 44 of the PDF]

  1. Test designs in hot box. (20 minutes)
  2. Have students research innovations in building materials on computers while penguins melt. Or use PowerPoint presentation, Innovative Building Materials.
  3. Analyze and discuss results. (20 minutes)
  4. Have students record modifications they would like to do on their design, and then use their remaining money to purchase more supplies, or reconfigure the materials already purchased. (20 minutes)
  5. Test re-designed igloos in hot box. (20 minutes)
  6. Administer the post-test and work on their storyboards. (10 minutes)
  7. Analyze and discuss the results. (20 minutes)
  8. Optional: Hand out award certificates (PPT template) for winning designs.

Suggested awards:

  • Effective Design – Awarded to the teams that saved the most penguin. (1st, 2nd, and 3rd place awards can be given)
  • Most Improved Design – Awarded to the team that improved the most from Test 1 to Test 2
  • Affordable Housing Award for Financially Challenged Penguins – Awarded to the team that spent the least amount of money but still saved at least half of the penguin.

Teacher Note: 20 minutes is approximately how long it takes for a “homeless” ice penguin to totally melt. Be sure to add a “homeless” penguin as a control by placing an ice penguin on the floor of the hot box. After 20 minutes it will be a very tiny morsel of ice.

Assessment

Formative assessment – embedded within the lessons, providing continual feedback to the teachers and students for improving instruction. They include:

  • Whole-group discussions involving students’ predictions of what will happen during demonstrations and feedback from students/groups following each demonstration.
  • Measuring the amount of penguin ice cube that is ‘saved’ as a result of students’ designing an energy efficient penguin dwelling.
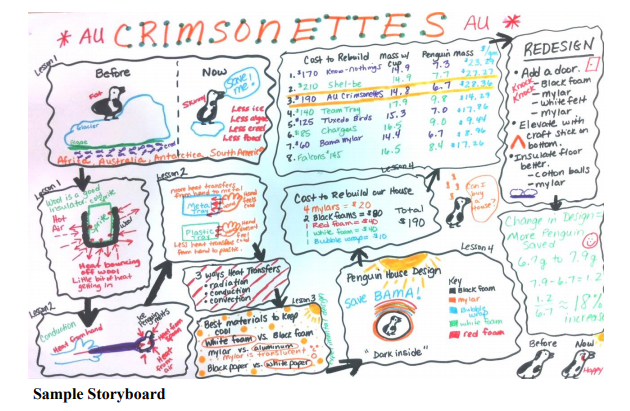
  • Storyboarding during each lesson. A storyboard is like a comic strip in that it tells a story through drawings and words divided up into sections that flow logically. Each time students learn a new concept, do an experiment, create a design, or test a design, it should be recorded on the storyboard for teachers and students to see and comment on. Ideally, the storyboard is on the wall for easy viewing.

Summative assessment – an evaluation of cumulative performance, given as written tests before and after the unit to determine students’ content knowledge gains on heat transfer concepts. Teachers should have each student complete the “Heat Transfer Evaluation” at the start of the unit, collect the assessments, score them, but do not return or discuss them with the students. The instrument is based on misconceptions research and has been assessed for face and content validity, construct validity, and reliability. The same evaluation will be given to each student at the end of the unit. Collect the post-tests, score them, and compare each student’s pre- and post-test scores. The assessment will provide the teacher with information about students’ misconceptions about heat.

Safety considerations

Caution students not to touch heat lamps during any of the demonstrations or during the testing of designs or materials. The surface of the heat lamp and surrounding dome can cause significant skin burns if touched during or immediately after use. If you use heat lamps with clamps, consider clamping them to ring stands or other stationary devices to reduce the need for handling them.

Additional resources

Antarctic Ice: Sea Level Changes  and Global Warming Threatens Caribou. Short videos, standards, and activity from PBS Learning Center.

Penguin cam. Explore.org livestream webcam from Long Beach, Calif.


A BBC Dynasties film crew make snow ramp to help penguins stranded in gully in Antarctica:


©2009 Christine G. Schnittka, Ph.D., in cooperation with the Virginia Middle School Engineering Education Initiative (updated version 12-21-14). Developed through funding from the National Science Foundation ITEST awards # 10-29724 and #12-47287.

Polar Ice

Lesson developed by Liesl Hotaling and presented at the 2017 NSTA STEM Forum and regional conference.   

Grade level: 6 – 12

Time:  Four 50-minute lessons

Summary

Students learn about the importance of the polar regions by connecting with scientists and the data generated by their cutting-edge research on penguins and ocean environments.

Introduction/Motivation

Polar regions influence our daily lives, including climate, shipping routes, and the supply of resources from fish to petroleum. This series of lessons, presented by ASEE member Liesl Hotaling at the National Science Teachers Association’s regional meeting in October and annual STEM Forum in July 2017, aims to engage students in understanding the importance of this region by connecting them with polar scientists and data generated by cutting-edge polar research. Click HERE for links to Hotaling’s presentation, activities, and other materials.

Lesson 1: Ocean Convergence: Let’s Get Together

Ocean convergence zones occur where water comes together in a specific area due to the meeting of two ocean currents or when the water meets the coastline. This often causes a build up in height of the surface. Anything floating at the surface collects in a convergence zone. The students will participate in a hands-on activity to explore how convergence zones collect particles in the water. Students will then look at Surface Current maps from Antarctica to find patterns in where convergence zones occur in the Palmer Deep area.

Lesson 2: Penguins Foraging: Where and Why?

Adelie penguins forage by collecting Antarctic krill and returning to their nests to feed their chicks. Forage density is higher in convergence zones, as the penguins are more efficient at finding food. Students will experience foraging behavior of Adelie penguins by acting out foraging patterns and analyzing their data. The students will then look at distribution data of penguins foraging to determine what factors could influence the location of penguin foraging.

Lesson 3: Ocean Robots & Data: What? How? Why?

Gliders enable scientists to gather lots of information about ocean conditions, such as temperature, salinity, and phytoplankton, from the surface to the deepest reaches. Through a class demonstration, students will learn about how a glider works and then brainstorm how and why scientists use ocean robots to collect data.

Lesson 4: Investigating Why Penguins Forage There: Piloting Gliders

Through a hands-on activity, students will simulate a science team as they integrate data about surface currents and penguin movements to decide where to send the glider.

Polar-ICE Data Story: What drives patterns in ocean change?

The ocean varies immensely over space and time. But how can we understand what drives the patterns in the differences of the ocean over space and time? How might the differences influence what kind of animals lives where?

Polar-ICE is made possible by the support of the National Science Foundation Grant# PLR-1525635. http://polar-ice.org/

Project Polar Bear

Project Polar Bear is an international competition for middle and high school student groups taking action to fight climate change. Teams compete by creating a plan for a project that will help reduce reliance on fossil fuels and engage their communities. This can be a new project or a proposal to continue an existing project. Students and advisors track their progress during the competition through photos, research, and on social media. The top three high-scoring teams receive a grant of $1000, $750, and $300, respectively. For more information visit: www.polarbearsinternational.org


Arctic “Dust”

In her long career as an engineer and educator, Leslie Field has helped get the lead out of gasoline, inspired hundreds of students as a Stanford University lecturer, and earned dozens of patents for innovations with billion-dollar impacts on industries as diverse as oil and microelectronics.

Such accomplishments pale in comparison to her latest undertaking, however, a “Silicon Valley moonshot” called Ice911. Its mission: Mitigate climate change by restoring ice in the Arctic. How? Spread an environmentally safe, white silica sand in strategic locations to reflect heat “like a white shirt on a hot summer day” and protect the ice below, explains the nonprofit’s website.

Ice911 is just one of the many intriguing – and unsettling – initiatives to emerge from the controversial new field of geoengineering. These intentional, large-scale manipulations of the environment tackle different processes but share a common goal of  counteracting the effects of global warming. At Harvard’s Solar Geoengineering Research Program, for example, investigators are working on novel aerosols that might reduce or even reverse ozone loss as well as reduce stratospheric heating. Other researchers are examining the public’s perceptions and policy implications of geoengineering.

The New Yorker laid out geoengineering’s pros, cons, and players in a thoughtful May 2012 article by Michael Specter called “The Climate Fixers.” Field, who founded Ice911 in 2006 after seeing the environmental call-to-arm An Inconvenient Truth, understands the widespread anxiety about such massive technological interventions. Thus, she starts with the principle of “do no harm” and seeks safe, reversible solutions.

White sand, dubbed “Arctic dust” in the December 9, 2018 episode of Podcast Earth, fits the bill.

Inert and lightweight, the silica microspheres that Field and her team spent a decade researching and testing, don’t attract oil-based pollutants and are considered safe for arctic creatures. Moreover, the particles – which are basically engineered silicon dioxide, or beach sand, not plastic – can be evenly distributed atop the ice. And since they are hollow, they float on the melt water, preserving the protective covering in spring.

Ice911 has tested several methods for spreading the sand without putting humans on sea ice. (See image from a winter test that illustrates this blog post excerpt.) In April 2017, researchers automatically deployed sand across 17,500 square meters of Arctic ice. In 2018, they used the same method to cover 15,000 square meters of ice. The goal within a few years is to protect 15,000 to 100,000 square kilometers.

Learn more about Field and her work in the Xinova profile, “Love and Ice,”

Top Teacher Joins Congress

The 116th U.S. Congress shattered a number of barriers when a historic number of women of color were sworn in on January 3. The ranks include New York Rep. Alexandria Ocasio-Cortez, 29, the youngest woman ever elected to the House or Senate, and Minnesota Rep. Ilhan Omar, Congress’s  first Somali-American member.

Also making history is a former high school history teacher and 2016 National Teacher of the Year. Rep. Jahana Hayes, the first black woman from Connecticut to serve in Congress, was one of more than 170 current teachers who ran for office this election cycle, according to Education Week.

Before taking office, Hayes spoke to Education Week about her legislative priorities—she hopes to join the House education committee—as well as her thoughts on Education Secretary Betsy DeVos, her experiences on the campaign trail, and what her election means for her students. 

Here are some excerpts:

On Her Decision to Run for Office

“The defining moment for me was when I had a group of my students in California for a Habitat for Humanity trip because what I did was service—I had a club called the HOPE club, which stood for Helping Out People Everywhere. I really wanted to instill in these young people that you have a responsibility to be of service to others; to help in your community in any way that you can. And I had these kids in California this year, over spring break, and literally just looked at them and had a moment where I thought, ‘I’m teaching them about this world that waits for them and their responsibility to be contributors. And I see this being chipped away at.’ You know, ‘Who will speak for them?’ is a line that I’ve said often, but that’s really where it came from. I asked myself that question, ‘Who will speak for them?’ and decided I was going to run for Congress to speak for all of those people who do not have a voice in the conversation.”

On Her Priorities in Congress

Hayes wants to prioritize universal pre-K, career readiness, civics education, and mentoring new teachers.

On Education Secretary Betsy DeVos

On School Safety and Arming Teachers

[Editor’s noteHayes represents the district that encompasses Newtown, where the 2012 Sandy Hook Elementary School shooting took place.]

“I worked in a school with 1,300 young people. I would never want the responsibility of securing a firearm in a school with 1,300 teenagers or having to have a conversation that began, ‘I thought I locked my desk,’ or ‘I don’t know how they got the gun away from me.’ My husband is a police officer. We have firearms in our house. If there’s an active shooter in a school and police are deployed, it’s a high-tense, high-pressure situation. To have almost no training and be expected to use a firearm in a high-pressure situation, I don’t think I would want that responsibility.

We need to have more background checks to make it more difficult for people to obtain firearms illegally. We have a lot of conversation about getting them off the streets. How about, let’s stop them from getting on the streets. I think we really need to look at mental health and the crisis that we have surrounding mental health.

On Inspiring Young People to Get Civically Engaged

Hayes’ historic campaign motivated her students and other young people to get involved in politics, she said.

On Her Experience as 2016 National Teacher of the Year

“I saw education through so many different lenses. I had been a classroom teacher in the state of Connecticut in the same community where I was born and raised for my entire career. But what I saw [during my travels across the country] was that different communities were suffering with the same challenges, and different communities have tried different approaches. What I saw was that we want the same things… Different states, different demographics, and people were having the same conversations. And I realized that this is a national conversation. It’s not just about what affects kids at Kennedy High School in Waterbury, but it’s everywhere. In Wisconsin, New Mexico—everywhere around the country—people are faced with the same challenges, and we just want the best outcomes for our children and to elevate the profession.”

Click HERE to watch Rep. Hayes discuss her Teacher of the Year experience – and Congressional orientation – on Late Night with Seth Meyers.

National Youth Science Camp


Level: Graduating High School Seniors
Deadline: Feb. 28, 2019
Where: Camp Pocahontas, near Bartow, W.V.
Dates: June 27 – July 20, 2019
Cost: Free, including travel to and from the camp and visit to Washington, D.C.

Click HERE to apply.

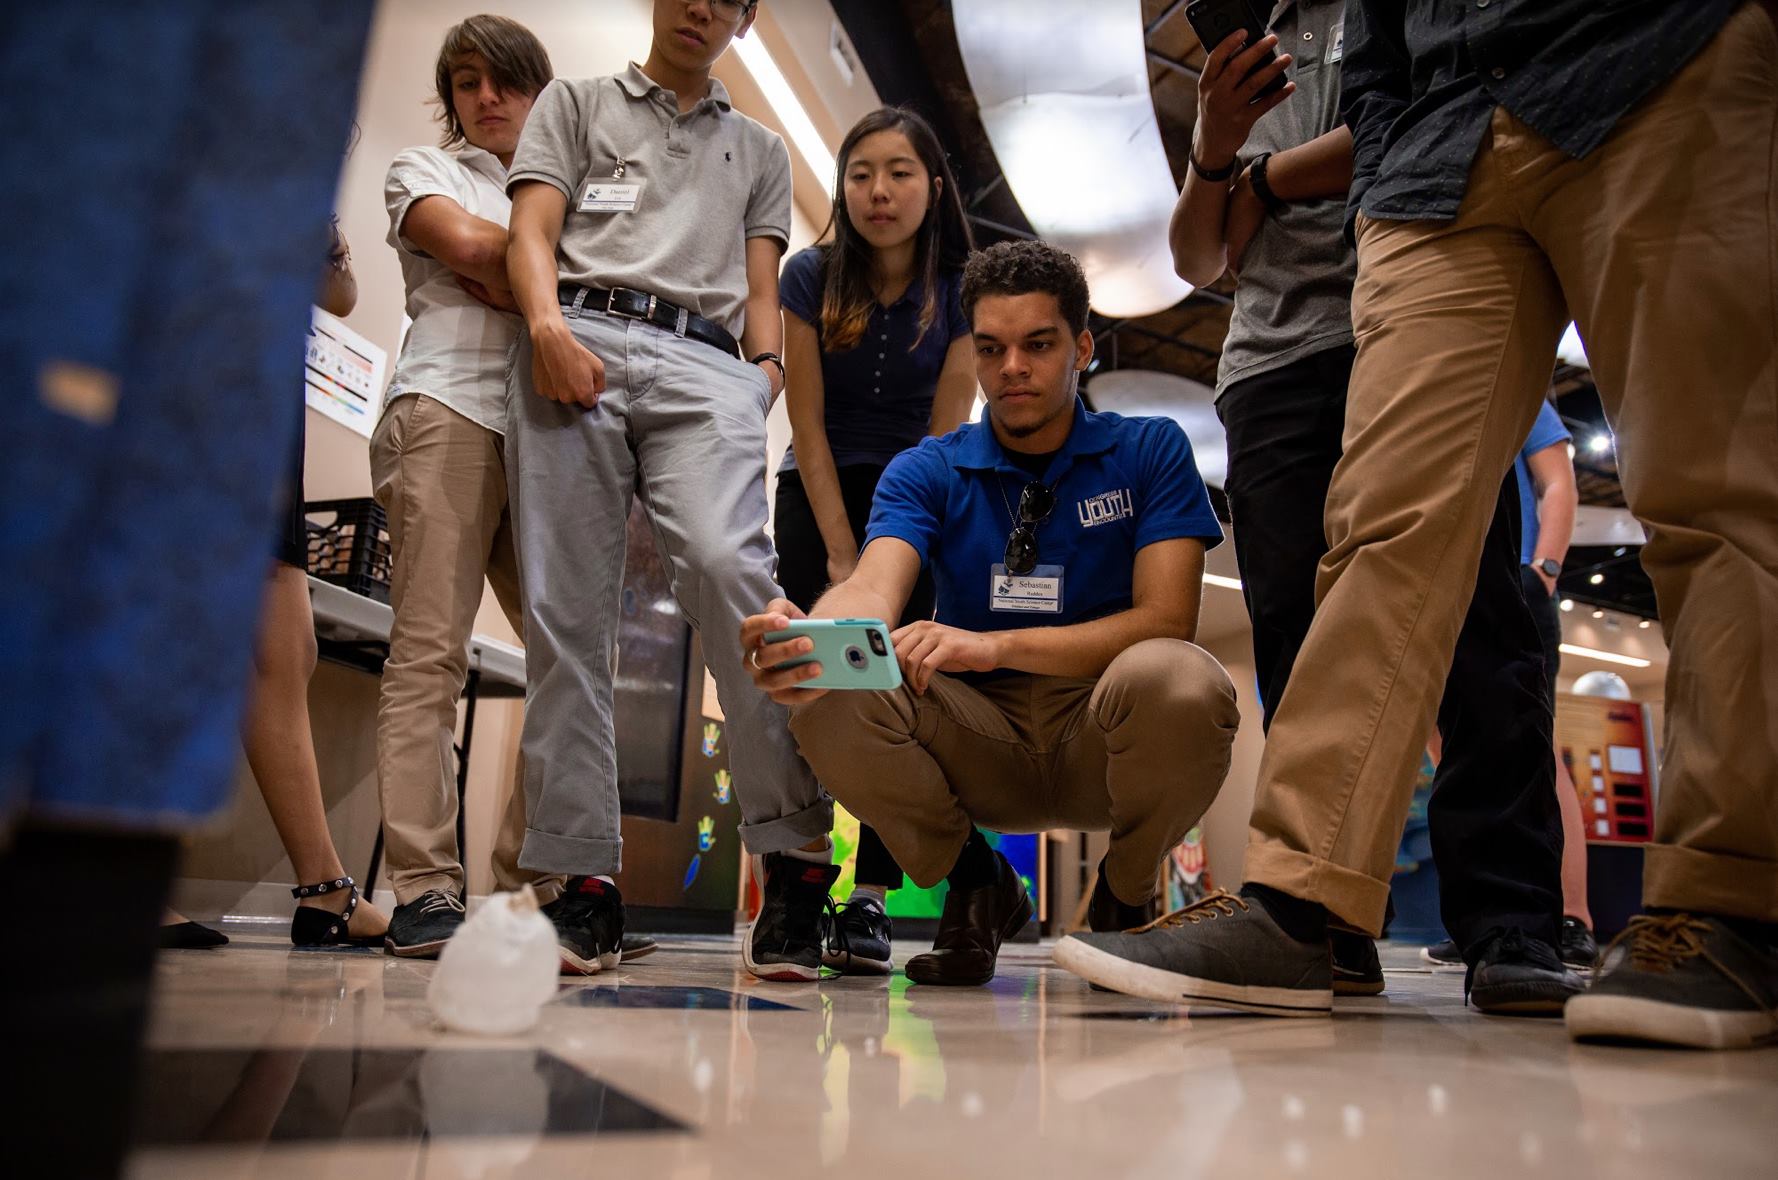
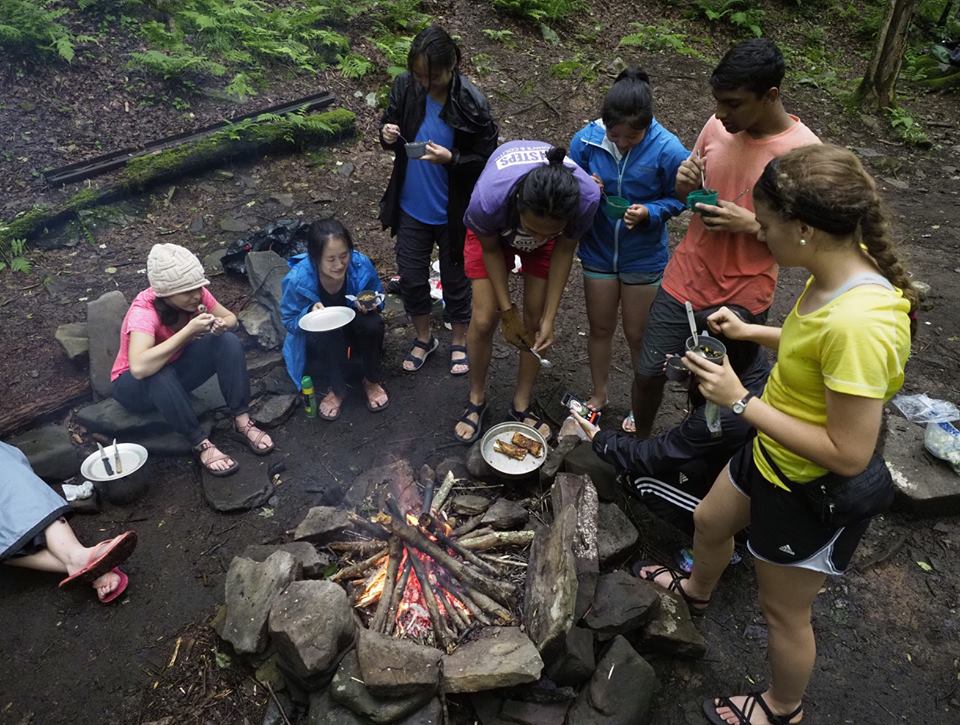
The National Youth Science Camp (NYSC), one of the country’s premier science education programs, offers graduating high school seniors from around the country and world a month of outdoor adventure and hands-on projects in the beautiful woods near Bartow, W.V., all travel costs and camp fees paid.

A typical day might include a morning lecture from a guest scientist

or astronaut, small-group, hands-on science seminars, and lots of hiking, caving, art projects, and fun discussions on topics from why engineered systems fail to origami. There also are trips to the National Radio Astronomy Observatory and to Washington, D.C., just five hours by car, where recent keynote speakers have included National Institutes of Health director Francis Collins and NASA director .

This article on the 2016 camp describes the camp activities… like the visit to Einstein’s statue at the National Academies of Science in Washington:

Each state and country conducts its own competition to select two delegates to represent them at the camp. NYSC alumni include astronauts, members of Congress, Nobel Prize winners, and business leaders.

Watch a short video of two students from Trinidad and Tobago describing their time at the 2017 NYSC, or another short video of Mateo Duque, from Colombia, on his 2011 NYSC experience.

Applications must be completed online (except for students in Florida, Georgia, and Massachusetts) and are due February 28, 2019. Click HERE to apply. (http://apply.nyscamp.org/) Students will need to set up an account) and for answers to frequently asked questions

  • Graduate from high school between July 1, 2018, and June 30, 2019;
  • Demonstrate superior academic proficiency, including recognition in mathematics and/or the sciences;
  • Demonstrate an application of leadership abilities and social maturity through involvement in both school and community activities;
  • Demonstrate skills and achievements outside the realm of science and outside the realm of academic pursuits; and
  • Demonstrate a curiosity and an eagerness to explore many and varied topics.
  • Commit to attending all four weeks of the camp.

The camp is made possible through planning and fundraising from the National Youth Science Foundation, a nonprofit organization with a mission to honor, sustain, and encourage youth interest and excellence in science by conducting comprehensive informal science education programs. These programs are designed to provide opportunity for students to have constructive interaction with others and emphasize the social value of scientific careers.

Deck the (Campus) Halls

Who says engineering is all work and no play? Not the creative undergraduates at the University of Minnesota’s College of Science and Engineering who created the pulsating, 250,000-bulb Winter Light Show (above).

They’re in great company. A few years back, University of Toledo electrical engineering major Alec Connolly synchronized holiday songs airing on a downtown radio station with 3,000 twinkling lights strung outside in the shape of a Christmas tree.

He dreamed up the idea during a co-op with the iHeartMedia, when his boss, the director of engineering and information technology at iHeartMedia, threw a bag of holiday lights on his desk and challenged him to figure out how to program them to blink to live music rather than a narrow set of prerecorded songs.

Then there is Tech Twinkles, the Massachusetts Institute of Technology’s annual student-mounted holiday light show. The event features a cappella performances, hot apple cider, cupcakes, and selfies while strolling through the trees. The tradition was started in 2014 when Veronika Jedryka ’17, Teresa de Figueiredo ’17, and Jane He ’15 realized how early it gets dark outside during the winter. “We thought it would be great to add some kind of brightness to MIT’s campus and lift people’s spirits,” Jedryka explained in an MIT news account,  “especially during a tough time with finals and final projects.”

Of course, engineering is not all sweetness and lights. Faculty and students do lots of serious year-round research on such breakthrough technologies as white lasers, smart LEDs, and photonics. Utah State University faculty and students dazzled at ASEE’s Annual Conference in Salt Lake City this past June with an enormous display of research – topped by a blue-lit A.

Back in 2012, Washington State University’s Haluk Beyenal, then an associate professor of chemical and bioengineering, and his graduate student Timothy Ewing created an unusual light display powered by a microbial fuel cell – essentially a bucket of muddy water full of bacteria with wire that could channel the energy generated by the creatures eating. The lights spelled MFC, which remained glowing all year in the hope it would prompt students to ask questions about the unique alternative energy source.

The funding source for this outreach project: A prestigious 2010 National Science Foundation CAREER grant for outstanding early-career engineering and science researchers. Bayenal is now directs a biofilm lab that takes students out in the field – no matter what time of year.

For an artist’s take on seasonal displays, check out Bruce Munro: Winter Light, a transfixing – and tranquil – series of colorful installations at the Minnesota Arboretum.

Paper Circuits Greeting Cards

TeachEngineering.org activity contributed by SparkFun. Click HERE for a  TeachEngineering high school circuits activity.
Similar activity, for use at home or with younger students, and guide is available for free at see the Exploratorium Tinkering Studio’s Paper Circuits.
Note: This activity uses a Valentine’s card template. Holiday card SparkFun templates can be found HERE, or let students design their own. 

Grade level: 6-12       Time: 1 hour

Summary

Create a sure-to-impress light-up paper card—no soldering required! In this activity, students create simple paper circuitry using only copper tape, a coin cell battery, a light-emitting diode (LED), and small electronic components such as a LilyPad Button Board. A  great way to teach the basics of how circuits function while giving students an outlet to express their artistic creativity.

Engineering Connection

Electronic circuits are at the core of nearly every new technology. Circuits power cell phones, computers and televisions, and are essential in cars, houses and kitchens. Circuits are everywhere and modern innovations would not be possible without them. Circuits enable electricity to flow between speakers, bulbs, buzzers, sensors, buttons and batteries. When engineers design new technologies, they often design and build companion electronic circuits so the technology functions as intended. In this activity, students are reminded about how electronic circuits work and then build their own circuits using simple, easy-to-use materials and provided templates (three designs). A PowerPoint® presentation is provided.

Pre-Req Knowledge

Some familiarity with electronic circuits and a working knowledge of the function of LEDs, batteries and wires. If new to working with electronics, see the Additional Multimedia Support Section for suggested online resources.

Learning Objectives

After this activity, students should be able to:

  • Design a product (a light-up pop-up greeting card) from a template, utilizing symbols and a model.
  • Troubleshoot and iterate through different designs.
  • Explain how a paper circuit works, including which electrical components accomplish which task.

Learning Standards

Next Generation Science Standards

Common Core Literacy Standards

  • Follow precisely a complex multistep procedure when carrying out experiments, taking measurements, or performing technical tasks, attending to special cases or exceptions defined in the text. (Grades 9 – 10)
  • Determine the meaning of symbols, key terms, and other domain-specific words and phrases as they are used in a specific scientific or technical context relevant to grades 9—10 texts and topics.

International Technology and Engineering Educators Association

  • Systems, which are the building blocks of technology, are embedded within larger technological, social, and environmental systems. (Grades 9 – 12)
  • Engineering design is influenced by personal characteristics, such as creativity, resourcefulness, and the ability to visualize and think abstractly. (Grades 9 – 12)

Materials List

Each student/card needs:

  • adhesive-backed copper tape, 5-mm width, ~18-inches per card; such as from a spool of 50 feet for $3 from SparkFun – available HERE.
  • 1 (or more) LED; use the smallest size you can find so it does not add much bulk to the folded greeting card, such as 3-mm size for 35¢ each; for extra flair, consider using 3-mm, color-changing cycling RGB LEDs for 50¢ each; alternatively, cut apart individual LEDs from a set of LET string lights and then use a hobby knife to scrape the coating off the wires before using OR experiment with different LEDs to find what works best for the project objectives
  • coin cell battery, 12-mm size, such as SparkFun’s CR1225 for $1.95
  • LilyPad Button Board for $1.95 OR LilyPad Slide Switch for $1.75
  • 2 sheets of cardstock, 8.5 x 11-inch, may be different colors, on which the teacher prints a template
  • I <3 U TemplatePixel Heart Template or Frame Template, one template per student/card; printed out on cardstock (2 pages per template)
  • (optional) vellum or parchment paper, to create a diffused effect for LEDs, such as in the center of the heart in the I <3 U design
  • scissors or hobby knife (can share among a few students)
  • needle nose pliers, to bend wire (can share among a few students)

To share with the entire class:

  • clear tape
  • glue stick or glue
  • decorating supplies such as stickers, markers, paper and paints, to embellish card designs
  • Making Light-Up Pop-Up Greeting Cards Presentation, a PowerPoint® file, to project to the class, make selected handouts or use as a teacher preparation resource. Click HERE for PDF.

Introduction/Motivation

Have you ever wanted to give someone a Valentine’s card or a greeting card of some kind, and wanted to really impress them? Are you feel limited or bored with making the same old drawings with pencil, pen or marker? Did you know it is possible to create greeting cards that light up? Well today is your chance to make the best Valentine’s Day (or birthday, Arbor Day, holiday, etc.) card ever!

In this activity, you will get to design, customize and create your own light-up card that is powered with a mini battery, an LED (or multiple LEDs), and a circuit made of copper tape. Your design is totally up to you, but templates are available if you want some ideas. (Adjust the previous sentence depending on the teacher’s planned use of the provided three templates.)

A very important aspect of engineering is creativity. Engineers often need to think creatively in order to dream up the amazing new technologies that have never existed before. It is not possible until you dream it, so today is your chance to think like an engineer and create something special and all your own!

Vocabulary/Definitions

  • circuit: A roughly circular line, route or movement that starts and finishes at the same place.
  • electricity: The transfer of energy resulting from the flow of charged particles (such as electrons).
  • electron: A subatomic particle found in all atoms and acting as the primary carrier of electricity in solids.
  • paper circuit: A low-voltage electronic circuit created on paper using conductive copper tape, LEDs and a power source such as a small battery.

Procedure

Before the Activity

  • Gather materials.
  • Print the greeting card templates on cardstock: I <3 U TemplatePixel Heart Template and Frame Template, one template per student/card. You may want to pick just one template that every student makes, or print an assortment of the provided three templates, or make the activity more free-form and not use the provided templates. Tips: Printing the templates might require that you adjust your printer’s margins or choose the “Fit to Page” print setting. The card template is slightly smaller than standard 8.5 x 11-inch paper, so make sure to cut along the outer black border (or have students do this) for the final cards.
  • Set up a computer and projector to show the class the 13-slide Making Light-Up Pop-Up Greeting Cards Presentation, a PowerPoint® file. Click HERE for PDF version. Alternatively, as makes sense for your class, just show/make handouts of certain slides for students or use the slides as a teacher preparation resource.

With the Students

  1. Begin with the pre-activity assessment about basic circuitry. Present the Introduction/Motivation content to the class. Then hand out the supplies and begin the presentation.
  2. Create copper traces: Begin the project by using copper tape to create a path for electricity. Notice that the card templates have icons to help in constructing the circuit; notice the symbols for cut, fold, copper tape, cut tape, LED, button and battery (see slide 5).
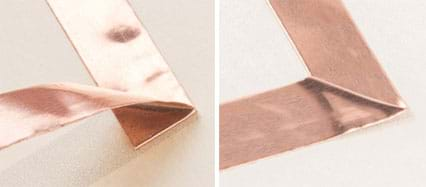
  3. Line B: Place copper tape along Line B, which includes a corner. To keep a solid connection of copper around corners, use a folding technique to press the tape into the shape (see Figure 1 and slide 6).
  4. Line A: Look at the template and find a circle marked A. Peel away a few inches of the paper backing from the copper tape and stick it down along the gray line. Cut the tape when you reach the scissors icon.
  • Start by sticking the copper tape down along Line B until you reach the corner.After the copper tape reaches the corner, start to fold the tape backward on itself. Use a fingernail or pen to give it a good crease along the fold.
  • Fold the tape back to approximately the width of the gray line and then carefully move the tape at a right angle from the copper tape already taped down. Notice that a second fold forms out of the corner point. Press the second fold down and then tape it flat against the paper. Note that the neatness of the fold does not matter too much since it will be covered by the pop-up in the end.
  • When you reach the scissors icon, cut the tape.

how to turn a corner with copper tape

Figure 1. How to turn a corner with copper tape

5. Line C: This stretch of copper tape also forms a battery holder (see Figure 2 and slide 8).

  • Start by folding one-half inch of copper tape onto itself, sticking the adhesive sides together to form a flap. Doing this enables the top of the copper to fold down over the coin cell battery. Since the battery’s positive side is the top and its negative side is the bottom, doing this creates a “battery sandwich” with copper tape touching each side.
  • We will not install the battery until the end of the project, so leave the flap be and lay the copper tape down along Line C, making a similar fold at the corner as previously done for Line B.
  • When you reach the scissors icon, cut the tape.

paper circuits figure 2 how to make a battery holder with flap of tape

Figure 2. How to make a battery holder with a flap of tape.

6. Fold the card in half along the dotted center line before moving onto the next step. Tip: It is easier to make a crisp and neat fold now, before the circuit components are added to the paper.

7. Prepare and place the LED(s): Now that the copper is in place, it is time to add the light. Each template has an LED symbol that shows a shaped wire. Using this method helps us remember which LED side is positive or negative. Share with the class the following excerpt from the light-emitting diodes tutorial about LED polarity:

  • In electronics, polarity indicates whether a circuit component is symmetrical or not. LEDs, being diodes, only permit current to flow in one direction. And no current flow means no light. Luckily, this also means that you cannot break an LED by plugging it in backwards. Rather, it just won’t work. The positive side of an LED is called the “anode” and is marked by having a longer “lead,” or leg. The other, negative side of the LED is called the “cathode.” Current flows from the anode to the cathode and never in the opposite direction. A reversed LED can keep an entire circuit from operating correctly by blocking current flow. So if adding an LED seems to break your circuit, try flipping it around.

8. Bend a standard LED to prepare it for the circuit (see Figure 3 and slide 9):

  • Using pliers (or your finger), bend flat the longer leg of the LED. Then shape the wire into a zigzag shape. Be careful not to break the wire by bending back and forth over the same bend too many times.
  • Next, bend the other leg flat and curl it into a spiral by using the tip of a pliers to lightly grab the end of the wire and curl it around the tool.
  • Once all wire shaping is complete, place the LED on a table or flat surface to make sure it lays flat and with the bulb upright. If not, make any adjustments now.
  • Line up the positive (longer) LED lead with the copper tape marked + (plus) and the negative with – (minus). Use clear tape over the wire to hold it down to the copper.

paper circuits how to position LED wires

Fig. 3: How to bend and position LED wires

9. Attach a button/switch: Next, place the LilyPad button on the oval icon on the template, facing up (see slide 10). It does not matter which side touches positive and negative. Make sure the conductive pads on the bottom of the button touch the copper tape, then tape down the ends with clear tape. Be careful not to tape directly over the push part of the button or it may interfere with the ability to press it. As an alternative, use a LilyPad switch instead of a button; the installation is the same.

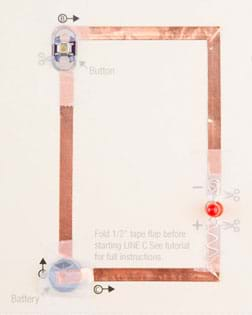
10. Insert a battery: Once all the components are installed, test the circuit by adding a battery (see Figure 4 and slide 8). Carefully slip the battery underneath the copper tape flap made earlier and center it inside the circle icon. Make sure the positive side of the battery (top, marked with the battery model and +) is facing up. Press the copper flap over the battery, and tape it down with clear tape.

11. Now, press the button, and the LED should light up! See the Troubleshooting Tips if it does not.

paper circuits finished circuit

Fig. 4. The finished i<3 U circuit.

12. Prepare the pop-up: Now cut out the pop-up pieces and do some careful folding (see slides 11-12). As needed, click the links below for detailed guidance on assembling the pop-up cards.

    • I <3 U instructions: It is easiest to glue a piece of vellum or parchment paper to the back of the heart outline before folding this pop-up. Since the original project is in Korean, you may want to watch this (4:27-minute) YouTube video tutorial that shows the process.
    • Pixel heart instructions: This card can be tricky to pop up since it has so many small cuts. It helps to use a pencil or thin marker to pull up the folds one at a time from the bottom of the heart up to the top.
    • Frame instructions: The folding instructions for the window card at this Christmas Pop-Up Card tutorial are helpful. Place a piece of parchment paper or vellum behind the frame to create a base on which to attach stickers or cut outs, or to draw on with markers. This template is a blank canvas awaiting students’ unique messages and scenes.

Paper Circuits finished pixel heart card

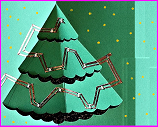
Fig. 5 Finished pixel-heart card.

13. Assemble and finish:

    • When the pop-ups are constructed and ready to light up, carefully place them over the copper tape circuit. Glue or tape the corners down to adhere to the backing (see Figure 5 as an example). Gently fold down the pop-up to close the card.
    • Finally, use a marker or stickers to indicate where to push the button.
    • Add additional decorations to make the card extra special.

14. Conclude by asking the post-activity reflection questions as described in the Assessment section.

Attachments

Safety Issues

  • Never connect the positive and negative terminals of a battery directly together as this causes a short circuit and the connecting material may become very hot.
  • Depending on the age of the students, have them especially use care with the hobby knives, which are very sharp.

Troubleshooting Tips

Most activity snags are solved by emphasizing the importance of a “continuous circuit.” Doing this encourages students to check for loose and broken interconnections, or torn circuit elements. When in doubt, substitute a new circuit element (that is, an LED, battery, button, wire, etc.). Other tips:

  • Check the tape connections: Use a fingernail or pencil to make sure the tape is firmly adhering the components to the copper tape.
  • Check the battery: Make sure the battery is sandwiched firmly between the top and bottom copper tape lines and that the top copper does not accidentally touching the bottom of the battery.
  • Check the LED wires: Double check that the wires did not accidently break while bending them into shapes with the pliers.

Assessment

Pre-Activity Assessment

Prior Knowledge: In an informal discussion, quiz students about the key elements of basic circuity to see what they know about the essential circuit components and the importance of creating a continuous circuit. As necessary, refer to the diagram on slide 2 in the Making Light-Up Pop-Up Greeting Cards Presentation.

Activity Embedded Assessment

Engagement: Observe students during the activity to make sure each makes forward progress and does not get stuck at any step of the process.

Post-Activity Assessment

Reflection Questions: As a class discussion or a journal writing assignment, ask students the following questions:

  • What is the minimum number of parts you needed to make your finished product? Name them.
  • What was one problem you encountered and how did you overcome it?
  • What is your most favorite aspect of your design?
  • What makes your design unique?
  • What improvements or new ideas would you implement in designing another light-up greeting card?

Activity Extensions

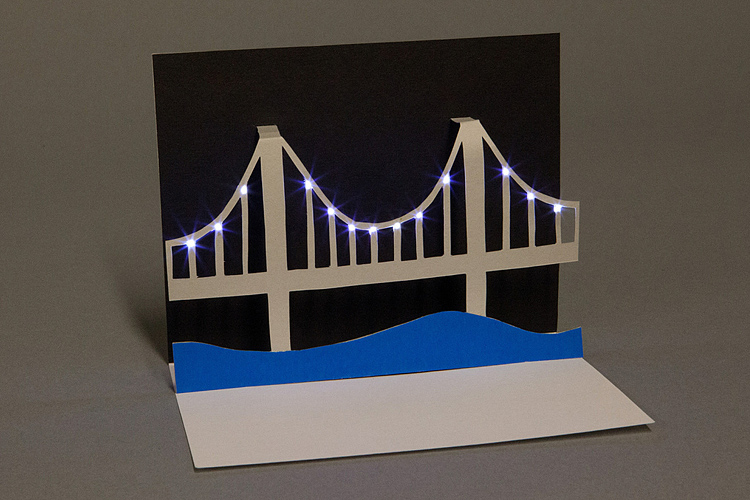
Try these techniques with other pop-up designs or have students create their own. Ask students: Can you figure out how to adapt the copper tape path to fit your card choice? Further ideas and card variations:

Activity Scaling

For more advanced students, challenge them to add more LEDs and/or sensors and buzzers to their greeting card paper circuits.

Additional Resources

SparkFun’s helpful diagram for making paper circuits: https://learn.sparkfun.com/resources/65

If new to working with electronics, check out these helpful readings: 

MIT Media Lab’s High-Low Tech project offers simple circuit templates and guides for a variety of paper cards. Check out their work of Jie Qi and Leah Buechley  for more ideas and tutorials.
Similar paper circuits activity, suitable for doing at home or with younger students, can be found at the San Francisco Exploratorium Tinkering Studio’s Paper Circuits. Click HERE for the paper circuits guide.

References

Activity adapted from SparkFun and Angela Sheehan’s Light-Up Valentine Cards activity.

Contributors

Angela Sheehan; Devin Rourke

Copyright

© 2017 by Regents of the University of Colorado; original © 2014 SparkFun Education

Best STEM Books 2019


Looking for inspiring books that not only are good stories that build literacy skills but accurately depict complex STEM content?

Check out the National Science Teachers Association’s 2019 Best STEM Books!

Responding to continued calls from teachers for just such a “best books” list, NSTA invited a unique collaboration several years ago with three other groups to help set the standard: the American Society for Engineering Educators (ASEE), the International Technology and Engineering Educators Association (ITEEA), and the mathematics representatives from the Society of Elementary Presidential Awardees (SEPA).

The list of 24 books was chosen by volunteer educators identified in collaboration with the Children’s Book Council. Click HERE to see the criteria for selecting a book.

The 2019 roster includes tales of technology, such as the development of NASA’s Curiosity Mars rover and a history of Google, and biographies of women like Komodo Dragon  researcher Joan Proctor, Navy engineer Raye Montague, and mathematician Sophie Germain, who defied sexism and racism to become innovators in their fields. Other works illuminate coral reefs, the comeback of the American chestnut tree, and the daring effort to build the first trans-Atlantic telecommunications cable.

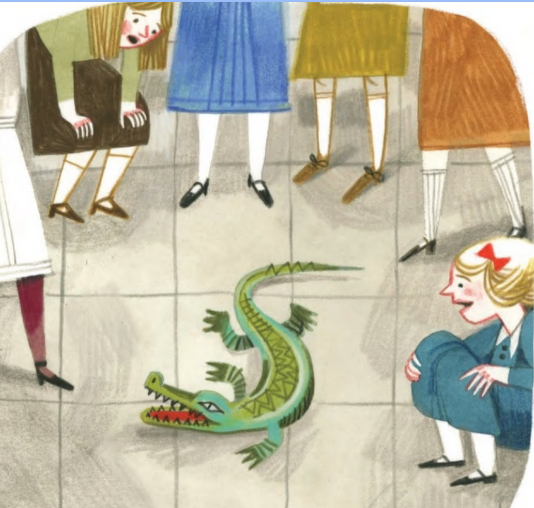
Image from Joan Proctor, Dragon Doctor: The Woman Who Loved Reptiles,  by Patricia Valdez

Seek tips for teaching STEM through literature? ASEE engineering educators have research-proven curriculum and tips! Check out PictureSTEM, Purdue University’s early grades engineering-through-literacy curriculum project. Or search for papers presented at the ASEE Annual Conference such as this 2011 Texas Tech’s paper: Introducing Engineering to Young Children Through Early STEM Literacy.

Doing a bridge-design activity? Check out eGFI Teachers’ Building Bridges to Literacy with titles sure to spark your students’ imaginations! Click HERE for the 2017 Best STEM books line-up featuring ASEE Pre-college Division past chair Pamela Lottero-Perdue, professor and director of the Integrated STEM Instructional Leadership (PreK-6) Post Baccalaureate Certificate Program at Towson University in Maryland.

Happy reading!

ExploraVision Contest 2019


NSTA/Toshiba ExploraVision

  • Who: Students in grades K-12 and their teachers
  • Project: Research a current technology and what it might look like in 20 years, describing the development steps in 5 sample web pages.
  • Prizes: Up to $10,000 in U.S. Savings Bonds; eight teams are flown to Washington, D.C., for the national finals in March.
  • Projects Due: 11:59 p.m. Eastern, February 8, 2019
  • REGISTER YOUR TEAM TODAY

ExploraVision is a K-12 STEM competition that focuses on what it takes to bring ideas to reality. Working with a teacher, teams of up to 4 students pick a current technology, research it, envision what it might look like in 20 years, and describe the development steps, pros and cons, and obstacles. Here are some sample projects.

Sponsored by the National Science Teachers Association and Toshiba, this year’s contest is linked to the Next Generation Science Standards. More than 375,000 students in the United States and Canada have participated in ExploraVision since its 1992 debut.

Students can win up to $10,000 in U.S. savings bonds. Past winners have envisioned technologies ranging from a hand-held food allergen detector to a new device to help people who have lost limbs regain movement in real time and a retinal lens to counter the cloudy vision of people with macular degeneration.

The competition is open to students enrolled in public and private schools or home educated in the United States and Canada. See the full eligibility requirements here.

Projects must be received at Toshiba/NSTA ExploraVision, online by 11:59 pm EST, Monday, February 8, 2019. Click HERE for project format.