Lesson: Solar Cooking
Saved by the Sun activity from NOVA Teachers is an updated verion of Solar Cooking, a lesson provided by the Teachers’ Domain, WGBH Educational Foundation, and WPSU, that appeared in the June 2009 eGFI Teachers newsletter.
Level: Grades 6-8
Time required: Two to three (2-3) 50-minute class periods
ABOUT THIS LESSON: In this series of lessons for grades 6-8, students first experiment with a virtual solar cooker to discover the mathematical relationship among reflection, transmission and absorption. Then they apply their knowledge to building and testing a solar cooker of their own invention. In an extension, students investigate how these principles can be used as sustainable energy sources for homes through passive solar heating.

Learning Objectives
Students will know that
• Incident sunlight is reflected, transmitted, and absorbed when it falls upon a surface.
• A solar cooker is a solar collector; it collects and traps the sun’s energy, creating heat.
• Solar cookers require three (3) components: glazing, insulation and reflectors.
• There are limitations to how we can maximize solar energy depending upon our geographic location.
Students will be able to
• Describe how passive solar energy can be used in our everyday lives and homes.
• Discuss the mathematical relationship among reflection, transmission, and absorption: incident solar radiation (I) must equal reflected (R) plus transmitted (T) plus absorbed (A) radiation (I = R + T + A)Predict the relative transmission, reflection, and absorption properties for various materials.
• Construct a solar cooker that fully cooks a food of the students’ choice.
Assessment Strategies
• Observation of students’ interaction with the virtual solar cooker as a pre-instructional tool.
• Evaluation of the completed student handouts, and of the students’ participation in class discussions.
Materials
Part 1:
• Student computers with Internet access
• Virtual Solar Cooker interactive simulation
• Solar Cooking Student Handout PDF
• Solar incidence equation lecture notes
• Solar Cooking Teacher’s Notes PDF
- Alternative link to Teacher’s Notes PDF
Part 2:
Model solar cookers
Cardboard cutting tools
Thermometers or electronic temperature sensor data loggers
Various household/classroom materials for demonstration and cooker components
Mirror
Window glass
Frosted glass
Aluminum foil
Unpainted copper sheeting
Wood
Waxed paper
Clear plastic wrap, sheet protectors or transparencies
Compass
Thin wooden skewers
Hot dogs or S’mores ingredients
Sunglasses
Cellophane: clear, yellow, red, blue, green
Construction paper: black, yellow, red, blue, green
Cardboard boxes or foam board
Black paint
Torn-up paper
Scissors
Tape (clear and masking tape)
Rulers/meter sticks

Multimedia Resources
• Background movie on solar cooking
• Box cooker design plans and FAQ
• Panel cooker design and rationale
• Parabolic cooker examples
• A sun path chart can be made for your town or school at the University of Oregon’s Solar Radiation Monitoring Laboratory using “Sun Chart.”
•Passive design elements
• Figure 1. Diagram of Azimuth Source
• Figure 2. Reflection of Light Source
The Lesson
Part I: Experimenting with a Virtual Solar Cooker (30 minutes)
1. Begin the lesson with a lively discussion that investigates students’ conceptions about radiant energy. Describe what a solar cooker is and spend several minutes eliciting students’
predictions about what types of materials will be best for use in constructing a solar cooker.
2. Allow students to investigate the virtual solar cooker (Virtual Solar Cooker interactive simulation) and prompt them to try to figure out which combination of materials performs the best as a solar cooker. Remind students to make notes about their virtual solar cooker’s performance in Part 1 (Virtual Solar Cooker Wrap-up) of the Solar Cooking Student Handout PDF Document (See above).
3. Discuss the results of investigating the virtual solar cooker with the students. Define transmission, reflection and absorption for the students and introduce the expression, I= T + R + A. Depending upon the level of your students, this may be more of a lecturing activity rather than discussion. Having sample materials to cite examples from the list for Part 2 is suggested.
A suggested demonstration is to throw crumpled pieces of paper at students to illustrate how this is an example of what happens when light strikes a surface (the pieces of paper caught are absorbed, those falling to the floor are transmitted and those bouncing off are reflected.)
4. Have students work in small groups to rank the materials included in Data Table 1 on page 2 of the Cooking Student Handout.
Part II: Collecting Solar Energy (2-50 min Class Periods)
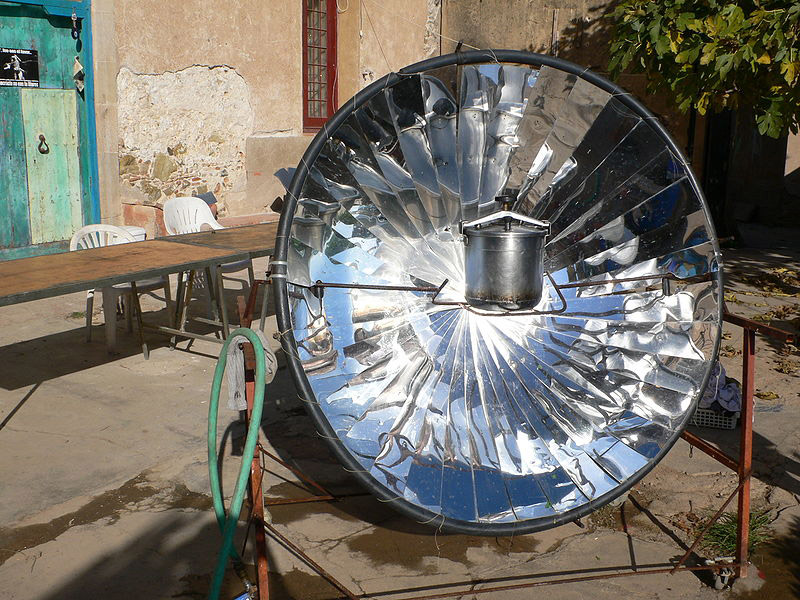
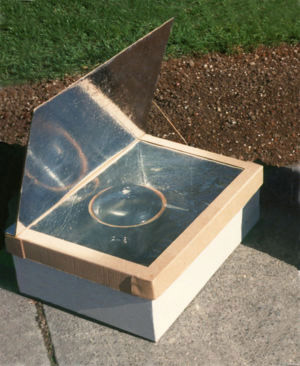
5. Share physical models of each of the three types of solar cookers (box, panel, parabolic.) If presenting physical examples is not possible, digital images will work well and the Solarcooking.org website referenced in the Multimedia Resources section of this lesson is a great source. Give a short lecture describing the function of each component of a solar cooker (cover or glazing, insulation, reflector).
Instructions for constructing each type are included in the Additional References section of the Solar Cooking Teacher’s Notes PDF Document.
A short movie link available from Solar Cooking Archive may also be of interest.
6. Divide the class or allow students to sort themselves into teams of 2 to 3 and set them to work on Part 2 (Select a Solar Cooker and Test Your Predictions) of the Solar Cooking Student Handout.
While working through Part 2 each student team needs to decide what type of solar energy collector will best cook the food that they choose. Students may not realize that the cooker cannot reach temperatures much higher than about 300 degrees F, so they may need some coaching away from cooking things like raw meat. They will also need to generate their list of materials based upon their relative properties of transmittance, reflectance and absorbance. An extensive sample materials list is provided in the materials section and the Frequently Asked Questions document from The Solar Cooking Archive. (This may be a useful document to share with students.)
7. Assist students in making connections to the mathematical expression, I = T + R + A in question #3 (Part 2) on page 4 of the Solar Cooking Student Handout.
8. Students will then sketch their solar cooker (question #4 of Part 2 of the Student Handout).
Question #5 prompts them to figure out how to measure the temperatures reached by the solar cooker. If necessary, interject a short lecture on how to collect temperature data, otherwise, allow students to devise their plan and make a data table.
9. Allow students to proceed with construction and testing of their cookers.
10. Once all teams have had an opportunity to test the cookers, allow students to investigate others’ designs and debrief the experience by sharing the data collected for each cooker and analyzing the success of each type of cooker. Students may do questions 6-10 (Solar Cooking Thought Questions) in the Student Handout as part of the in-class wrap-up or for homework.
Part III: Extension: Applying Solar Principles to Building Design (2-50 min Class Periods)
11. Allow students to explore some of their ideas from question 10 in the Student Handout.
Visit the Solar Oregon’s site for resources on the topics of why solar energy, solar for schools, and types of solar energy systems: Resources for Teachers and Kids.
12. A sun path chart can be made for your town/school at the University of Oregon’s Solar Radiation Monitoring Laboratory using “Sun Chart.”
LEARNING STANDARDS: AMERICAN ASSOCIATION FOR THE ADVANCEMENT OF SCIENCE
8. THE DESIGNED WORLD C. Energy Sources and Use
8C (6-8) #6 Different parts of the world have different amounts and kinds of energy resources to use and use them for different purposes.
Filed under: Grades 6-8, Lesson Plans
Tags: Grades 6-8, Solar Engineering


