Lesson: Magnify It
(Provided courtesy of Science Netlinks and the American Association for the Advancement of Science)
 In this lesson for Grades K-2, youngsters come to understand that there are limits to what the eye can see and that a magnifying glass can help extend those limits.
Context
Children come equipped with natural curiosity and creativity and have had many experiences with technology by the time they enter school. In particular, students may have been exposed to optical technology such as glasses, magnifying lenses, or even periscopes, microscopes, and telescopes. For this age group, classroom activities should begin to channel students’ inventive energy to increase their awareness and purposeful use of tools.
Standards
AAAS Benchmarks for Science Literacy state: By the end of the 2nd grade, students should know that
- Tools are used to do things better or more easily and to do some things that could not otherwise be done at all. In technology, tools are used to observe, measure, and make things. 3A/P1
- When trying to build something or to get something to work better, it usually helps to follow directions if there are any or to ask someone who has done it before for suggestions.
Ideas in this lesson are also related to concepts found in the following AAAS benchmarks: By the end of the 2nd grade, students should know that
- People can often learn about things around them by just observing those things carefully, but sometimes they can learn more by doing something to the things and noting what happens. 1B/P1
- Tools such as thermometers, magnifiers, rulers, or balances often give more information about things than can be obtained by just observing things unaided. 1B/P2
- Describing things as accurately as possible is important in science because it enables people to compare their observations with those of others. 1B/P3
- When people give different descriptions of the same thing, it is usually a good idea to make some fresh observations instead of just arguing about who is right.
In this lesson, students will view objects of various sizes from several viewing distances to discover that their visual field is limited. Students will record what they see and will compare their observations with classmates in an open, nonjudgmental forum. They will have the opportunity to speculate about and experiment freely with magnifying glasses and will also conduct more structured experiments.
 Planning Ahead
Materials:
Common objects of various sizes and shapes, such as blocks, coins, pencils, books, and erasers
Yardstick
Masking tape
Magnifying glasses
Draw What You See student sheet
Draw What You See with a Magnifying Glass student sheet
Set up several viewing stations in the classroom. Each station should include an object placed on a surface, such as a desk or a chair. Measure distances one, five, and ten feet from each station to serve as observation points. Clearly mark these with masking tape labeled with the correct distance, noted as “near,” “middle,” or “far.” (See the Motivation section for further explanation.)
Motivation
To begin this lesson, assign students to viewing stations. Explain that they will look at an object from three different distances–near, middle, and far–and will draw what they see. Then distribute the Draw What You See student sheet. Make sure that students locate the spaces on the student sheet where they should draw the object as they observe it from each observation point.
Have students stand at the closest observation point and draw what they see in the space provided. Have them then repeat the procedure at the other two observation points. Emphasize that they are to reproduce the size of the object as closely as they can.
Allow students to discuss how the size and distance of an object from their eyes affects how easy it is to see. Encourage students to look at other objects at various distances from them in the classroom to reinforce their formal observations.
Have them consider the following questions:
- Which object is easiest to see? Why?
- Are objects easier to see up close or far away?
Facilitate the discussion to make sure students understand that the larger and closer an object is to their eyes, the easier it is to see.
Development
Continue the discussion by asking the following questions:
- How small would the object you observed have to be before you couldn’t see it any more? How far away?
- What are some things you have trouble seeing?
- What can you do if an object is too small or too far away for you to see?
- Do you know of any tool that might help you see objects more easily?
Accept any answers to the first question, but make sure students understand that their vision is limited. As they discuss the second and third questions, point out that if they can’t move closer to an object, they can use tools such as the ones they mentioned–which might include glasses, magnifiers, binoculars, microscopes, and telescopes–to make the object appear larger and easier to see.
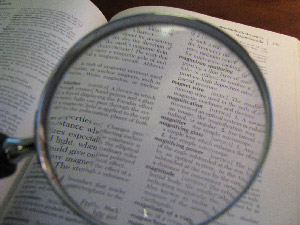
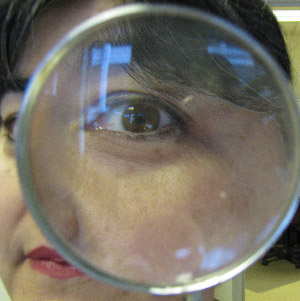
Then hand out magnifying glasses, one per viewing station or one per student, as available. Tell students what they are and ask if anyone has used one or knows anything about it. Have students look through the magnifying glass at each other and at objects around the classroom to get a feel for what it does.
Encourage students to experiment with the magnifying glass–looking through it with both eyes open and one eye closed and holding it at various distances from their eyes–to find the best way to use it. They will probably see best with the non-viewing eye closed and with the magnifying glass held five or six inches away from their face. Stress that there isn’t one “right” way to use the glass, but that they should find the way that works best for them.
Note: It’s important, however, that students do understand that the closer they hold the glass to an object, the larger the object appears. The Extensions section includes a website for an interactive tutorial students can do to reinforce this concept.
Once students have determined the way the magnifying glass works best for them, hand out the Draw What You See with a Magnifying Glass student sheet. Have students return to their viewing station and instruct them to view the object through the magnifying glass at each observation point and again draw the size and shape of what they see as accurately as they can.
Assessment
Have students hold the Draw What You See and Draw What You See with a Magnifying Glass student sheets side by side and compare their drawings of what they saw with and without the magnifying glass.
Have them discuss the following questions:
- Are your two sets of drawings the same or different? If they are different, in what way?
- How did the magnifying glass affect your vision?
- How might people use magnifying glasses in real life?
- What other tools do you know that help people use their senses and bodies better?
Students should be able to conclude from their drawings that the magnifying glass makes objects look bigger. You might want to point out that the word magnify actually means “to make bigger in size,” and mention other related words they might know, such as magnificent and magnitude to reinforce the meaning of “bigness.”
If students are curious about how the magnifying glass works, you could give a simple explanation about how it focuses light rays. A good explanation and drawing for your reference can be found at ThinkQuest: The Optics.
In discussing real-life applications of magnifying glasses, students might mention seeing grandparents or other adults using them to read. If someone brings up using a magnifying glass to start a fire, explain that students should not use the tool in this way, since it is very dangerous.
A discussion of other tools that help people experience and get around in the world might include hearing aids, canes, crutches, and wheel chairs–as well as roller skates, skateboards, bicycles, automobiles, airplanes, and rockets. By the end of the lesson, students should have developed an appreciation of the importance of tools and technology in their lives.
This lesson is part of a series of Science NetLinks Lessons dealing with optical technology. The other lessons in the series include Seeing Around Corners (3–5), Looking into Space (6–8), and Watch Your Thoughts!—Diagnostic Imaging and the Brain (9-12).
Updated 1/21/2020
Filed under: Grades K-5, Lesson Plans


