How the Rubber Meets the Road
Engineers Week 2015 lesson courtesy of TryEngineering. Click HERE for PDF.
Summary
In this activity, teams of students in grades 3 to 12 learn how engineers design tire treads to increase safety and reliability, then follow the design process to construct, test, and evaluate treads sculpted from clay that will be safe when driving in heavy rain.
Grade level: 3-8
Time: Two or three 45-minute sessions
Engineering connection
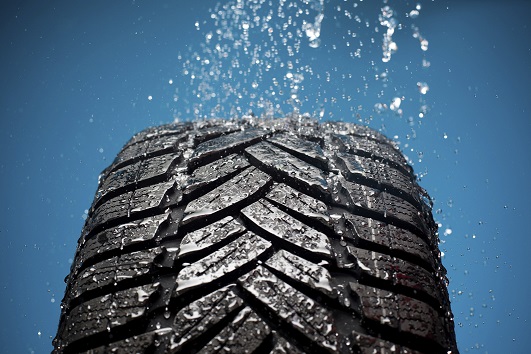
Engineers design tire tread patterns to achieve safety in a range of driving conditions. Different grooves can reduce slippage in heavy rain by forcing water to flow out to the side of the road, away from the tire.
Learning objectives
After doing this activity, students should have a better understanding of:
- The engineering design process.
- The role of planning and construction in engineering.
- Teamwork and working in group
- 3-5-ETS1.1 Define a simple design problem reflecting a need or a want that includes specified criteria for success and constraints on materials, time, or cost.
- 3-5-ETS1-2 Generate and compare multiple possible solutions to a problem based on how well each is likely to meet the criteria and constraints of the problem.
- 3-5-ETS1.3 Plan and carry out fair tests in which variables are controlled and failure points are considered to identify aspects of a model or prototype that can be improved.
- MS-ETS1.1 Define the criteria and constraints of a design problem with sufficient precision to ensure a successful solution, taking into account relevant scientific principles and potential impacts on people and the natural environment that may limit possible solutions.
- MS-ETS1.2 Evaluate competing design solutions using a systematic process to determine how well they meet the criteria and constraints of the problem.
- Understanding(s) about scientific inquiry [Grades K-8]
- Abilities necessary to do scientific inquiry [Grades 9-12]
- Understanding of properties of objects and materials [Grades K-4]
- Properties and changes of properties in matter [Grades 5-8]
- Motions and forces [Grades 5-12]
- Interactions of energy and matter [Grades 9-12]
- Abilities of technological design [Grades [K-12]
- Understandings about science and technology [Grades 5-12]
- Understanding of science and technology in local challenges [Grades K-4]
- Natural hazards [Grades 5-8]
- Risks and benefits [Grades 5-8]
- Science and technology in society [Grades 5-8]
- Science and technology in local, national, and global challenges [Grades 9-12]
- Understanding of science as a human endeavor [Grades K-4]
Materials
- Paper
- Cardboard
- Clay or plasticine
- Plastic knives or kid-safe clay carving tools
- Pencils
- Student Resource Sheet (page 5 of activity pdf)
- Student Worksheets (rtf) or PDF version: (See pages 6 – 9 of activity)
- Water
- Measuring cup
- Spout or funnel
- Tape to secure each tread
- Divided basin (or three small containers) for testing and measuring the water that is gathered at the bottom, and on each side
- Tread depth measuring device (can be a ruler, or an actual tread measuring device)
Procedure
- Show students the various Student Reference Sheets. These may be read in class or provided as reading material for the prior night’s homework.
- Divide students into groups of 2-3 students, providing a set of materials per group.
- Explain that students must carve or shape a unique tire tread pattern out of clay that will route over 50% of incoming water to the sides of the tire to prevent hydroplaning. In addition, less than 40% of the surface material may be carved away in order to achieve this goal.
- Students meet and develop a plan for their new “tread.” They must consider the path the water will take, and also how deeply they will carve into the clay for their test model.
- They first draw the design on paper and then transfer it – using a pencil – to a block of clay that is about 5″ x 10″ x 2″.
- Students then carve the clay using plastic instruments or kid-safe clay carving tools.
- Student teams then present their plan to the class, explaining their predictions for how their design will work. They will present the depth of the new tread and their hypothesis for how efficiently their pattern will whisk water to the sides of the tire to prevent hydroplaning.
- All “treads” are then tested by pouring two cups of water through the carved clay. The teacher may decide to do the testing, appoint a team of testers, or allow students to test their own designs. Note, the “tread” should be secured with tape at about a 25-degree angle, which will help make the tests of all teams more consistent. Measure the water collected at the bottom container, as well as the water collected from the right and left side to determine the percentage that was pushed away to the side. Pouring through a spout may assist in making the flow of water at a speed so it doesn’t splash out. Students keep track of the data and measurements on a student worksheet, while the teacher is responsible for pouring the water to ensure fair testing among all teams.
- Student teams record their results,complete an evaluation/reflection worksheet, and present their findings to the class.
Troubleshooting Tips
- For younger students, you may choose to do the carving yourself, or perhaps do this lesson as a joint project with an older class – working together – and have the older students do the carving for the younger ones.
- Having the teacher measure the two cups of water for each group’s test ensure fairness.
- Secure each tread to be tested with tape at a 25-degree angle.
- Pouring the water through a funnel or spout may assist in making the flow of water at a speed so it doesn’t splash out.
Activity extensions
Have students write an essay or a paragraph about the impact of material science and engineering on tire performance over the past hundred years.
- Visit a local tire store as a class and explore the different tire treads and applications. Have a sales clerk explain the importance of tire pressure with regard to safety and performance.
- Organize a tracing experience, where either the teacher or adult volunteers trace different tire treads to show in the classroom.
- Explore online sites showing examples of hydroplaning, such as this one from University of Pittsburgh’s engineering department.
Additional resources
An Expert’s Lesson in Tread Design. How tire patterns can reduce noise, increase safety, handle better in snow, and other features, explained by a Yokohama Tire Co. designer at the 2007 SEMA show. [YouTube 4:32]
Tireology. Yokohama Tire Co’s short illustrated guide to rib, block, and other types of tire treads. An additional page explains water-deflecting and other design features.
Why do Tire Designs Vary? Quick primer on assymetric treads, snow tires, and other design featurees by Best-One tire care experts.
How to Check Tire Tread Wear A mechanic shows how to use a penny to assess tread wear. [YouTube 2:23] And a WSN Channel 12 investigation with Consumer Reports experts that call the penny test into question. [YouTube 4:40]
What to do when your car hydroplanes. ABC News reports explains how cars skid out of control on wet road and how to drive safely through such dangerous conditions. [YouTube 1:50]
How to model tire treads. This 3ds Max tutorial presumes some computer-aided design experience but takes viewers through the steps in thinking about and designing tire treads. [YouTube 18:19]
Bridgestone’s Tire Testing Facility A hydroplaning pool and “skid pad” are among the features of the 6,000 acre Texas Proving Ground where Bridgestone puts its tires through performance tests.
Filed under: Class Activities, Grades 6-8, Grades 6-8, Grades 9-12, Grades 9-12, Grades K-5, Grades K-5, Lesson Plans
Tags: Automotive engineering, car, Class Activities, Engineering Design, Lesson Plan, safety, tire, Transportation, tread


