Activity: Glass Blowing Simulation
 (Lesson plan courtesy of Reach Out Michigan and Newton’s Apple)
Level: Grades K-8
Overview
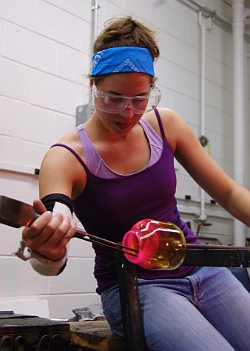
In this class activity, students learn about glass and the techniques for making it, especially glass blowing. Then, students experiment with honey to get a feel for how glass is blown and butter to show how temperature changes affect how a material acts.
Background
Glass is an amazing substance – hard, transparent, capable of beautiful colors and sparkles, strong yet brittle. Where does this material come from?
A crude version of the material we know as glass was most likely first produced about 4,500 years ago. Around 1500 b.c., artisans learned how to press glass in open molds, producing a variety of shapes and containers. The process, however, was slow, labor intensive, and expensive. Pressed glass was considered as valuable as precious metals.
More than a thousand years passed before people discovered how to shape intricate and delicate objects through glass-blowing techniques.
Today there are a variety of glasses. These materials have ingredients and structures that produce distinct characteristics. Automobile glass (also called safety glass) is actually two layers of glass that “sandwich” a layer of plastic. If the glass layers shatter, the pieces don’t go flying off. Instead, they are held together by the plastic. Laboratory glassware contains a large amount of silica and boric oxide. These components produce a material that can withstand sudden temperature changes.
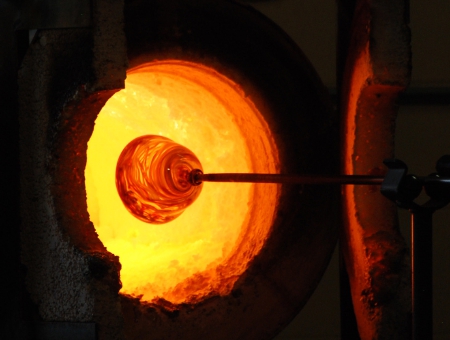
Perhaps the most common type of glass is called soda-lime glass. The basic ingredients include sand (a source of silica), soda (sodium oxide), and lime (calcium oxide). These materials are mixed together and then heated in furnaces. As the materials melt, they combine to form a syrupy liquid. This molten glass is then withdrawn from the furnace and processed in different ways.
Although it is brittle, hardened glass is not a solid. It exists in a slow-flowing state known as a supercooled liquid. When molten glass cools, there is no “solidifying temperature” at which the batch suddenly transforms from liquid to solid. Instead, the molten material undergoes a gradual change from a free-flowing to a more viscous material. The more it cools, the less it flows. At room temperature, the minuscule flow goes unnoticed.
There are several ways to shape glass. It can be pressed into a mold. This technique produces objects such as bowls and optical lenses. It can be drawn through rollers or holes to produce fibers, tubes, and plates. It can also be blown, with or without a mold.
Materials
- butter
- two 250-ml beakers
- five small test tubes
- test tube rack
- test tube holder
- spatula
- ice
- water
- honey
- chopsticks or coffee/tea stirrers
Procedure
Begin the lesson by having students dip a chopstick or coffee/tea stirrer into a small cup of honey at room temperature. Tell them to try to keep the largest gob possible of honey on the tip of the stick as they pull it out of the cup. They are simulating how a glass blower works with gravity to keep a gob of molten glass on the end of the blowpipe.
Ask: Is all glass the same? Compare and contrast different types of glass (based on properties such as heat resistance, shatter resistance, and color).
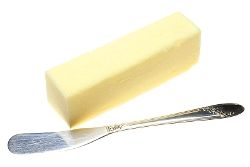
Like glass, butter is an example of a supercooled liquid. Although it appears solid, butter’s hardness depends on its temperature. As its temperature increases, butter becomes less viscous. Eventually the butter flows like more traditional liquids. If liquid butter is cooled, it takes on the hardened characteristics we associate with solids. The colder the temperature, the more solid the butter becomes.
Use the spatula to place a marble-sized lump of refrigerated butter in the five test tubes. Label the test tubes 1-5.
Place test tube 1 in a freezer. Place test tube 2 in the refrigerator.
Fill a beaker halfway with cold water. Add several ice cubes to form an ice-water solution. Place test tube 3 in this solution. Fill the other beaker halfway with hot water. (Be careful not to burn yourself.) Place test tube 4 in this solution.
Keep test tube 5 in the rack at room temperature.
At the end of the period, examine the butter sample in each of the test tubes. Note and record any differences in shape and appearance and relative hardness. Discard samples 3 and 4. Replace samples 1, 2, and 5 in the freezer, refrigerator, and test tube rack, respectively.
Observe samples 1, 2, and 5 on the following day.
Questions for Students
1. Did you observe any relationship between the physical properties of the butter and the temperature at which it was maintained? Explain.
 2. How is the viscosity of butter and glass similar? How is it different?
3. Predict how the shape of a windowpane might change over many years. Would this change be more dramatic in a hot climate or a cold climate? Explain.
4. Consider the differences you might find between glass created by hand and glass shaped by machine. When might a plastic product be preferable?
5. The use of fiber optics for telecommunications has become a reality. How many different objects can you think of that are made of glass?
Extensions
Observe variations in the viscosity of honey, syrup, liquid soap, hand lotion, and milk. Gather about half a cup of each. Dip a wooden stick into each to pull out a sample. Record your observations. Pour each liquid into another cup; record observations, including temperature, flow rate, and color. Change the temperatures of each and observe changes. What happens to the viscosity of each as the temperature changes?
Make two batches of any candy requiring that the sugar reach a specific temperature and candy stage in cooking. For one batch, follow the recipe exactly. For the second batch, heat the sugar to a different candy stage-cook either too little or too much. What differences do you observe in the candy? How can you explain your observations?
References / Resources
Books and articles
Carbery, E. (1993) Glassblowing: An introduction to artistic and scientific flameworking.
Marshall, MN: MGLS. Whitehouse, D. (1993) A pocket dictionary of terms commonly used to describe glass and glassmaking.
Organizations
Corning Museum of Glass
One Museum Way
Corning, NY 14830-2253
(607) 974-8257
National Glass Association
8200 Greensboro Drive
McLean, VA 22102
(703) 442-4890
Print and AV materials
Video: Beginning Glass Sculpturing by Bill Rasmussen (103 min.).
Available from Arrow Springs, (916) 677-9482.
Tours
Michigan State University Glassblowing Facility
Filed under: Class Activities, Grades 6-8, Grades K-5
Tags: Glass, Glass engineering, Lesson Plan


