Activity: Float a Clay Boat
 (lesson courtesy of Duke University’s Center for Inquiry Based Learning (CIBL). Grade level: 5-12. Time required: 1 hour.
Float a Clay Boat
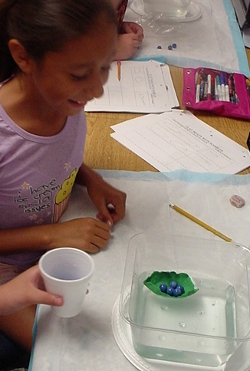
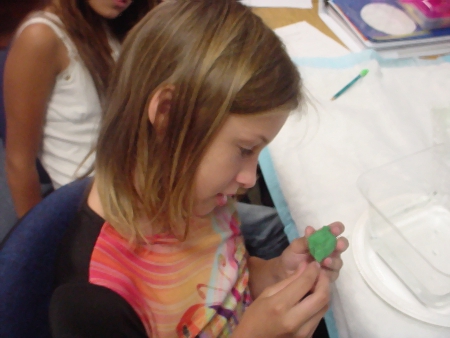
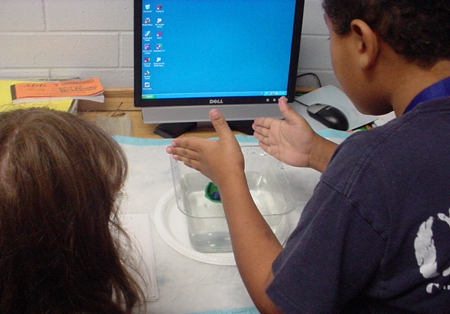
Each student uses a small quantity of modeling clay to make a boat that will float in a tub of water. The object is to build a boat that will hold as much weight as possible without sinking. In the process of designing and testing their boats, students discover some of the basic principles of boat design and gain first-hand experience with concepts such as buoyancy and density.
Learning Objectives
- Students will be able to describe a means to make a material that is denser than water (modeling clay) float.
- Students will be able to describe the parallels between the design process used to create a dense but floatable object, and the scientific method of inquiry.
Materials List
- one half stick (about 2 ounces or 50-60 grams) of modeling clay (non-hardening) per student
- one tub of water, at least six inches deep, per four or five students
- 100+ large washers, e.g., 1.5″ fender washers (available from hardware stores)
- paper towels (dozens)
- one roll of waxed paper
- tape (masking or transparent)
Introduction/Motivation
Very little introduction should be required for this fun activity. Rather, this activity can serve as the Introduction for the Lesson itself. However, if students did not already complete the Determining Densities activity portion of the Floaters and Sinkers lesson, you can introduce this activity by showing the class a half-stick of modeling clay and asking if they think it will float or sink in a beaker of water. After students make their predictions, drop it into a beaker of water to demonstrate that the clay sinks. Then write on the board, “Create an object out of clay that will float.” See the Procedures section for more details on how to proceed with the activity.
Procedure
Part 1: (5-10 minutes)
Have each student tape a sheet of waxed paper (about 18″ long) at his or her work station. This will make cleanup much easier, since wet clay gets very messy.
If you have not already done so, write on the board, “Create an object out of clay that will float.” Note that the wording specifies the creation of an object as opposed to a boat. In fact, students who attempt to mold their clay into the shapes of familiar boat hulls will quickly realize that these shapes are less than ideal – at least for clay.

Give each student a half stick of modeling clay, and have several tubs of water placed throughout the classroom. Let students know they can test their objects as often as they like, but advise them to pat the clay dry after testing and before shaping it into a new design.
Part 2: (15-20 minutes)
As students successfully complete Part I, challenge them with a new goal. Write on the board, “Design an object out of clay that can carry the largest load of washers possible.” Show students the washers that will be used to make up the load.
As students work, encourage them to continue making improvements every time their boats sink. Students may become competitive and want to declare a winner, and it is quite possible that a tie for the number of washers supported will occur. Should this happen, you could try using a balance to determine the actual mass of the washers held, since there will be slight variations in the masses of individual washers.
Troubleshooting Tips
- If students do not dry their clay adequately between tests of “seaworthiness”, the clay may become too wet to work with. Have some extra clay on hand to give to students if their original portion becomes unworkable.
Investigating Questions
Stimulate a discussion by asking questions referring to experiences the students had while designing their boats. Some examples include:
- What did you notice while building your boats?
- Why did you make the changes you made?
- What boat designs seemed to work best? What is it about these designs that made them successful?
- What boat designs didn’t seem to work well? What is it about these designs that made them less successful or unsuccessful?
- How did your boat change throughout the activity?
- How does the process of building a boat relate to the way the scientific process works?
The last question may take some guidance in order for students to formulate an answer. The point is to lead students to realize that:
- each boat design they tested reflected a hypothesis they had about what would help the boat float;
- each test produced data: either the boat sank or it didn’t;
- the data was used to formulate a new hypothesis, which led to yet another test.

Assessment
- Ask students to write a paragraph describing how the process of designing an object out of clay that will float in water is similar to the scientific method of experimentation.
Activity Extensions
Students will likely have a number of observations about the shapes of successful boats, and express some curiosity about “real” boats and their design features. Students can conduct library and Internet research to find out about boat designs and how they affect performance. Information on this subject is also covered in the Lesson Background & Concepts for Teachers section.
Acknowledgement: This activity was originally published, in slightly modified form, by Duke University’s Center for Inquiry Based Learning (CIBL). Please visit the website http://www.biology.duke.edu/cibl for information about CIBL and other resources for K-12 science and math teachers
Contributors: Mary R. Hebrank , Project Writer and Consultant , Duke University. Owner: Engineering K-Ph.D. Program, Pratt School of Engineering, Duke University. Copyright: ©2004 by Engineering K-Ph.D. Program, Pratt School of Engineering, Duke University, including copyrighted works from other educational institutions and/or U.S. government agencies; all rights reserved.
All images: http://www.flickr.com/photos/wmchamberlain/ / CC BY 2.0
Filed under: Class Activities, Grades 6-8, Grades 9-12
Tags: Class Activities, Design, Engineering Design, Engineering Design Process, Water


