eGFI - Dream Up the Future Sign-up for The Newsletter  For Teachers Online Store Contact us Search
Read the Magazine
What's New?
Explore eGFI
Engineer your Path About eGFI
Autodesk - Change Your World
Overview E-tube Trailblazers Student Blog
  • Tag Cloud

  • What’s New?

  • Pages

  • RSS RSS

  • RSS Comments

  • Archives

  • Meta

Simple Musical Instruments

cardboard guitar

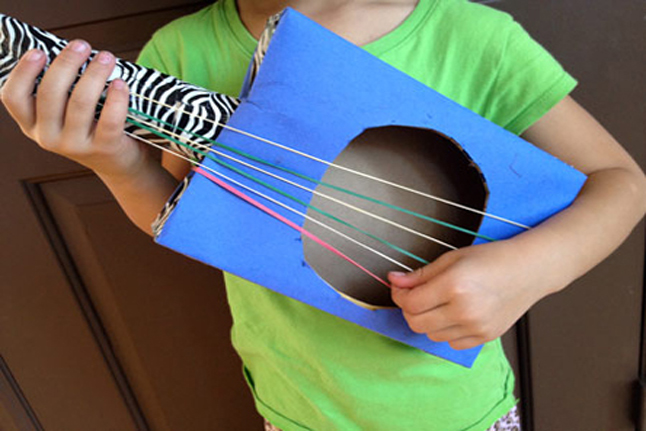
Photo from PBS Parents’ Crafts for Kids.

Activity from Teachengineering.org, contributed by the Integrated Teaching and Learning Program, College of Engineering, University of Colorado at Boulder. See The Energy of Music and Making Music for the complete  lesson plan and other activities about sound and music engineering.

Grade level: 3-5

Time: 30 minutes

Summary

Students in grades 3 – 5 work with partners to investigate sound frequencies and acoustic engineering by creating four different instruments – a shoebox guitar, water-glass xylophone, straw panpipe, and soda bottle organ.  Teams can choose to make one instrument or all four!

Engineering connection

Acoustic engineers help design effective auditoriums (and other spaces) so that everyone in the audience can hear the music that is being produced on stage. To do that, they must understand music and the frequencies at which different notes are formed.

Learning objectives

After this activity, students should be able to:
  • Explain that high frequencies produce high-pitched sounds, and low frequencies produce low-pitched sounds.
  • Understand the connection between sound waves and frequency.

Standards

International Technology and Engineering Educators Association

  • D. Tools, materials, and skills are used to make things and carry out tasks.
  • C. Various relationships exist between technology and other fields of study.

Next Generation Science Standards

  • Develop a model of waves to describe patterns in terms of amplitude and wavelength and that waves can cause objects to move. (Grade 4)

Introduction/Motivation

Now that we have learned about frequency and how different notes have different frequencies, it’s time for you to create your own musical instruments. Remember, sound is energy that moves through a medium (for example, air) in a wave pattern. While you are making them, I want you to think about the different frequencies your instrument is creating. The frequency of a sound is directly related to its pitch. That is, the more waves per second hitting your ear, the higher in pitch the tone is, and subsequently, the smaller the wavelength. Ask yourself if the sounds your instrument makes have high or low frequencies. And, make sure to check out some of the other instruments – they all are going to sound a little different! See if you can figure out what some of the differences are. Furthermore, note that some instruments are louder (higher amplitude) because they can compress the air to a greater extent.
And, one more thing you should know before you begin: Sometimes, when we hear a noise, it sounds really good to our ears, like beautiful music. Other times, it sounds like a horrible noise. The sound waves for a pleasant sound and a noisy sound look very different – does anyone have an idea about how they might look? The pleasant sound wave is very smooth, like this (draw it on the board) while the noisy sound wave is rough, like this (draw it on the board). The noisy wave actually looks noisy, doesn’t it? (see Figure 1 for these two waves.)
sound waves musical instrument
Illustration of timbre. Copyright © 2005 Chris Yakacki, ITL Program, University of Colorado Boulder

Materials

Note: Each of the four instruments requires a different set of materials. Student teams may make one type of instrument, or each student can make all four, depending on your available time and budget. These instruments were selected because they can make notes of different pitches (frequencies) and most should be ready to play in about 5-10 minutes if all the supplies are available.

Water-Glass Xylophone:

Straw Panpipe:

Bottle Organ:

Shoe Box Guitar:

Procedure

Background

This is a fairly unstructured activity; be sure to give students plenty of time to experiment and explore their instruments. If you like, bring in an electric tuner, so that students can investigate the frequencies that their instruments are creating. There is also a free, easy-to-use tuner app available for smartphones called gStrings free.

Before the Activity

  • Gather materials.
  • Make copies of the Instrument Construction Worksheet, one per student.
  • Make a sample musical instrument of each type to show the class before the activity begins

With the Students

  1. Divide the class into teams of two students each.
  2. Have teams spend a few minutes deciding which instrument they wish to construct.
  3. Hand out the worksheets. Provide groups with the materials for their chosen instruments.
  4. Direct students to begin designing and creating their instruments. Help with construction when necessary. Instrument instructions are listed below.
  5. Once students have completed their instruments, give them time to practice playing them.
  6. Ask students questions regarding the frequency of the created sounds. For example: Do you think that your panpipe is making high or low frequency sounds? (Reminder: Higher frequency sounds are higher pitch sounds, while slower frequency sounds are the lower sounds.)

Instrument Instructions

Water-Glass Xylophone:
Materials: 4-5 same-sized glasses, water, spoon
Instructions: Fill each glass with a different amount of water.
How to Play: Tap each glass lightly with a spoon.
Straw Panpipe:
Materials: 4-8 straws, tape, scissors
Instructions: Cut the straws so that each one is one-half-inch shorter than the next one. Lay the straws in order by height (so one side of the lined-up straws is even and the other is angled) and tape them together.
How to Play: Hold the straight (even) end of the straws against your lower lip and blow across the top of each straw to make sounds.
Bottle Organ:
Materials: 5 same-sized plastic soda bottles, water
Instructions: Fill the plastic bottles with different amounts of water.
How to Play: Blow across the top of each one to make sounds.
Shoe Box Guitar:
Materials: Sturdy shoebox, 8-10 rubber bands of varying widths, pencil
Instructions: Cut a circular hole in shoebox lid. Place rubber bands of different widths around the shoebox, with thicker ones at one end and thinner ones at the other end. Place a pencil perpendicularly underneath all the rubber bands on the end near the shoebox hole, similar to the bridge on a guitar.
How to Play: Pluck the rubber bands to make sounds.

Safety Issues

Assist students using scissors to cut straws, as needed.

Troubleshooting Tips

If students have trouble getting their panpipes to play, ensure that at least one end of the straws matches up, leaving the opposite side — staggered ends — uneven. Students should blow through the matched up sides of the straws to make their instruments play.
If all materials are ready, it is possible to make and play all of these instruments in 25 minutes. However, if more time is available, students can decorate their instruments and even create their own band.

Investigating Questions

  • How many different kinds of instruments are in an orchestra?
  • How long does it take to build a piano? A guitar? A harp?
  • What does an acoustical engineer do?
  • What did you notice about the different sounds the instruments make?
  • Do higher pitched sounds have frequency, or greater wavelength, or both? (Answer: Higher frequency = higher pitch = smaller wavelength)
  • Are some instruments louder than others? Why? (Answer: Greater air pressure is created by the louder instruments, resulting in higher amplitude, or loudness.)
  • Can you control the loudness of your instruments? How? (Answer: By blowing harder into an instrument or plucking strings with more force, you are exerting more energy and thereby creating more pressure.)
Activity Embedded Assessment

Student Discussions: As you assist students with creating their instruments, ask them what they are learning about frequency.

Post-Activity Assessment

Strike Up the Band!: Gather the class together and try to play a song as a class. Afterwards, talk about why it was so difficult. Talk about the importance of tuning. (Note: musicians tune their instruments so that they can create specific frequencies that match up with specific notes.) Since our instruments are not tuned, it’s hard for us to play the right notes – another reason why frequency is so important.

Activity Extensions

Have students learn about engineers who are instrumental (pun intended) in the music industry. Have students visit the following ASEE Engineering, Go For It websites and report back to the class what they learned about engineers and music:  http://www.engineeringk12.org/students/engineer_spotlight/engineer_george_stetten.htm and http://www.engineeringk12.org/outreach/Making_Engineers_Cool/search.cfm.
Have students make their own instruments at: http://www.mudcat.org/kids/. Assign student groups to a different instrument and form a class band.

Activity Scaling

  • For upper grades, spend more time creating instruments, tune them using tuners, and play a song together.

Additional resources

Crafts for Kids: Shoebox Guitar. PBS Parents website has this project from Jen Goode’s Projects for Preschoolers.

Make a Toy Guitar. Projects for Preschoolers has step by step directions for turning a recycled cracker box into an musical instrument.

How to Make Musical Instruments for Kids: Shoebox Guitar. Rubber bands, pencils, shoebox – play.[YouTube 2:23]
How Sound Works in Rooms. Acoustic Geometry shows how sound travels using Nerf Disc guns, fluorescent green string, and acoustic diffusers.
Joe Genius Science of Sound. Voice distortion, musical Instruments made from vegetables, and other fun with sound. [YouTube 9:57]

Contributors: Jessica Todd, Brad Dunkin, Luke Simmons, Brian Kay, Frank Burkholder, Abigail Watrous, Janet Yowell Copyright © 2007 by the Regents of the University of Colorado.

Comments or Questions?

By clicking the "Submit" button you agree to the eGFI Privacy Policy.