Lesson: Design a Sturdy Paper Table
 (Lesson courtesy of PBS’s Design Squad Nation. View the original lesson, see more activities like this, or visit the Design Squad Activity Guide.)
Download the project guide in English or Spanish.
Overview:
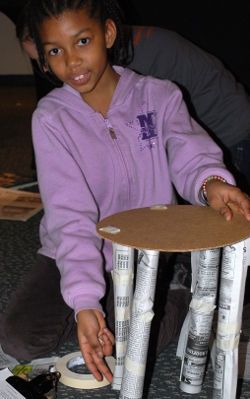
In this lesson, students will explore the engineering design process by building a table out of tubes of newspaper that is strong enough to hold a heavy book. They will learn to brainstorm, test, evaluate, and redesign their tables to support more weight and figure out how to keep the table legs from buckling.
Grade Level: 4 -7 (Students from age 9 to 12)
Time: 60 minutes
Relevant Standards:
Massachusetts Curriculum Frameworks, Science and Technology/Engineering Standards (Grades 3-5) Materials and Tools 1.1-1.2; Engineering Design 2.1-2.3; Physical Science 1. (Grades 6-8) Materials, Tools and Machines 1.1-1.2; Engineering Design 2/1-2/5
ITEA The Nature of Technology (1-3); Technology and Society (6); Design (8 -10)
National Science Standards (Grades 3-5) Science as Inquiry; Properties of Materials; Technology Design. (Grades 6-8) Motions and Forces; Technological Design; Science and Technology; Technology in Society.
 Themes
- Structures
- Recycled materials
- Interior Design
Learning Objectives:
Students will:
- Work in cooperative groups or alone to construct a table using materials provided.
- Discuss what happened, how they solved problems that arose, what strategies they used, and why certain arrangements of materials proved stronger than others.
- View the DIY Paper Table video clip in which Design Squad Nation hosts Adam and Judy try this activity.
- Present their projects to classmates and answer questions related to their table’s design.
Materials Needed:
- Newspaper sheets (8 per person)
- Cardboard or particle board (one 8.5″ x 11″ piece per person)
- Masking tape
- Books or stacks of magazines to test each table’s strength
- Paper or design notebooks for sketching table designs
- Ruler to measure height of table
Procedures:
1. Introduce the challenge. (5 minutes.) Pique interest by asking, “Do you think you can build a table out of newspaper?”
2. Have students discuss how a flimsy piece of paper could support a hefty weight. Have them look at the furniture in the room and describe the different supports they see that keep surfaces on tables and chairs from tilting or twisting.
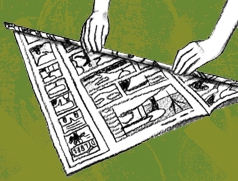
3. Demonstrate how to make a strong tube by rolling it tightly. Start at one corner and roll diagonally toward the other corner, with the first roll about the diameter of a straw. Tape the tube closed with a strip or two of tape–and wave it around to show how stiff it is. Hint: To avoid having to spend time teaching each student how to make a tube out of newspaper, make samples that illustrate the process in advance and tape them to a poster board. For instance, take three pieces of newspaper. Use one to show how tight the first roll needs to be to make it strong. Roll the second paper halfway up. With the third, show a finished tube.
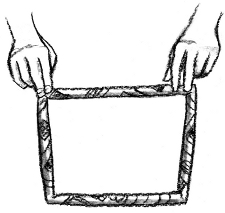
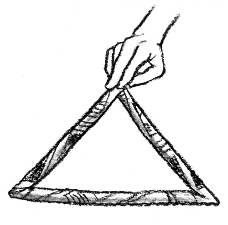
4. Demonstrate different shapes. Take two newspaper tubes; bend one into a triangle, a common shape for supports, and the other into a square. Tape them closed and set them on the floor. Push down on them and rock them from side to side. The triangle will withstand more force and provide more stability than the square, but orientation matters! A triangle resting on its point will be weaker and less stable than before.
5. Have students brainstorm (10 minutes) how they could use these materials to make a paper table that’s at least 8 inches tall and strong enough to hold a book. Ask them to sketch their designs on a piece of paper or in their design notebooks.
6. Distribute the challenge sheet and have the kids begin building. (35 minutes)
If problems arise, ask questions to encourage students to think about how they might solve their design problems:
- The table legs tilt or twist. (Support the legs by running tubes between them.)
- A tube buckles when loaded down. (Roll loose tubes tighter. Tape securely. Reinforce or replace dented or wrinkled areas that weaken legs.)
- The table wobbles. (Make sure it isn’t lopsided and has adequate supports. Reduce height to increase stability.)
- The table collapses. (Check that the base is truly sturdy. In general, the more triangles kids use, the stronger their tables will be.)
7. Discuss what happened. (10 minutes) Have kids talk about their designs and how they solved any problems that came up. Ask how they were able to support a heavy book on just pieces of newspaper. Did they make paper support more weight by changing its shape? Tubes distribute loads quite well and increase the amount of weight that paper can support. How did knowing certain arrangements of materials, like triangles, influence the table’s design? What helped make a table especially strong? Students may mention the use of good bracing, triangles, and keeping everything compact.
Modifications
- For younger kids – Younger kids will have a difficult time limiting themselves to 8 sheets of paper. Allow them to use lots of tape and paper to strengthen their design. Younger kids may need help from adults to roll tight, strong tubes. Allow them to make the table lower than 8 inches.
- For older kids – Consider limiting them to one foot of tape. Challenge them to make their table taller than 8 inches.
Take it to the Next Level
Build a table that can hold two or more heavy books… Build a 16-inch table… Build chairs out of newspaper to go with the table.
Videos
[youtube]http://www.youtube.com/watch?v=z0Tuaqcxa0I[/youtube]
- DIY Paper Table – Design Squad hosts Adam and Judy try the activity in a short video – 0:49. http://www.youtube.com/watch?v=z0Tuaqcxa0I
- Design Squad Episode: Cardboard Furniture – Teams compete to make cardboard furniture for IKEA – 28:40. http://pbskids.org/designsquad/video/season2.html?pid=bweTa64_dgkmX4WPIJFby9UunIQWwxzc
- Package Design – Packaging engineer Jennifer Chua makes recyclable packaging for non-toxic, biodegradable products. Her designs are good-looking and good for the environment, too – 2:14. http://www.youtube.com/user/DesignSquadNation#p/c/D1BCF5848ABE3671/11/POVCe_Plcso
- What’s A Truss? – Have your students talk about designing the table to distribute the weight so that every part of the frame is supporting the load. This animation introduces students to what makes a structure strong. http://www.youtube.com/user/DesignSquadNation#p/c/1FCA18AB7F4F0F96/42/BtGCdmQHWX4
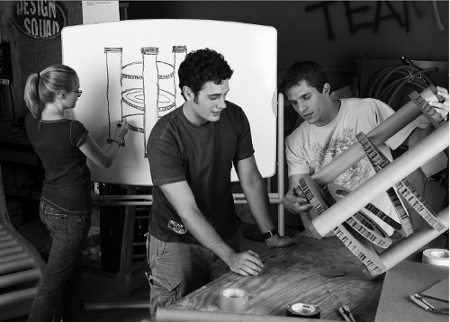
Team builds cardboard furniture on Design Squad episode
Illustrations by Jamie Hogan. Photos: Top photo courtesy of Susan Buckey; cardboard furniture (above) courtesy of Anthony Tieuli.
For more activities like these, see the Design Squad Nation Activity Guide or browse section by section at PBS Kids.
Filed under: Grades 6-8, Grades K-5, Lesson Plans
Tags: Building Design, Design, Design Squad, Engineering Design, Engineering Design Process, Lesson Plan, PBS, PBS programs, Videos


