Seeing the World Through a Different Lens
Activity courtesy of TeachEngineering,contributed by the K-12 Outreach Office, Worcester Polytechnic Institute
Note: This activity can serve as an introduction to Engineering and Empathy: Teaching the Engineering Design Process Through Assistive Devices, a 23-class curricular unit contributed to TeachEngineering by the Inquiry-Based Bioengineering Research and Design Experiences for Middle-School Teachers RET Program, Department of Biomedical Engineering, Worcester Polytechnic Institute.
Summary
Students gain an understanding of physical limitations and the biomedical engineering design process by performing a variety of tasks without using their thumbs, eyes, or legs, then working in teams to create or improve and adaptive device.
Grade level: 6 -9
Time: 60 minutes
Engineering Connection
Bioengineering technologies explore the production of mechanical devices, products, biological substances, and organisms to improve health and our daily lives. Biomedical and mechanical engineers design and test various types of prosthetics to assist people with disabilities.
Learning Objectives
After this activity students should be able to:
- Explain a range of differing needs for adaptive or assistive devices.
- Describe how technology can be involved in developing and improving assistive and adaptive devices.
Standards
National Science Education Standards
- Form and function are complementary aspects of objects, organisms, and systems in the natural and designed world. The form or shape of an object or system is frequently related to use, operation, or function. Function frequently relies on form. Understanding of form and function applies to different levels of organization. Students should be able to explain function by referring to form and explain form by referring to function. (Grades K – 12)
International Technology and Engineering Educators Association
- New products and systems can be developed to solve problems or to help do things that could not be done without the help of technology.
- The use of technology affects humans in various ways, including their safety, comfort, choices, and attitudes about technology’s development and use.
- Throughout history, new technologies have resulted from the demands, values, and interests of individuals, businesses, industries, and societies.
- Social and cultural priorities and values are reflected in technological devices.
- Use information provided in manuals, protocols, or by experienced people to see and understand how things work.
Materials
- penny
- tape
- zipper / jacket with zipper
- a few pairs of latex gloves or any other thin pair of gloves
- shirt / coat with buttons
- child-proof medicine bottles
- eye chart
- 3 pairs of eyeglasses (old, unwanted pairs are best)
- picture for puzzle (see instructions in Procedure section)
- guitar case and/or large suitcase or a big cardboard box
- large books that can be dropped
- brooms (2-4)
- stopwatch
- sticky notes
- student worksheets [pdf]
- assistive and adaptive devices to show during the activity introduction, such as a tool for buttoning shirts, specialized eating utensils, remote controls or telephones with huge numbers/buttons, or containers approved by the Arthritis Foundation, for example the Folger’s AromaSeal Canister (look for items with their symbol)
- wheelchair (2 if convenient)
- crutches (2-5 sets of various sizes)
- Why did someone invent this? (Give students time to look at the device and figure out what the inventor’s purposes was in developing the device.)
- What might the inventor(s) been considering when s/he developed and tested the device? (Listen to student ideas. Suggest possible specifications and needs that went into the engineering design process.)
- Page 1: Pre-assessment reflection questions
- Page 2: Loss of opposable thumb activity
- Page 3: Eyesight impairment activity (using one pair glasses)
- Page 4: Eyesight impairment activity (multiple glasses comparison, A-B-C)
- Page 5: Wheelchair activity
- Page 6: Crutches activity
- Page 7: Crutches-wheelchair-feet mobility course activity (instructions)
- Page 8: Crutches-wheelchair-feet mobility course activity (data sheet)
- Page 9: Reflection sheet
Before the Activity
- Prepare vision impairment glasses: Using a pair of plastic wrap-around glasses, use a piece of sandpaper to roughen the glasses to various degrees. Label them A, B or C, but do NOT include information on the level of impairment in the labels or worksheets; leave that for students to figure out as part of the activity. A = moderately impaired, B = mildly impaired, C = severely impaired. Alternatively, tape layers of scotch tape over the glasses lenses to make them hard to see through.
- Note: Two different versions of the vision impaired worksheet have been included; one version is for one pair of glasses and the other version is for multiple pairs.
- Make the puzzle: Using a picture of a familiar person or place and a paper cutter, create the jigsaw puzzle. First, cut the picture so its overall dimensions are 6 inches (15.2 cm) by 9 inches (22.8 cm). Next, cut this same picture into nine equal rectangles, each measuring 2 inches (5.1 cm) by 3 inches (7.6 cm). Use the paper cutter to make these rectangles as uniform as possible. Shuffle the puzzle pieces and place in an envelope.
- Gather materials and make copies of the student worksheets.
Set Up Workstations. Place appropriate worksheets at each station.
- Locate the wheelchair station next to a set of shelves so students must reach from the wheelchair, attempting to retrieve an object from a high shelf. If you do not have easily accessible shelves, place sticky notes (Post-Its) at various heights on the classroom board and position the wheelchair in front of it. Set clear boundaries for where the wheelchairs and crutches are allowed to move about.
- At the vision impairment station, use a towel, large box, or cloth to cover the items students will be trying to see. Alternatively, place the items face down on the table.
- If you are opting to use the crutch-wheelchair-walking course challenge, set up a route, perhaps in the hall or cafeteria. Choose three points along the way at which each student is to retrieve a sticky note. (Instead of putting the notes directly on the wall, you may want to put them on a piece of paper taped to the wall.) At one location, place the notes should at a comfortable height for all three students. At another point, place them higher, and at the third spot, relatively low. After traveling the course, students walk back to the starting point, placing the sticky notes back on the papers as they go.
With the Students
- Demonstrate taping down a student’s thumb to model the loss of opposable thumb. Ask students to put on the gloves such that the thumb is not inserted into the glove. Then, tape down the thumb to disable its movement. Then pick up a penny, close a zipper, button a jackiet , tie a shoe and open an empty child-proof bottle.
- Represent moderately or severely diminished eyesight. Have a student with the impairment glasses read from different medicine bottles, school books, posters in the room or a medical eye chart. Have them try to put together a picture of a famous person or building that you have previously cut into 9 equal parts.
- In introducing the wheelchair station, ask students, “How do you reach something if you have to be seated all the time?” Tasks include reaching for a cup on a shelf, picking up somthing small/low to the ground, carrying a plastic cup of water (without holding it between legs) or moving while something bulky that does not fit in one’s lap (such as a guitar case, a huge beach ball or an empty cardboard box).
- Have students at the crutches station each carry one (large) book while traveling from one end of the classroom to the other. Then again with three (large) books. Try again while carrying a plastic cup filled with water. Compare this disability to the wheelchair station where students in the wheelchair attempt to carry a guitar case, a large suitcase, a pile of books, or a plastic cup of water.
- (optional) Mobility Comparison Course: Put several sticky notes in three different areas and heights of a hallway or classroom. Record the time required for a student with no disabilities to pick them up and compare with the time needed by students in a wheelchair or using crutches to complete the same activities. Ask students to assess the relative difficulty of this task, comparing the three modes of mobility.
Safety Issues
- Use crutches and wheelchairs appropriately, being mindful of stairwells and other hazards.
- Students working at the impaired eyesight workstation should not leave their seats until they have taken off the glasses.
- Instruct students in the correct use of crutches. Armpits do not rest on the crutch pads. Instead, use your hands to support your weight.
- You may wish to have several pairs of crutches already adjusted to different heights in order to avoid students changing the heights of the crutches themselves.
- Instruct students in safe use of the wheelchair, being careful not to stick fingers in spokes. Show them the brakes and the correct method for turning the chair. Remind them that wheelchairs can tip over, and that anyone who tips a chair may face both an injury and a consequence.
- At the opposable thumbstation, make sure students do not tape their thumbs to their palms directly. Ask them to use the gloves before taping their thumbs, to prevent any injury while removing the tape.
Troubleshooting Tips
- For the opposable thumb station, the procedure that worked best was to have a student insert all four fingers into the gloves (not the thumb) and then put tape on to prevent thumb movement.
- Take special care when introducing students to these workstation experiences. Ask them to consider friends or family with physical difficulties, reflecting on appropriate, respectful behavior regarding disabilities.
- You may wish to invite a disabled individual to speak to the class about his or her disability and everyday experiences.
- Using crutches or a wheelchair may seem fun to students, but remind them that people who use these devices may not have the choice of ever being without them.
- A student may mention prosthetics as assistive and adaptive devices. You may wish to think ahead on how you wish to handle such questions, as some prostheses are clearly functional, such as arms and legs, while others may be more cosmetic, such as prosthetic breasts and eyes.
Assessment
Pre-Activity Assessment
- What do you think assistive and adaptive technology is?
- Who do you think might use it, and why?
Activity Embedded Assessment
Post-Activity Assessment
Activity Extensions
- Have students conduct research or interview individuals with disabilities, and write reports or make presentations on what they learned and for what types of activities these people would like assistance because no sufficient adaptive device exists.
- Have students investigate how prosthetic devices have enabled disabled athletes to participate in sports. Many wheelchairs have been especially designed for specific sports. Amazing prosthetic legs have been designed to enable double amputees to run faster than able-bodied runners. Have students research the process by which these legs were developed.
- Casey Martin, a young man entering the pro golf circuit in the 1990s, requested and was denied an accommodation allowing him to use a golf cart because of a serious leg condition – leading to a 1991 Supreme Court victory. [See 2011 ESPN video and article.] More recently, after much debate, double-amputee sprinter Oscar Pistorius was allowed to compete in the 2012 London Olympics. Explore the issues created when a disabled athlete wants to enter an event traditionally open to all athletes.
- Have students research the Americans with Disabilities Act, its effect on employment of people with disabilities and its effect on companies.
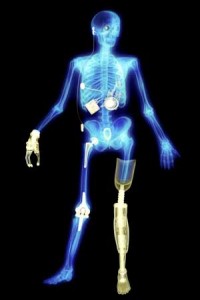
- The Smithsonian’s Lemelson Center for the Study of Invention and Innovation includes a photo essay on the history of prosthetics from peg legs to the FlexFoot, a look at hearing aids through history, and Yorick, an interactive bionic skeleton that displays various implantable devices. (Photo, right.)
- Freedom Machines. Free standards-based lesson plans and activities to be used with PBS’s POV (Point of View) documentary on engineering lighter, sturdier wheelchairs and other assistive devices. Click here to watch the Freedom Machines trailer. PBS has free lending library of DVDs for teachers.
- Designing Swimming Prosthetics for a Dancer. PBS Design Squad video about creating prosthetic devices for an amputee’s underwater performance. Another video explores the process of designing a wheelchair for a rugby player.
- Class Projects Change Lives. University of North Carolina, Chapel Hill biomedical engineering undergraduates design devices to help disabled individuals work or enjoy kayaking. [YouTube 5:36]
- The Arthritis Foundation has a a list of recommended “easy to use” products and packaging, many created with considerations for “universal design.”
- Adaptive sports equipment. The American Society for Engineering Education’s Prism magazine featured assistive technologies for skiers, runners, and other athletes. The National Science Foundation teamed up with NBC Learn to produce a series on engineering of the 2012 Olympic games, including a video of South African double-amputee sprinter Oscar Pistorius, aka “Bladerunner,” and his carbon-fiber prosthetic limbs.
- TechXcite, a series of activities plus videos, teacher’s guide, and student worksheets from Duke University’s Pratt School of Engineering, introduces kids to engineering design through developing a prosthetic arm. In one activity, for instance, students explore hydraulic and pneumatic systems and how they can move a mechanical arm. At the end of this module, each pair of students will have designed and built their own prosthetic arm.
- A Robot for Grandma. Short news feature on Worcester Polytechnic’s research to develop assistive robots to prolong independent living for the elderly.
- ASEE’s Prism magazine articles examining adaptive technologies for 1) amputees and other athletes with physical disabilities (“Leaps and Bounds”, Summer 2011); 2) cars and homes to help the elderly age in place; and 3) adapting instruction for deaf or hard-of-hearing engineering students.
Copyright © 2005 by Worcester Polytechnic Institute
Filed under: Class Activities, Grades 6-8, Grades 6-8, Grades 9-12, Grades 9-12, Lesson Plans
Tags: adaptive technologies, assistive technologies, bioengineering, biomechanical engineering, Class Activities, Grades 6-8, Lesson Plan, Mechanical engineering, Prosthetics, students with disabilities


